Introduction
Workspace consists of many components, such as a cross-platform runtime environment for executing scientific workflows, a collection of libraries that support scientific programming and a GUI application for creating workflows. The Workspace editor application is a graphical tool that allows users to create workflows by combining different components in useful ways. Depending on your goals, a workflow can be as simple or as complex as you need it to be. For example, you could create a workflow that:
- Applies a function to a dataset, then plots the results
- Reads some cartesian coordinates from file, transforms them, then generates a 3D scene
- Converts data between two unrelated file formats
The best way to understand what Workspace can do is by using it, which is exactly what we're going to do in this tutorial. We're going to use Workspace to print the text, "Hello Workspace!" and hopefully learn something along the way. As you can imagine, this is a somewhat contrived simplistic example, but it will serve to show you the basic principles involved in building a Workspace workflow.
By the end of this tutorial, you will:
- Know your way around the Workspace editor user interface
- Understand what an Operation is
- Understand the concepts of Inputs and Outputs
- Have printed some text to the screen
And, just in case you get stuck, a sample workflow has been provided for you.
- Note
- Please note: there are a few introductory overviews of basic Workspace concepts available in the Help system. If terminology or functionality says unclear in this tutorial then it may be worth reading these overviews:
Contents
Creating our first workflow
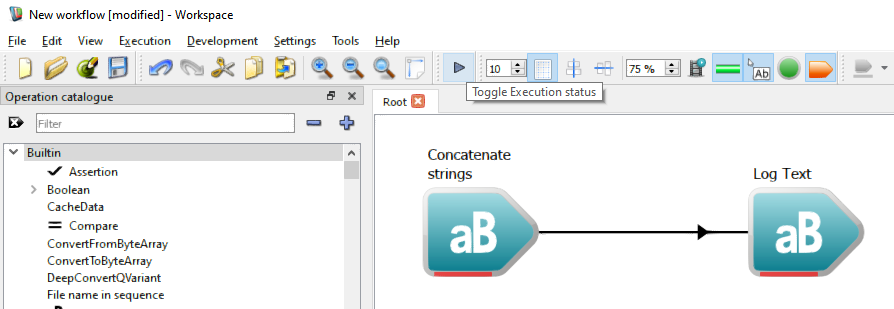
OK. Let's get started. Since you're already reading this tutorial, I'll assume you figured out how to open up the Workspace editor. Now that you have, you should see a screen that looks something like this:
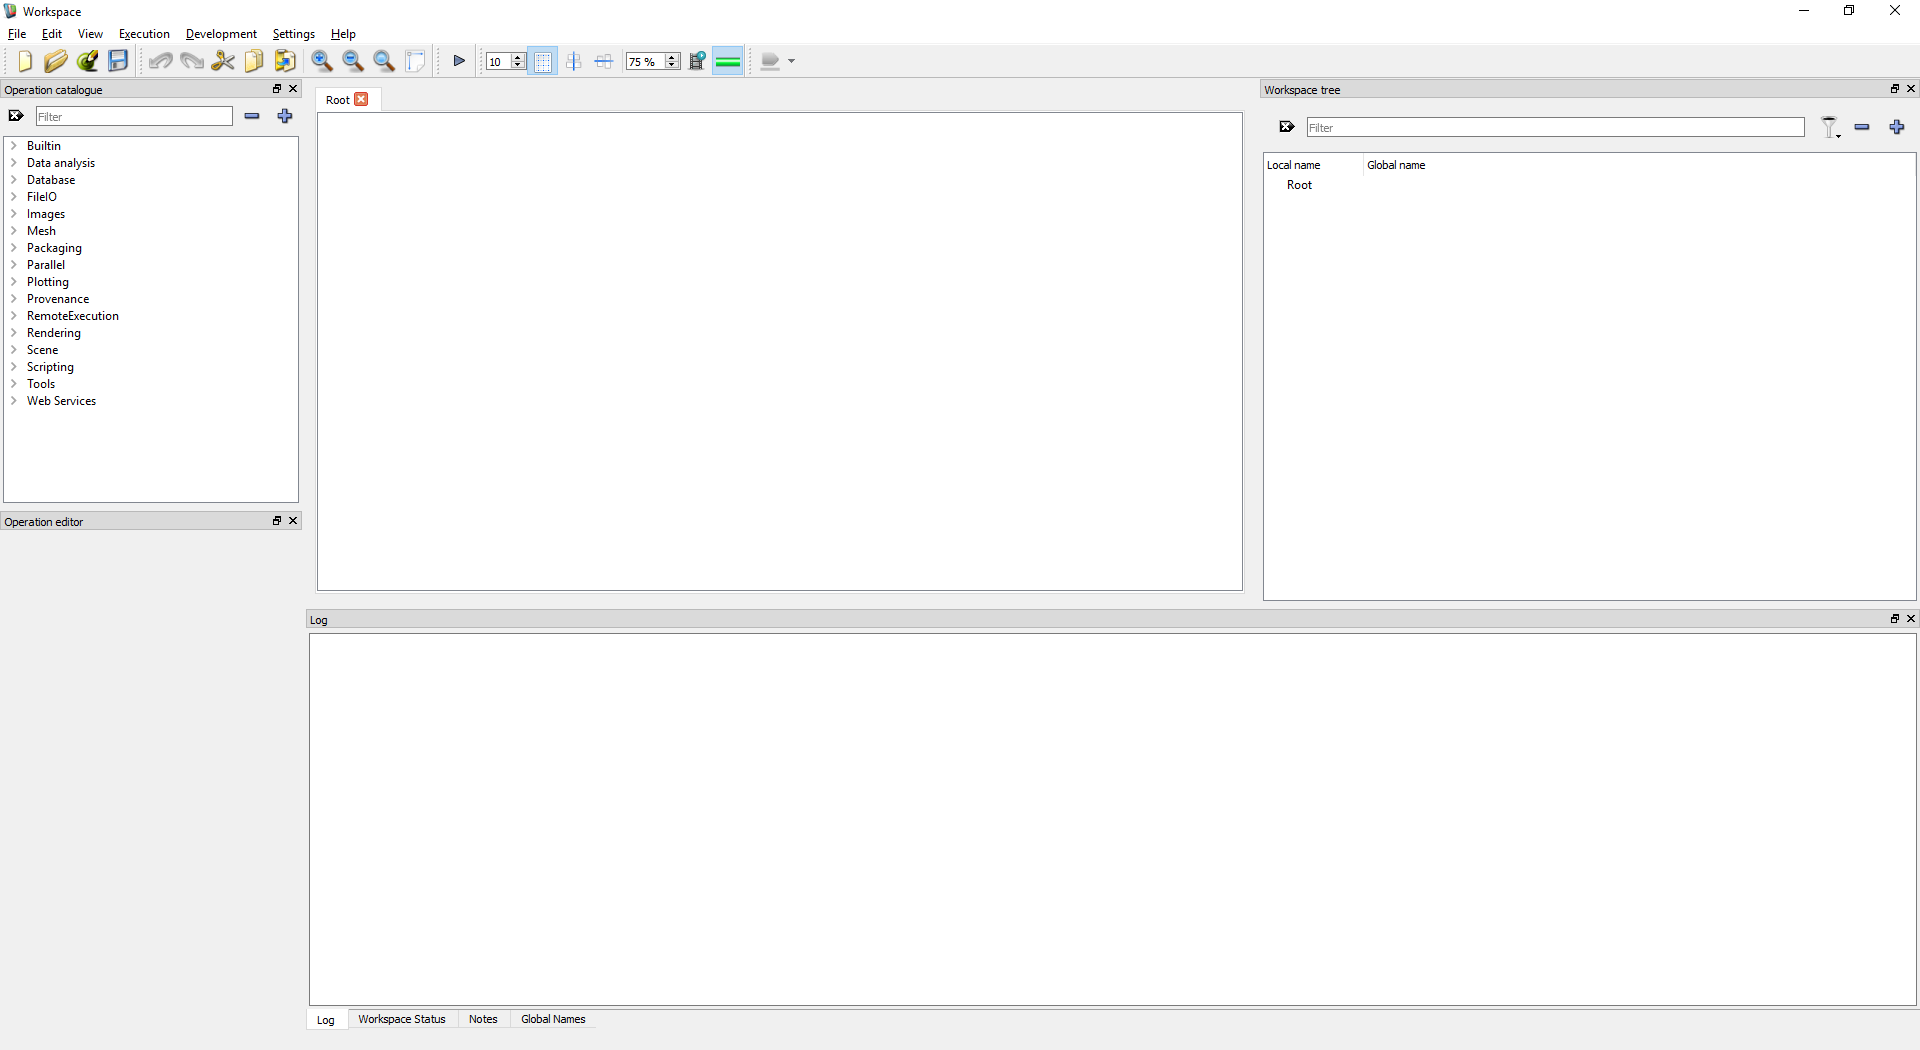
The Workspace editor
The Workspace editor can run on lots of different platforms, so your UI (user interface) might appear slightly different on different operating systems.
Now, don't worry about understanding what each part of the UI does just yet. We'll do that as we go. Let's put together our first workflow:
- Move your mouse over to the Operation Catalogue. It's the UI widget that looks like this:
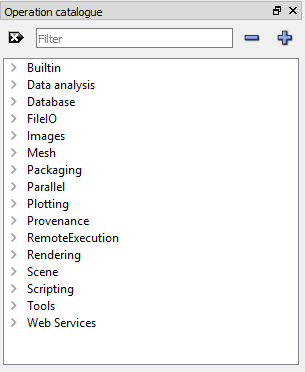
The Operation Catalogue
- In the little text box that says "Filter", type in "concat". That should be just enough for the catalogue to find us the ConcatenateStrings Operation. What's an Operation? It's a task or activity that can be performed as part of a workflow.

Finding the ConcatenateStrings operation
- Click-and-hold the left mouse button on the ConcatenateStrings, and drag it onto the big white area in the middle of the screen (we call this the Canvas) then drop it. This will create the operation. You will see a little icon appear that looks something like this:
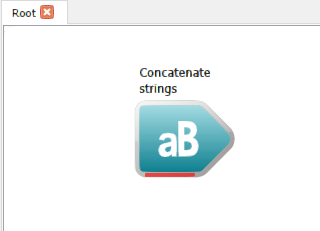
Creating the ConcatenateStrings operation
- Either move your mouse over the top of the ConcatenateStrings operation to reveal the Input and Output racks (this is the default behaviour) or, depending on your specific UI settings, you may need to click on the operation to reveal the Input and Output racks. After hovering for a few seconds you will see a tooltip too:
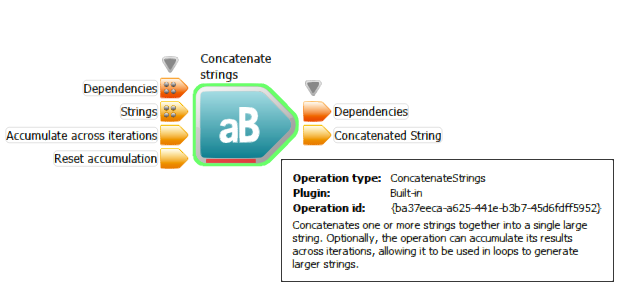
ConcatenateStrings Input and Output racks with Tooltip
- Notice the triangular buttons above the racks. These are pin buttons that you can left click to pin the Input and Output so that they stay visible when you mouse cursor has moved to another operation. Let's pin both racks now.

Pinned racks
- You can unpin the racks but left clicking on the pin buttons to toggle them to off. Alternatively, you can right click anywhere on the canvas to bring up a context menu to unpin all racks in one go.

Unpinning all racks
- Let's create a second operation. Navigate back to the Operation Catalogue and this time enter the text "logtext"
- Drag the LogText operation into the Workspace canvas to create it.
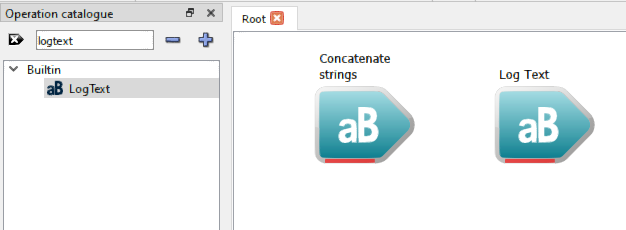
Creating the LogText operation
- If you pin all the Input and Output racks on both operations the workflow would look something like this:
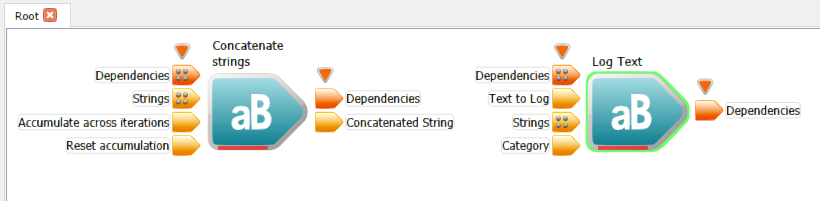
The workflow so far
At this point, take the time to familiarise yourself with how the Workspace canvas works:
- Use the mouse-wheel to zoom in.
- Hold down the Shift key and click a blank area of the canvas to "grab" it. You can then push it around by moving the mouse.
- You can also pan the canvas view by clicking and hold the middle mouse button.
- Move operations around by clicking and holding them.
Entering our text
So, now we know where we can find Operations and that we can create them by dragging and dropping them onto our workflow. Next, we're going to need to enter some text:
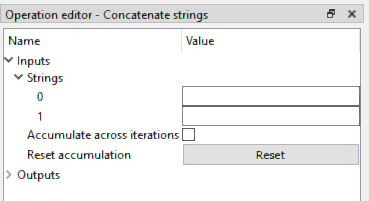
- Click on the new ConcatenateStrings operation to select it. Two things will happen; 1) a green outline will be drawn around the operation box, and 2) the Operation editor will display the inputs and outputs of this operation in a panel that looks like this:
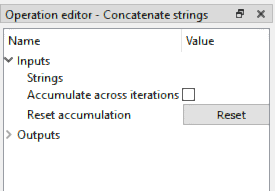
The Inputs/Outputs of the ConcatenateStrings Operation
We call this panel the Operation Editor. Here, the ConcatenateStrings operation will have a number of inputs, with one input being named Strings, and two outputs, with one output being named Concatenated String.
- Hover the mouse cursor over ConcatenateStrings operation to bring up its input and output racks.
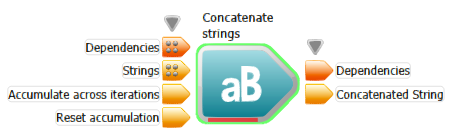
Hovering over the ConcatenateStrings operation
Again, if you hover the mouse over the inputs themselves, you will see a tooltip on the screen that looks similar to this:
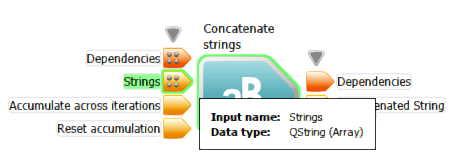
Hovering over an input
- Right click on the Strings input, and select the Add input element option in the provided context menu. (Alternatively you could also double click on the Strings input to achieve the same result.) The Strings input is a special kind of input, known as an Array input. For this tutorial, we will add two input elements to the Strings' Array input.
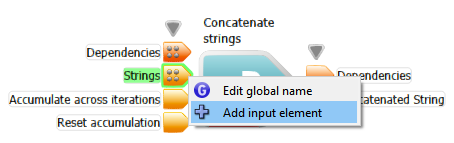
Adding the first input element to an array input.
You will notice that when you add the second input the context menu has two additional options, "Remove all inputs" and "Re-order inputs".:
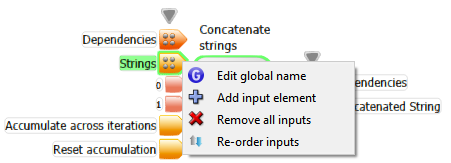
After adding the second input element to an array input.
- Again, you can get tooltips on the newly added input elements too:
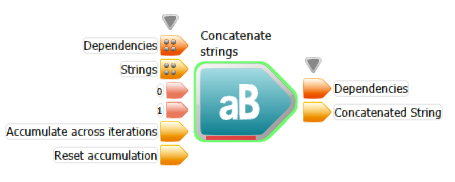
The strings concatenator with two inputs
- Click on the ConcatenateStrings operation again to select it, and note that in the Operation Editor, there is now a small arrow next to the Strings input. Click the arrow, and two text fields will be displayed:
The Operation Editor after adding an input element
- In the first text field, enter the text "Hello " (make sure to include a space character at the end - this is indicated by the insertion point in the screenshot - however you do not need to type the quotation marks), and in the second text field, enter "Workspace!" (and again you do not need to type the quotation marks). The Operation Editor should look something like this:
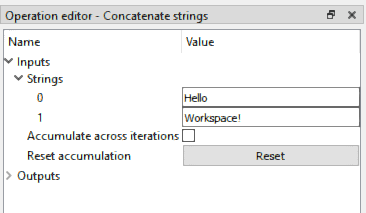
The Operation Editor with your user input
Logging text
Now we've set up our ConcatenateStrings operation to concatenate two strings. All we need to do now is get that text into the log:
- Hover over the ConcatenateStrings operation so that its master port is displayed, click the output master port and then click-and-hold over the Concatenated String output, and start to drag it towards the LogText operation. Notice that when we start dragging, the type compatible inputs of the LogText are shown:
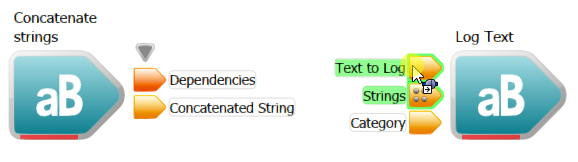
Dragging to connect compatible inputs and outputs
- Now, drop the output onto the Text to log input of the LogText operation. Our two operations will now have a Connection between them.
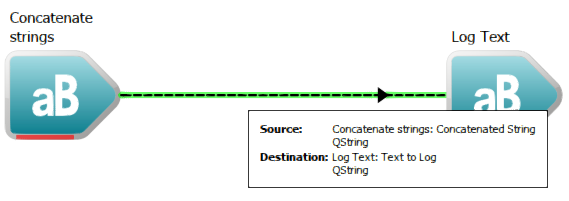
The two connected operations
This demonstrates that our data, in this case the final concatenated string, is going to flow in the direction of the arrow to the LogText operation.
Final steps
Did you notice that all of the operations on the canvas have red status bars? This indicates that the operations are not up-to-date. An up-to-date operation is one that has completed performing its task, and has assigned all of its outputs up-to-date data. In order to bring our operations up-to-date, we need to execute the workflow. We can do this by clicking on the execute button:
The execute button
Notice that when we do this, nothing happens. This is because Workspace's execution system is Demand driven. That means that it updates only those operations required to produce an output. Just like Operations have outputs, workflows have outputs, and without them, the execution system doesn't know what it needs to update. Now click on the execute button a second time to stop the workflow executing.
- Note
- An alternative way to force parts of a workflow to update when executed within the Workspace GUI Application is to attach a widget to an output. You may have seen this behaviour when you clicked execute if one of the operations was selected on the canvas and it properties were displayed in the Operation Editor for example. This scenario is covered in more detail in the next tutorial, Reading and displaying data.
To give our workflow an output:
- Hover over the LogText operation, right click on the Dependencies output, and select the Create workspace output option.
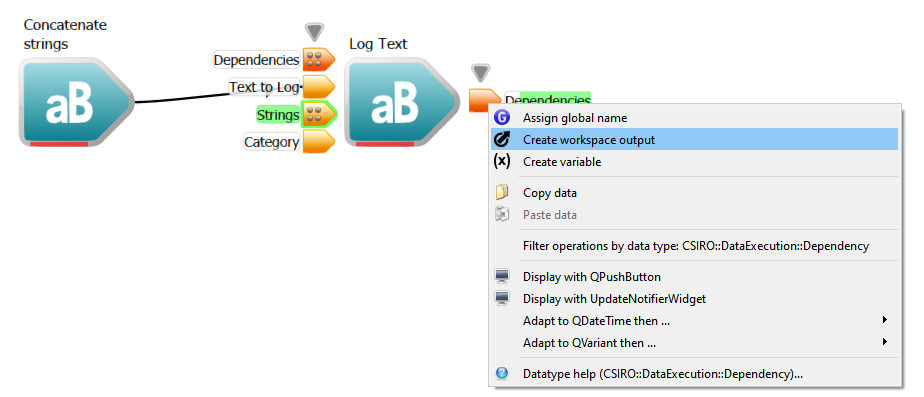
Creating a workspace output
This will create another operation on the workflow, called a WorkspaceOutput. When a workflow executes, it only updates operations required to bring the output up-to-date. In this way, the WorkspaceOutput acts like a goal - what needs to be updated to achieve the goal?
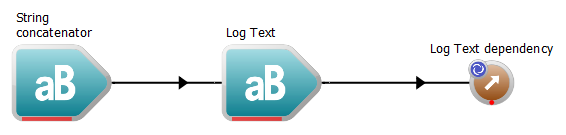
The completed (but unexecuted) workflow
Now that we've attached an output, let's execute the workflow again. We'll see two things:
- All the operations' status bars will turn green:
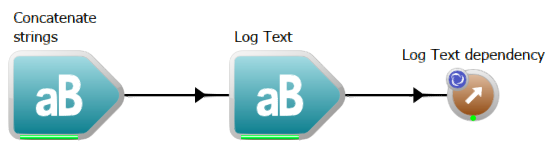
Successful workflow execution
- The text "Hello Workspace!" will be written to the log, it will look something like this:

Logged output
When an operation's status bar is green like this, it means that it is up-to-date and does not need to be re-executed. Workspace keeps track of which items are out-of-date and need to be updated. For example, if an operation's inputs are modified, it and all operations that depend on it are marked out-of-date. In this way, Workspace only needs to update the operations that are affected by the changes. Let's try this now:
- Stop Workspace from executing by clicking the execute button again.
- Click on the ConcatenateStrings operation to select it.
- In Operation Editor, change the first Strings input to the text "Updated ", then click on the canvas. Notice that all the operations have reverted to having red status bars. Because we updated the ConcatenateStrings operation, all of the operations that depend on it, LogText and Dependencies, must also be updated, so they are also marked out-of-date.
- Click execute again. Our text "Updated Workspace!" will be printed to the log and all the operations will again change to green.
See Understanding how a Workflow Executes for more information about how Workspace controls its execution.
Congratulations! You've just completed and executed your first workflow.
Summary
This concludes the first workspace tutorial. What have we learned?
- A workflow is a network of inter-connected Operations
- An Operation is a self-contained task or process that operates on some data
- An Operation can accept data through Inputs and provide data via Outputs
- Data flows from Operation-to-Operation via Connections between Inputs and Outputs.
- When modifying an operation, it and all its dependent operations are marked out-of-date, so that Workspace knows which parts it needs to re-execute.
- When a workflow is executed, it updates all out-of-date operations required to make a WorkspaceOutput up-to-date. In this way, the WorkspaceOutput acts like a goal.
We've also learned:
- How to navigate Workspace's canvas
- How to display Input and Output racks
- How to pin Input and Output racks
- How to use Operation Catalogue and Operation Editor
- How to print text to the log
A complete sample workflow for this tutorial can be found here
For some more detailed information about operations, inputs, outputs, connections, and Workspace's execution system, see the following pages:
Next Steps
The next tutorials in this series are as follows: