Introduction
When creating workflows, it is sometimes necessary to conditionally control when certain operations are executed; for example, you might want to use a different value in a calculation under specific conditions. Workspace makes this easy to do by providing two special operations; SelectInput and TryInputs.
By the end of this tutorial, you will:
Just in case you get stuck, a sample workflow has been provided for you.
Contents
Controlling flow conditionally
Workspace provides an operation called SelectInput which allows us to control which input source we use under certain conditions. This means we can "ignore" entire parts of our workflow when we don't need them to execute. Let's set up a very simple workflow to demonstrate how this works:
- Create a new, empty workflow.
- From the Operation Catalogue drag a SelectInput operation onto the canvas. (Again, just to repeat ourselves, dragging operations on to the canvas may cause their Properties dialog to automatically open. If you need to close it for any reason you can always reopen it later by right clinging on the operation and select Properties from the context menu.)

Creating the SelectInput operation
- Bring up the Operation's properties dialog, set the Data type to Dependency and click OK.
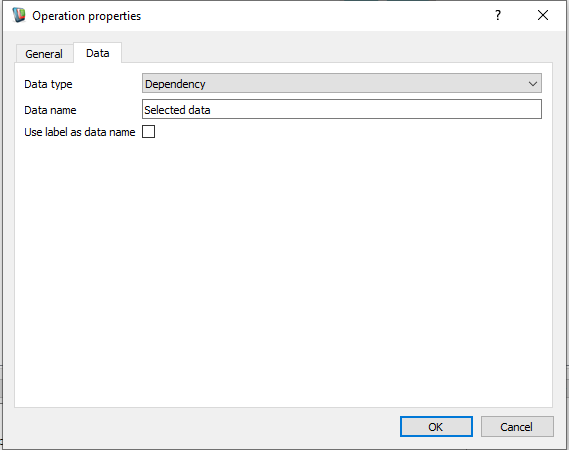
Changing type on the Data tab
- Display the input ports for the SelectInput operation. You'll notice that it has two inputs:
- Index: this controls which of its inputs is selected. It is zero-based, meaning that the index that corresponds to the first input is 0.
- Indexed inputs: the array of inputs from which we will select. Connecting an output to an element of this array input will allow us to retrieve that input's value (and thus bring it's associated output up-to-date) if the selected index is set to the corresponding number.
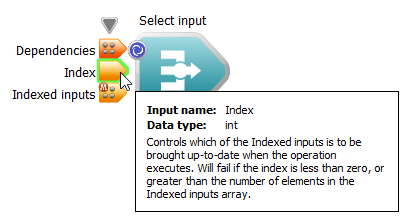
SelectInput's inputs
Now we need to create some integers to pass into the select input and something to view the results:
- From the Operation Catalogue, drag two Variables onto the canvas. Change their data-types to QString.
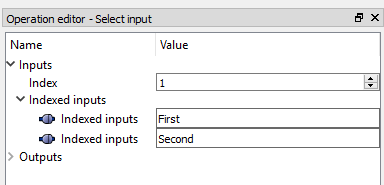
- Click on each Variable operation, and in the Operation Editor, set the Variable input values to the strings First and Second respectively.
- Drag 2 LogText operations to the canvas. Connect the variable "First" to one of the LogText operations ("Text to Log" input) and the variable "Second" to the other LogText operation
- Connect each LogText's Dependency output to the Indexed inputs array input of the SelectInput operation.
- Create a WorkspaceOutput operation attached to the Selected data output of the SelectInput operation.
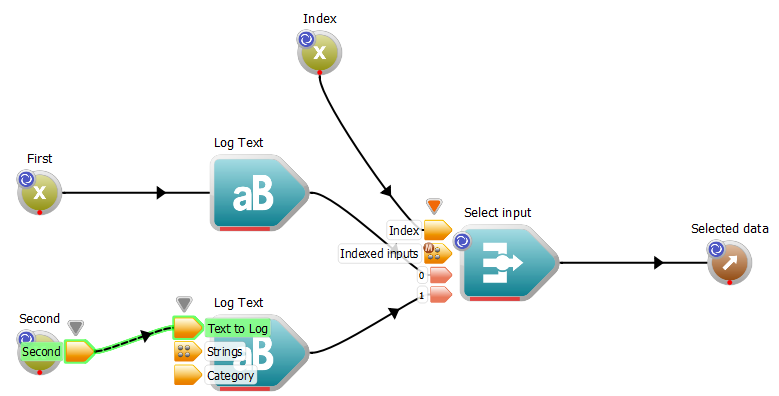
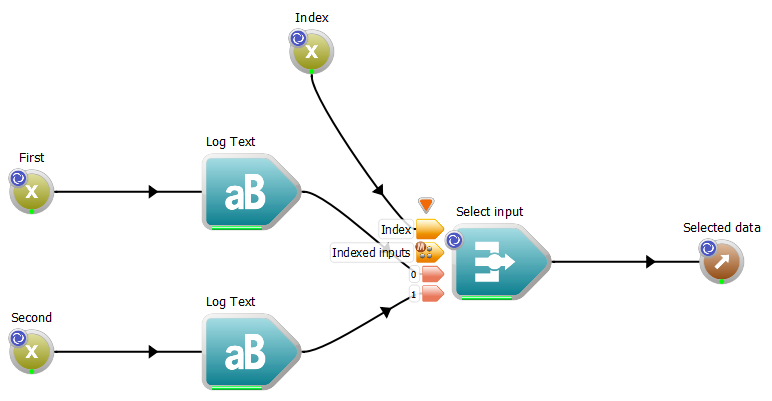
The workflow after adding the Variable and LogText operations
Ensure that you do not have the SelectInput operation selected before executing the workflow. We will see the following text in the log:
First
We will also see that only one of the two Variable operations is up to date:
Only one branch feeding into the SelectInput is updated
This is because the value of the SelectInput's Index input is set to 0, meaning that it is going to "Select" the first Indexed input to update.
- Note
- Were both of your Variable operations brought up to date when you clicked the execute button? This can occur when you have the SelectInput operation selected when execution was triggered. Because the operation's Input widgets are visible in the Operation editor, Workspace will attempt to bring both upstream branches up to date. You can retry this part of the exercise by selecting all the operations in your workflow, right clicking on an empty canvas spot to bring up the context menu and select "Reset selected operation(s)".

Resetting up to date status of selected operations.
Let's get Workspace to execute the other branch instead:
- Click the execute toggle button to turn off workflow execution.
- Click on the SelectInput to select it.
- In the Operation Editor, change the Index input from 0 to 1.
Updating the selected index to 1
- Click the execute button to resume workflow execution.
Now in the log, we will see:
Second
and our workflow will look like this:
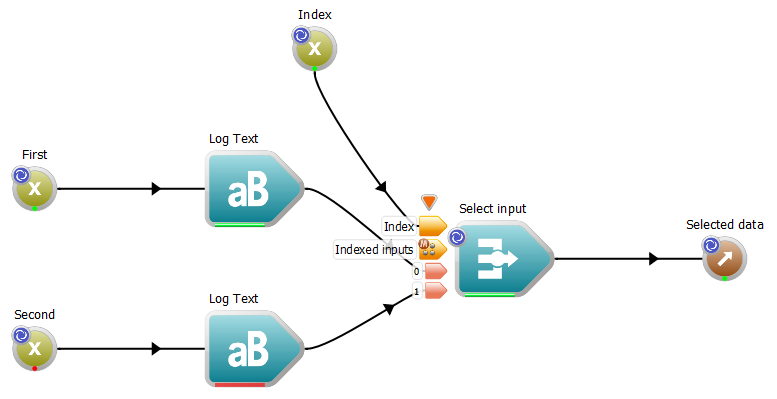
The workflow executing the second branch
- Note
- Notice that the first branch does not go red straight away. This is because although the SelectInput is not using that branch, it already brought it up-to-date during our first execution, so it remains green.
In practice, we can connect as many inputs as we like to a SelectInput. We can also control the index using other operations within the workflow. Let's try this now:
- From the Operation Catalogue, find the Compare operation and drag it onto the canvas.
- Change the Data typeof the Compare operation to "QString".
- Connect the Result output of the Compare operation to the Index input of our SelectInput operation.
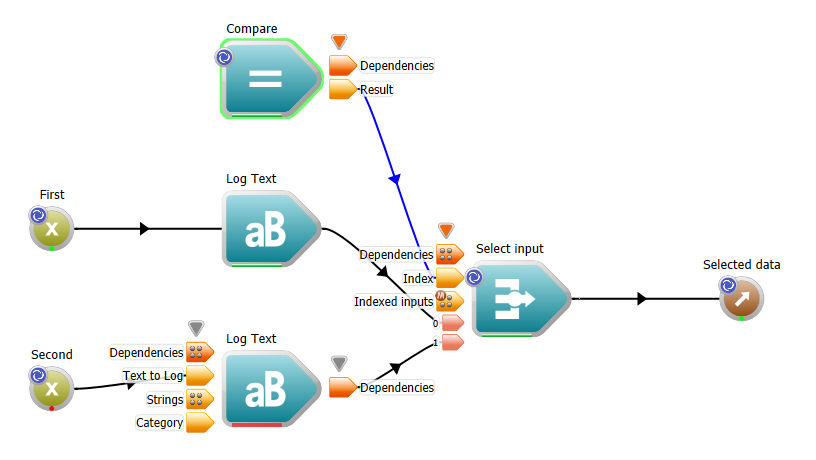
The workflow with the StringEqual operation added
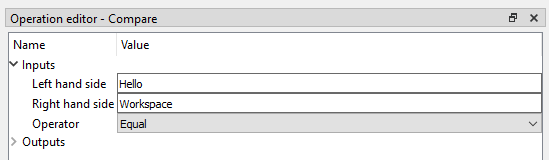
- Click on the Compare operation to select it, and in the Operation Editor, set its Left hand side input to the text "Hello", set its Right hand side input to the text "Workspace" and the Operator to "Equal":
StringEqual in Operation Editor
- Ensure that all your operations are not up to date by selecting them all, right clicking on an empty canvas spot to bring up the context menu and select "Reset selected operation(s)".
- Execute the workflow.
In the log, we will see the following:
First
Because the two strings we are comparing with the StringEqual operation are not equal, it is outputting a boolean value of "false", which is converted to an integer value 0.
- Note
- See how the connection between the Compare operation and the SelectInput operation is colored blue? This indicates that the data passing through the connection is being automatically converted from one datatype to another; in this case, from bool to int.
If we now change the value of the Left hand side input of the Compare operation to the text "Workspace", we will see the text change to:
Second
Now that the strings are equal, the value "true" is automatically being converted to the index value 1.
Controlling flow in the case of failure
We've now seen how to use the SelectInput operation to control execution using conditions. Workspace also allows us to control execution in another way: through trial and error. For example, let's say we have an operation which can fail to execute under certain conditions (e.g. file does not exist). Workspace provides a TryInputs operation which will attempt to bring its first input up-to-date, and if that fails, try to bring the next one up-to-date and so on.
Let's change our workflow so that it uses a TryInputs rather than a SelectInputs:
- From the Operation Catalogue find the TryInputs operation and drag it onto the canvas.
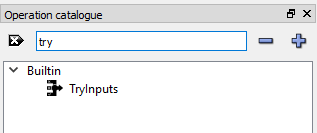
The TryInputs operation
- Change its datatype to QString.
- Click on the SelectInput operation to select it, and hit the "Delete" key to delete it.
- While we're at it, also delete our second Variable operation, our StringEquals operation, the two LogText operations and the selected data output.
- From the Operation Catalogue, drag a RunQtScript operation onto the canvas.
- Add an output called result to the RunQtScript operation.
- Connect the result output of our RunQtScript operation to the Inputs array input of the TryInputs operation.
- Connect the "First" Variable output of our Variable operation to the Inputs array input of the TryInputs operation.
- Drag a LogText operation on to the canvas
- Connect the Data output of our TryInputs operation to the Text to log input of the LogText operation.
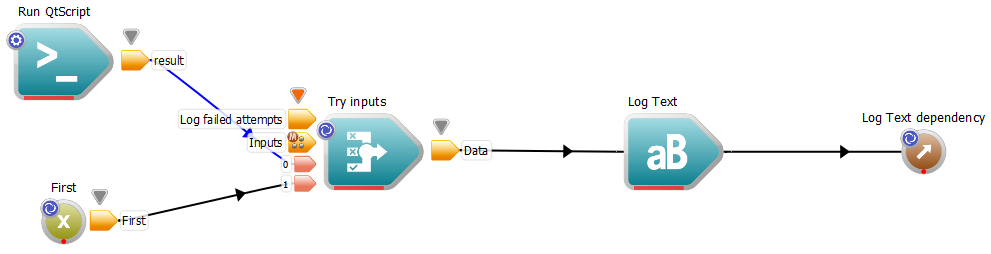
The modified workflow with a TryInputs operation
Let's set up our script to fail:
- Click on the RunQtScript operation to select it, and in the Operation Editor, enter the following code in the Script input text area:
result = invalid_code
This script won't work, as invalid_code is undefined.
- Ensure that you don't have any operation selected before executing the workflow.
You will see the following printed to the log:

Error message and execution output
Summary
This concludes the tutorial. You should now know how to:
- Use a SelectInput operation to control execution with a condition
- Use a TryInputs operation to control execution based on the success or failure of operations
Two sample workflows for this tutorial can be found here:
For some more detailed information about branching in Workspace, see these pages:
Next Steps
The next tutorials in this series are: