|
Workspace 7.1.0
|
|
Workspace 7.1.0
|
Workflows can be used in a variety of different ways. We can interact with them via the Workspace editor (as we have done in the previous tutorials), embed them in custom applications (beyond the scope of these tutorials), or run them as a stand-alone process from the command-line. In this tutorial, we are going to learn how to do the latter by using the workspace-batch utility. Using this utility, we can run workflows as though they are command-line utilities, allowing us to run them on remote machines, schedule them as jobs, or share them to others who are unfamiliar with Workspace. By the end of the tutorial, you will:
Just in case you get stuck, a sample workflow has been provided for you.
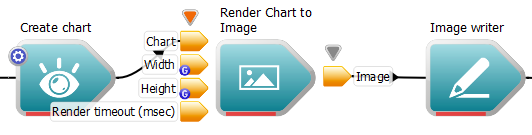
As stated above, we're going to begin by opening the workflow we created in the Modifying and writing data tutorial:

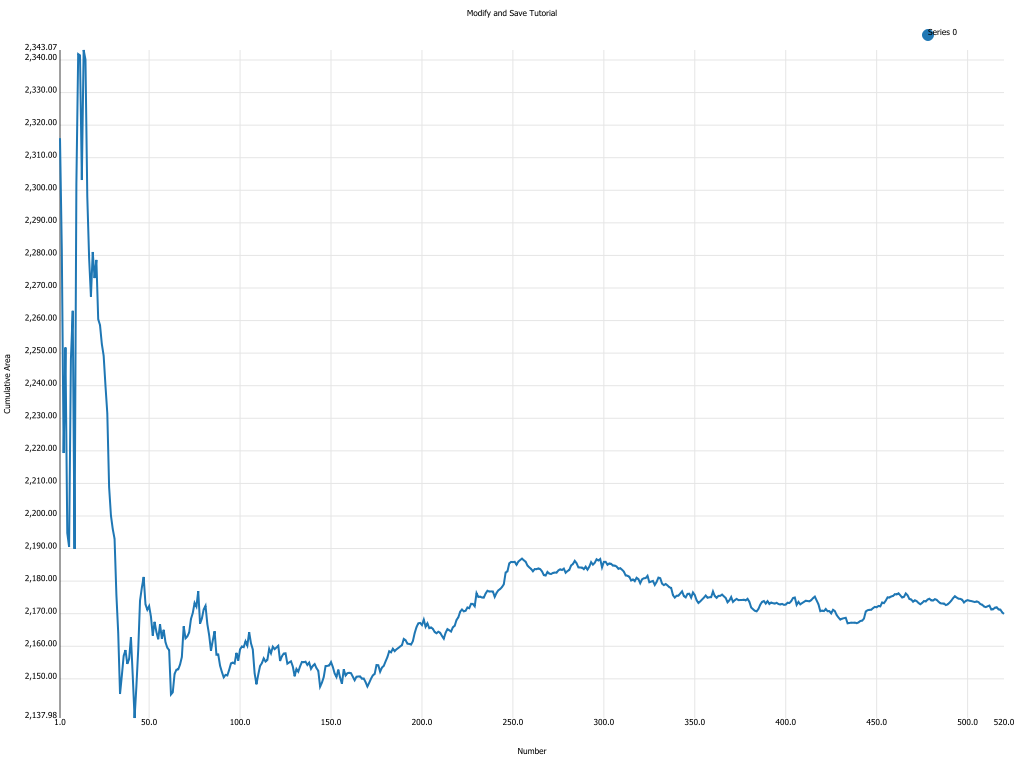
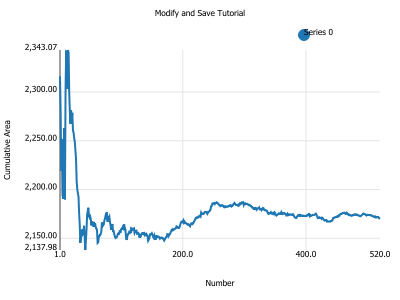
This workflow takes a CSV file, calculates some values for a new column, writes out the new CSV data, as well as an image of a chart of the data.
Now we know we have a workflow that we can run in one step. Let's learn how to run it from the command line:
bin directory is added to your PATH environment variable. For example, if the workspace-batch executable is located somewhere such as:/opt/csiro.au/workspace/bin/workspace-batch (Linux) orC:\Program Files\csiro.au\workspace\bin\workspace-batch.exe (Windows) or/usr/local/csiro.au/workspace/bin/workspace-batch (OSX)/opt/csiro.au/workspace/bin (Linux) orC:\Program Files\csiro.au\workspace\bin (Windows. Note: do not use double-quotes to surround the path)/usr/local/csiro.au/workspace/bin (OSX)PATH environment variable, then you will need to execute the workspace-batch commands listed below using the full path to workspace-batch, such as:C:\Program Files\csiro.au\workspace\bin\workspace-batch.exe.cmd and clicking run.Applications / Utilities folder in the dock.workspace-batch --help
Usage: workspace-batch.exe [OPTIONS] [workspaceFilename]

 --help                         Show help summary
 --version                      Show version information
 --no-plugins                   Don't load plug-ins
 --no-user-plugins              Only load the default plugins that ship with Workspace
 --no-settings                  Don't load user settings
 --no-rendering-plugin          Don't load the rendering plugin
 --config [filename]            Specify configuration filename
 --globalName [globalName] [value]
                                Specify an initial value for a global name in batch mode
 --globalNameFile [globalNameFile]
                                Specify initial values for global name from a global name variable file, file could be exported in Workspace editor by: 'File'->'Export global names'
 --input [inputName] [value]    Specify an initial value for a top level workspace input in batch mode
 --maxThreads [maxThreads]      Specify the maximum number of local threads to use
 --runAsServer                  Presence of this switch indicates the batch utility should execute in server mode
 --saveOnExit                   Specify whether to save the workspace to file post execution
 --reportWorkspaceProgress      Specify whether to report the internal workspace progress messages
 --provenance [reportingLevel]  Specify whether to capture and report provenance (basic|external|internal)
 --usedPluginsOnly              Specify whether to load used plugins only
 --requiredFeature [requiredFeature]
                                Specify a feature required of a scheduler before it can be used to queue a workflow.
--exitWithProcess [processId] Specify whether to exit once a given process exits.~/Documents/sample_batch.wsx, I would enter the following on the command line: cd ~/Documents
workspace-batch sample_batch.wsxThe output will look something like the following:
Starting workspace-batch on Thu Aug 17 17:37:58 2017
Adding Built-in version 4.3.0
Searching for Workspace plugin directories according to WORKSPACE_INSTALL_AREAS environment and C:\CSIRO\WorkspaceDocs\Workspace_reldeb\Install\installAreas
Searching for Workspace plugins (4.3.0.MSVC1900.x64.2) in:
C:\CSIRO\WorkspaceDocs\Workspace_reldeb\Install\lib\Plugins
Adding Application Support version 4.3.0
Adding Data analysis version 4.3.0
Adding HDF5Plugin version 4.3.0
Adding Mesh version 4.3.0
Adding Package version 4.3.0
Adding Python35 version 4.3.0
Adding C:\CSIRO\WorkspaceDocs\Workspace\Tools\ThirdParty\Python35 to PYTHONPATH
Adding Rendering version 4.3.0
Adding Parallel & remote execution version 4.3.0
Adding Help implementation version 4.3.0
Loading of workspace plugins complete
Running workspace file C:/CSIRO/WorkspaceDocs/Workspace/Source/Workspace/Examples/sample_batch.wsx from working directory C:/CSIRO/WorkspaceDocs/Workspace_reldeb/Install/bin
Starting workspace update
Image of size 1024x768 written to file ws:outputimage.png
Workspace update completed
Execution time = 11.303 seconds
Shutting down application
This shows us that our workflow has run successfully. If we view the contents of the directory, we will see two new files: outputimage.png and newcsvfile.csv. We can open these files to view the results, for example:
Now that we've successfully executed our workflow from the command line, we need to learn how to change inputs from the command line. This will allow us to pass data into the workflow in the form of command line arguments. In this example, we're going to specify the size of the chart image that we want.

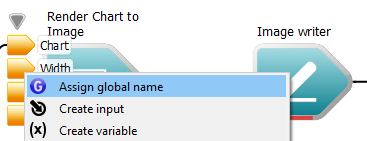
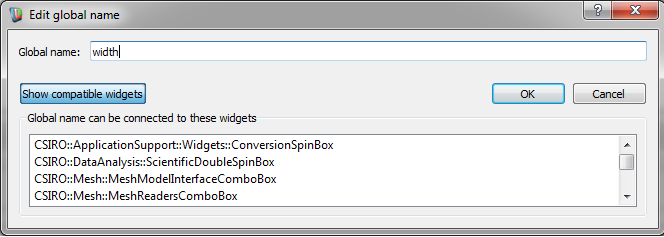
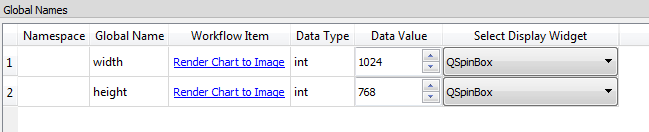
We've now successfully exposed two inputs as part of our Workspace's "global interface". We're now going to use the workspace-batch utility to assign values to these globally exposed inputs.
workspace-batch --globalName width 400 --globalName height 300 sample_batch.wsx
Starting workspace-batch on Thu Aug 17 17:51:00 2017
Adding Built-in version 4.3.0
Searching for Workspace plugin directories according to WORKSPACE_INSTALL_AREAS environment and C:\CSIRO\WorkspaceDocs\Workspace_reldeb\Install\installAreas
Searching for Workspace plugins (4.3.0.MSVC1900.x64.2) in:
C:\CSIRO\WorkspaceDocs\Workspace_reldeb\Install\lib\Plugins
Adding Application Support version 4.3.0
Adding Data analysis version 4.3.0
Adding HDF5Plugin version 4.3.0
Adding Mesh version 4.3.0
Adding Package version 4.3.0
Adding Python35 version 4.3.0
Adding C:\CSIRO\WorkspaceDocs\Workspace\Tools\ThirdParty\Python35 to PYTHONPATH
Adding Rendering version 4.3.0
Adding Parallel & remote execution version 4.3.0
Adding Help implementation version 4.3.0
Loading of workspace plugins complete
Running workspace file C:/CSIRO/WorkspaceDocs/Workspace/Source/Workspace/Examples/sample_batch.wsx from working directory C:/CSIRO/WorkspaceDocs/Workspace_reldeb/Install/bin
Update SQL table with DataSeries.
Set global name 'height' to '300' from command line
Set global name 'width' to '400' from command line
Starting workspace update
Image of size 400x300 written to file ws:outputimage.png
Workspace update completed
Execution time = 11.533 seconds
Shutting down application
Nicely done. You've now learned how to modify input values via the workspace-batch.
This concludes the tutorial on batch execution. You should now know how to:
A sample workflow for this tutorial can be found here.