|
Workspace 7.1.0
|
|
Workspace 7.1.0
|
In the previous tutorial Connecting a workflow to a user interface, we learned about how you can use global names to connect inputs and outputs to a user interface. In this tutorial we are going to see how we can use global name files to save and restore workflow settings, or to simplify setting multiple globalName parameters when running a workflow from the command line
We're going to begin by opening the workflow we created in the Connecting a workflow to a user interface tutorial:
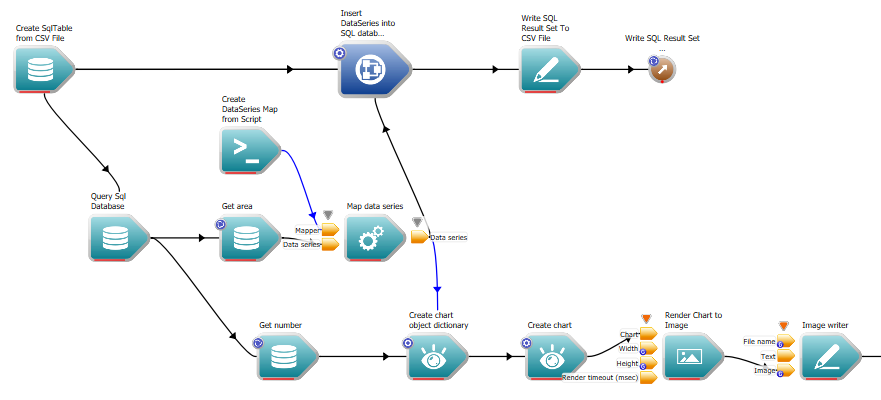
As in the previous tutorial, the workflow takes a CSV file, calculates some values for a new column, writes out the new CSV data, as well as an image of a chart of the data.
So far, we have been looking for a few special inputs and/or outputs and assigning them global names. What if we want to be able to control all of the workflow settings from an application or command line? Maybe the workflow is so complex that even a small subset runs into the hundreds. We can consider a workflow's set of global name values as the workflow's settings, and Workspace provides a mechanism for saving and loading them via exporting and exporting global name files.
Lets's have another look at our workflow. In this diagram, all the input racks have been pinned open so that you can see all the values that we can vary. So far, we've only assigned global names to inputs to the Render Chart to Image and Image Writer operations (see them at the bottom left of the workflow).
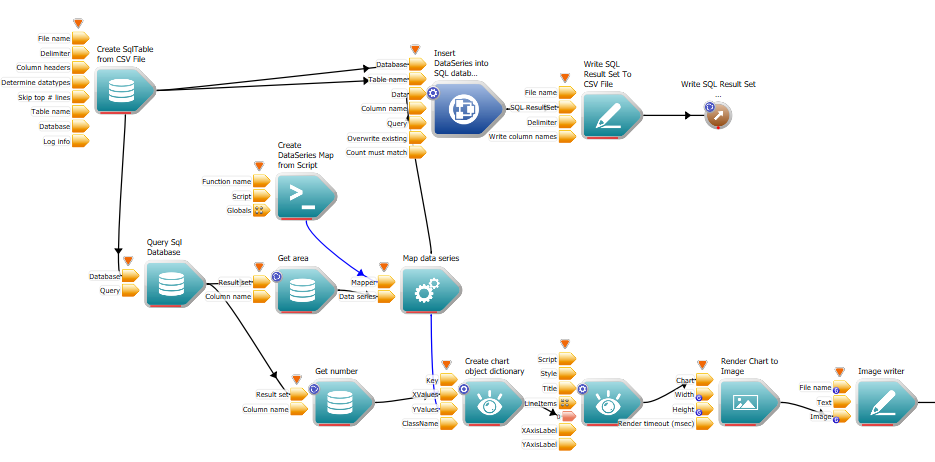
Suppose we want to use this workflow to chart any column from any column-separated (csv) file. While we don't need any more operations, if we want to use a custom interface or command line, we'll want to be able to set quite a few more global names:
Let's see what that might look like.
Even if we want to execute the workflow directly, it will simplify things a lot if we can save groups of settings - perhaps the format of files from a particular site.
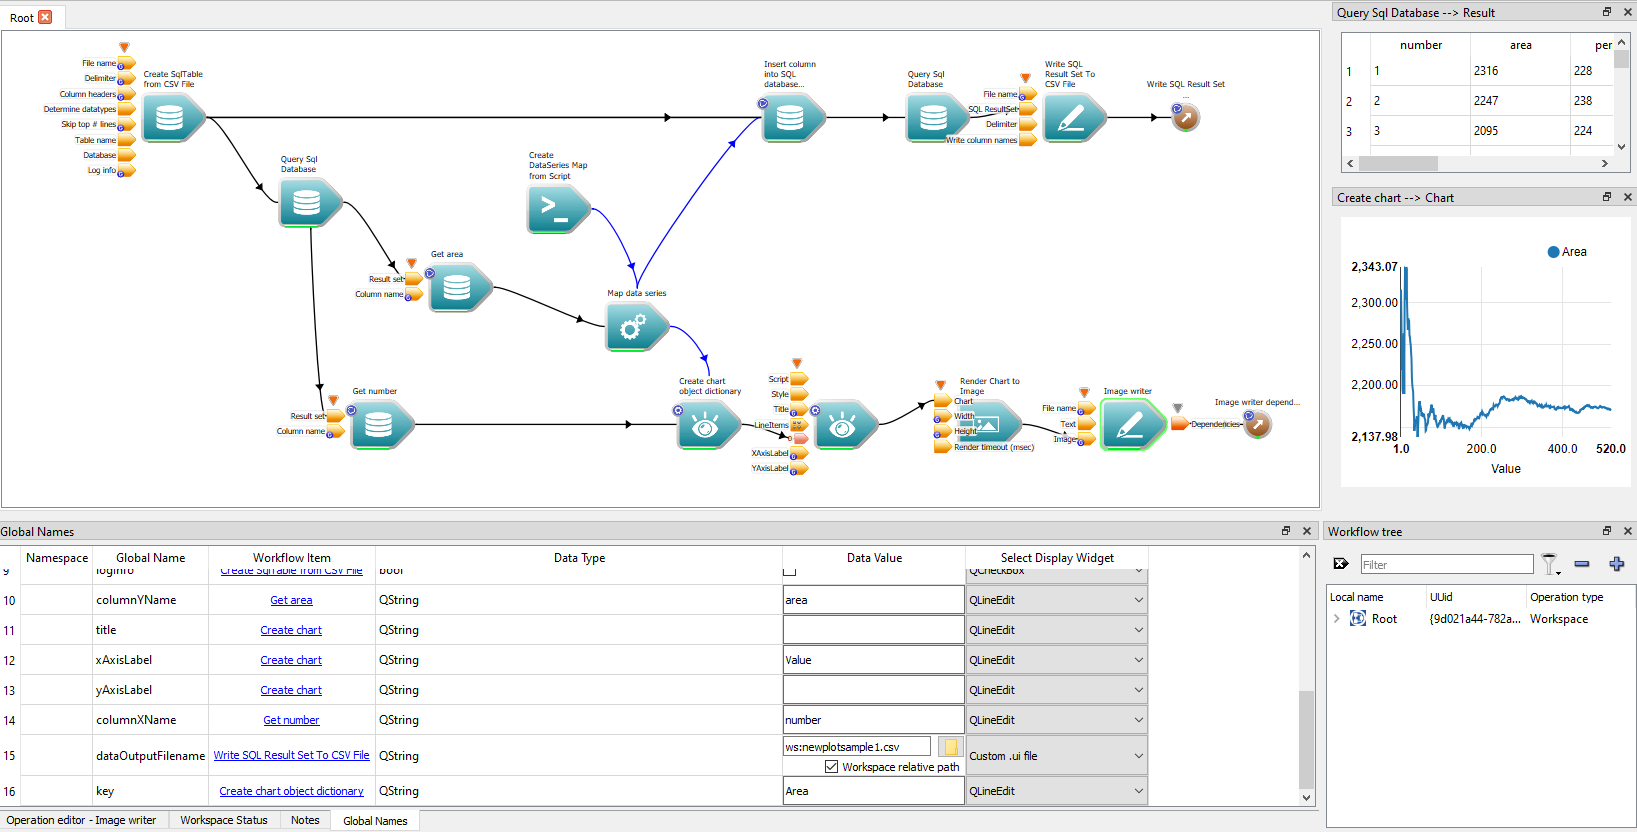
Global name files have suffix "wsg" Let's save these settings by exporting this file as workflow_chart_area.wsg, then we can change some settings.

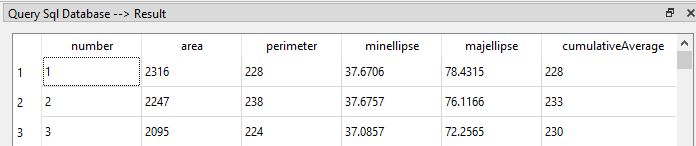
From the Query Sql Database Result output, we know that the input file has six columns to choose from.
Let's change the settings so that we are plotting the perimeter rather than the area column. We can save this file as workflow_chart_perimeter.wsg

Now we have two Workflow settings files saved. If the input file were updated regularly, we could load and execute the appropriate workflow to see the latest area or perimeter data.
While this is a trivial example, there are actually many reasons why you may want to use a workflow settings file:
You can save multiple global names files for the same the workflow.
If you use a global name file then you won't need to enter (or modify) different sets of these values every time you run the workflow or application.
The steps involved in running a workflow from the command line using a global-name-based settings file are:
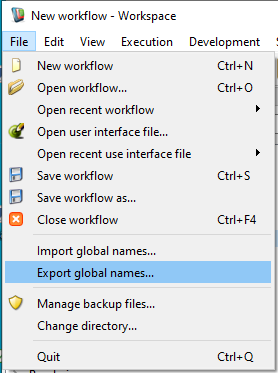
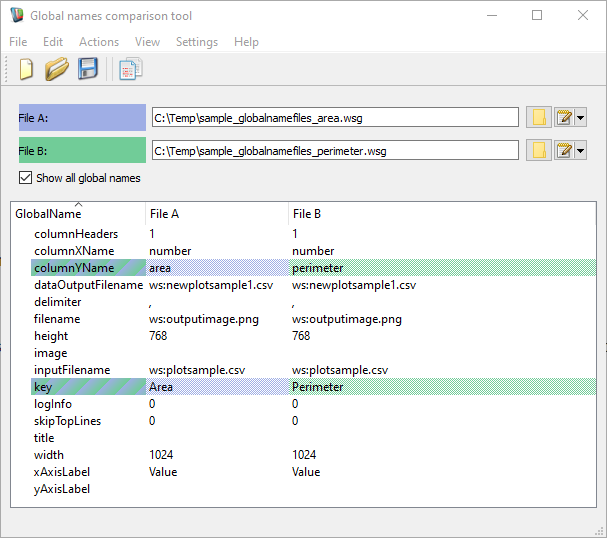
If you want to compare two workflow settings files, then you can use the Workspace global-name-diff application, distributed with the Workspace package. You can access it the same way to access the Workspace editor.
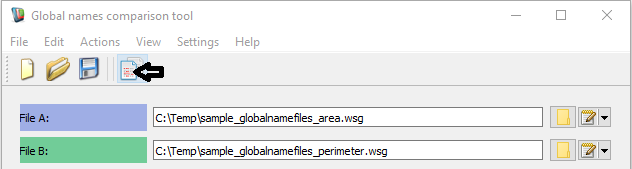
By default, settings will only be displayed where they are different, but if you check the Show all global names box you can see everything.
Legend:
We recommend that you make any changes to globalname files through the Workspace editor (the Global Names window is a good place to do this).
For more information about using the Workflow tools that are provided in the Workspace package, see Workflow tools
This concludes the tutorial on using workflow settings files. You should now know why global name files are useful in many different contexts, and how to: