Introduction
In the previous tutorial Batch execution, we learned about assigning a global name to an input and changing the input value from the command line. An input with an assigned global name can be changed from the command line as well as from your own Qt user interface (UI). This tutorial shows you how connect a workflow to a user interface. The example provided is quite basic but should demonstrate enough to allow you to attempt something more complex.
- Note
- This tutorial builds upon the workflow constructed in the Modifying and writing data tutorial. If you have not completed this tutorial, you can use this sample workflow.
Contents
Pre-requisites
We're going to begin by opening the workflow we created in the Modifying and writing data tutorial:
- Open up the workflow using the Workspace editor
- Make sure it executes successfully by clicking the execute button
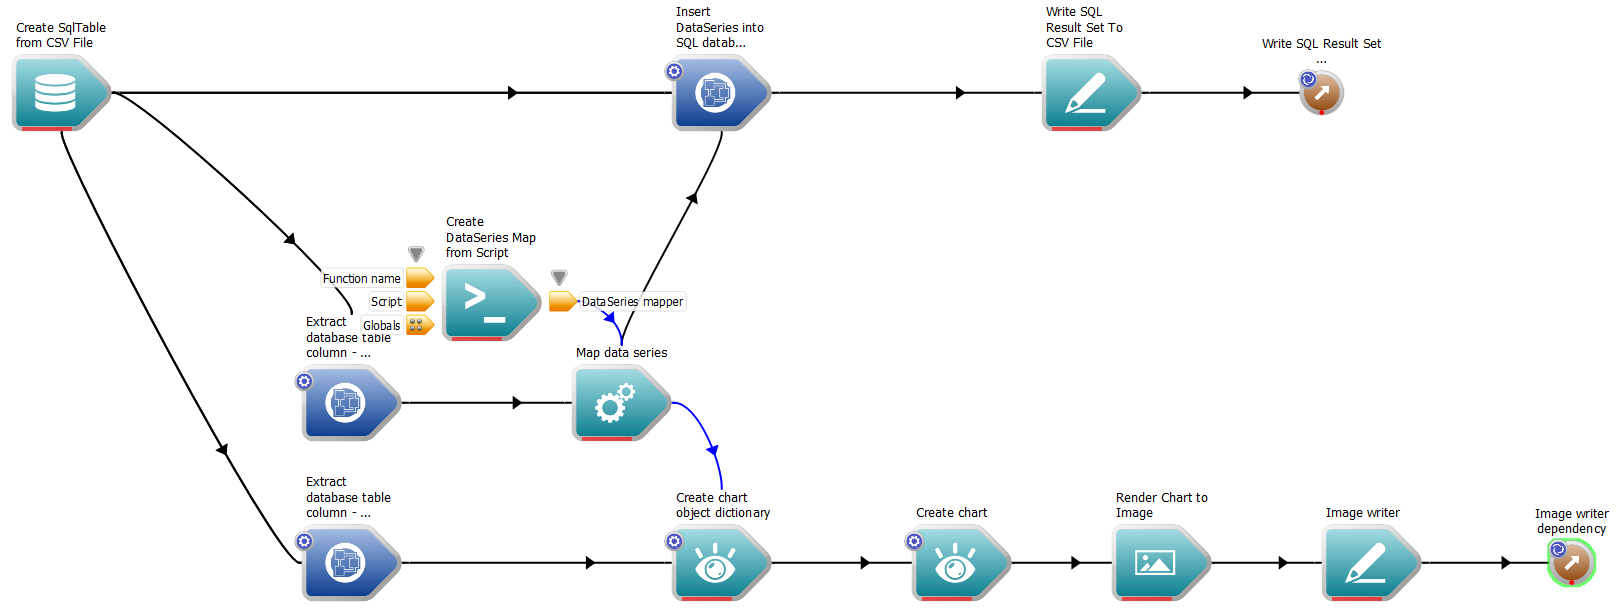
The workflow we're going to execute
This workflow takes a CSV file, calculates some values for a new column, writes out the new CSV data, as well as an image of a chart of the data.
Creating the UI
We now need to create the UI and connect various elements to the workflow.
- Launch the Workspace editor
- Launch Qt Designer from the "Development" menu:
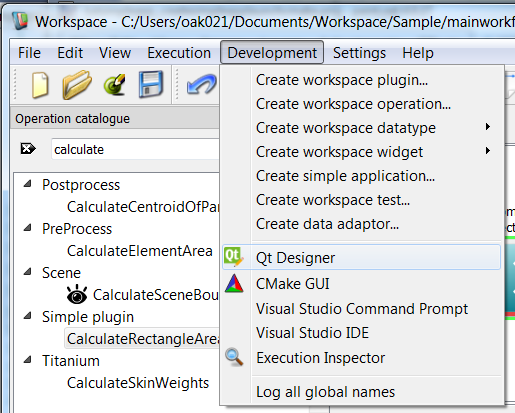
Launching Qt Designer
- Now we create a new UI file:
- Choose "Main Window" in the templates\forms section as we are going to create a QMainWindow
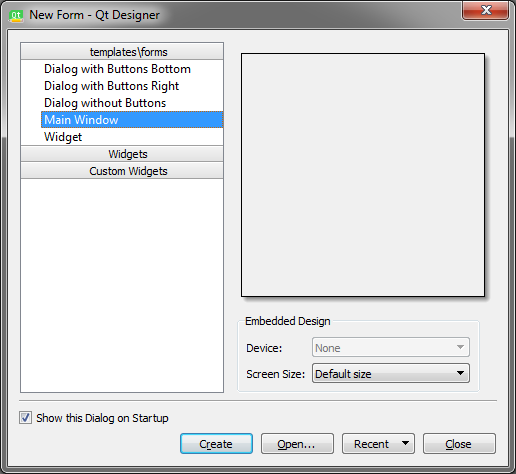
Creating a new main window
- An empty main window is created:
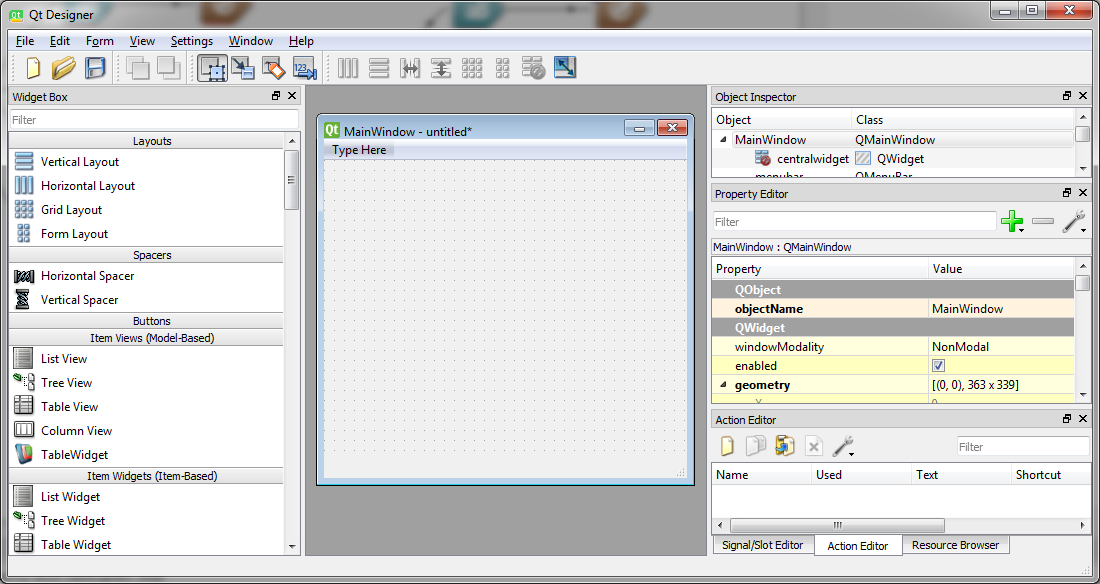
Empty main window
- Add some new UI elements :
- Create four new Labels with the text "Width", "Height", "File name" and "Image"
- Create two new "Workspace Line Edit", one "File name widget" and one "Image widget":
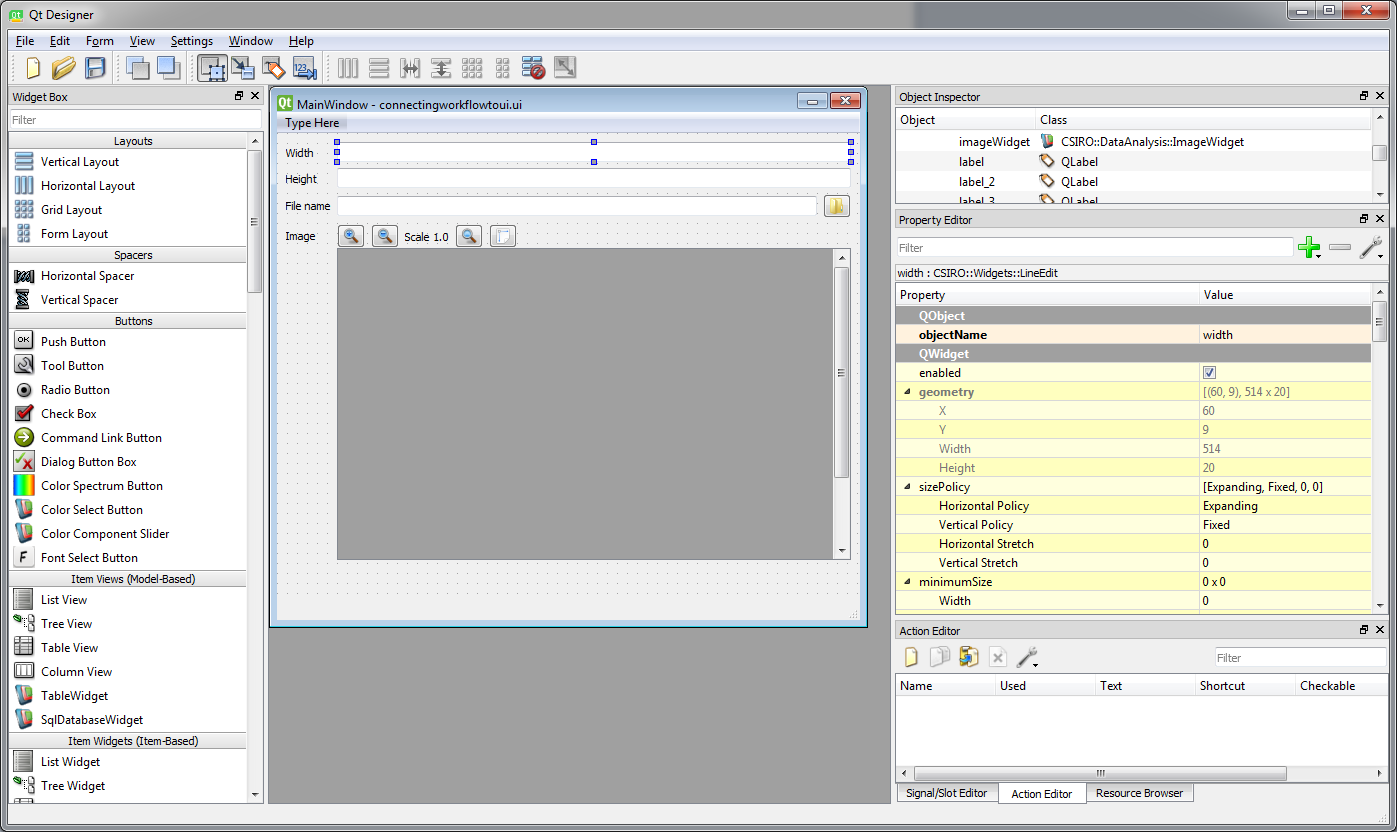
Updated main window
- Set the "objectName" property to "width" to aid in identifying it in the Qt Designer "Object Inspector":
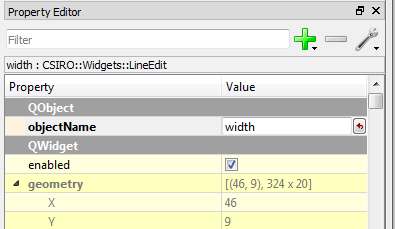
Line edit name changed
- Do the same for "height", "fileName" and "image"
Connecting the workflow elements
Now we connect the workflow elements to the UI using the global names:
- Back in the Workspace GUI, load the workflow created in the Modifying and writing data tutorial.
- Make sure there are global names on the "Width" and "Height" inputs of the "Render chart to image" operation and also global names attached to the "File name" and "Image" inputs on the "Image writer" operation.
- You can call these global names "width", "height", "filename" and "image".

Global names on workflow
- We will connect the "Height" input in the "Render Chart to Image" operation on the workflow to the "height" line edit element in the UI.
- There are two methods to drag-and-drop the global name from the workflow to the UI element in Qt Designer:
- Method 1:
- Left-mouse button on the height input and drag-and-drop onto the height line edit in Designer's "Object Inspector". Depending upon the layout of the application windows on your desktop, after starting the drag you may need to first drag onto the Qt Designer taskbar entry (or dock entry if you are on OSX) to ensure it pops up on top of other windows:
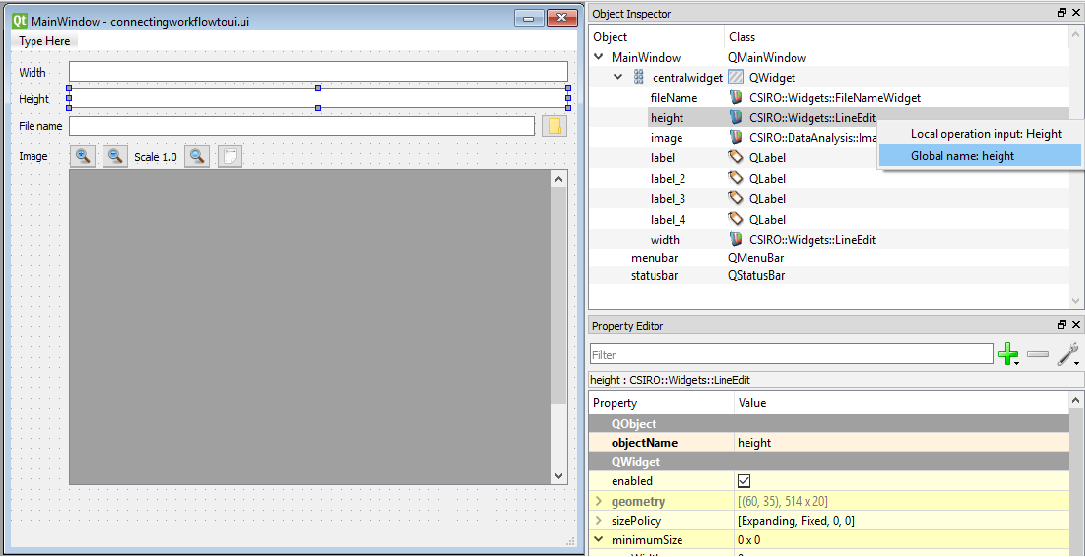
Dropping global name "height" on the Object Inspector for the height LineEdit
- A context menu will appear that allows you to link the workflow element to the UI element.
- You will also notice that the "height" line edit UI element is automatically selected when you drop in the Object Inspector and the Property Editor displays the properties of the "height" line edit item.
- When using this method i.e. dragging from the workflow and dropping on to the Object Inspector, be careful to drop on to the correct UI item. This is easier in a UI with a smaller number of items. For a complex UI consider using the next method.
- Method 2:
- In Qt Designer, select the "height" LineEdit element.
- Left-mouse button on the height input and drag-and-drop onto the height line edit in Designer's "Property Editor".
- This method is useful if you want to avoid the issue of accidentally dropping the global name on a UI element that is not the intended one. It does, however, require the extra step of selecting the necessary UI element before starting the drag-and-drop from the workflow.
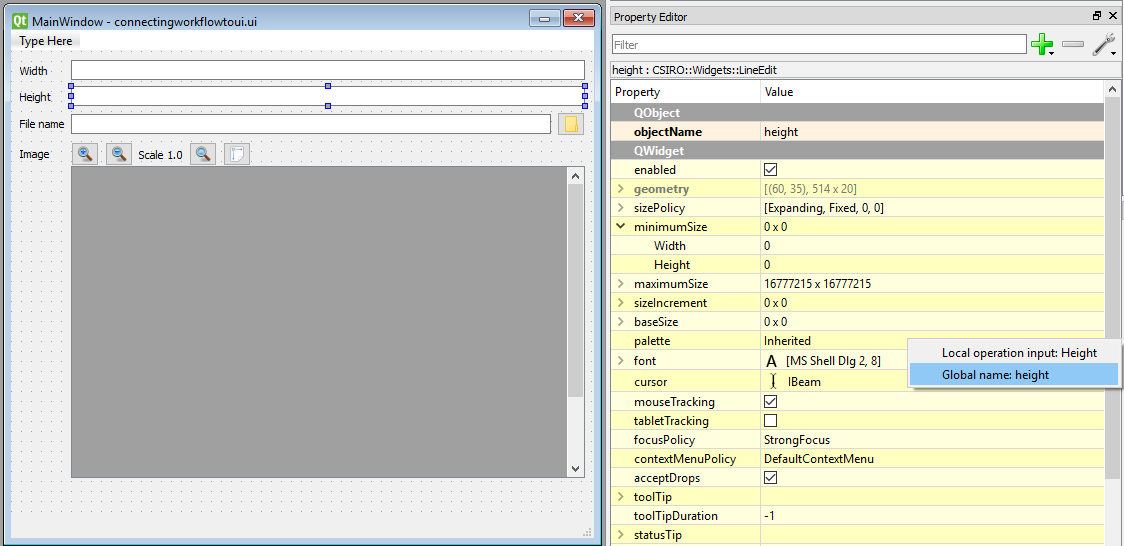
Dropping global name "height" on the Property Editor for the height LineEdit
- Whichever method you follow, select "Global name: height" from the context menu:

"height" line edit in "Object Inspector" or "Property Editor"
- "Height" will now show additional "Dynamic Properties":
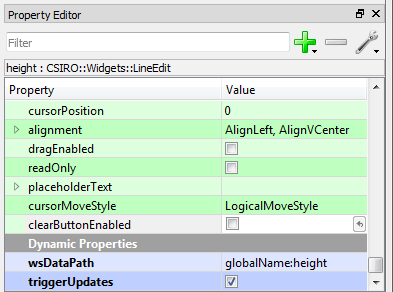
wsDataPath set to global name "height" from the workflow
- Repeat for:
- width
- fileName
- image
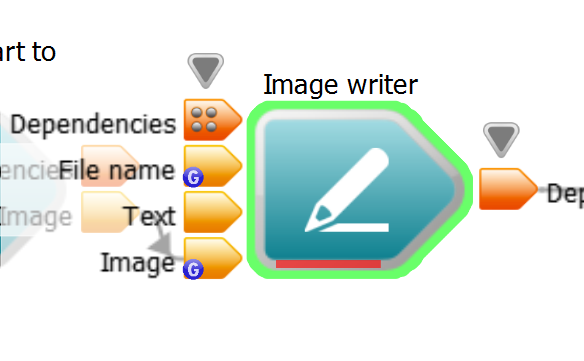
Global name "image" on workflow
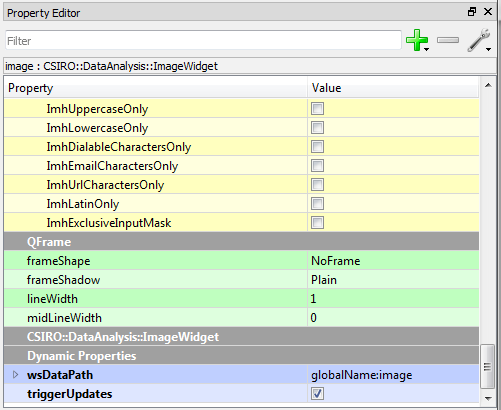
wsDataPath set to global name "image" from the workflow
- Save the UI file and quit Qt Designer.
Setting input values from the user interface
Now that we've successfully created a UI file and connected it to our workflow, we can learn how to change inputs from the user interface.
- From the Workspace editor, open the UI file created above. You can do this by clicking on "Open user interface file..." in the "File menu":
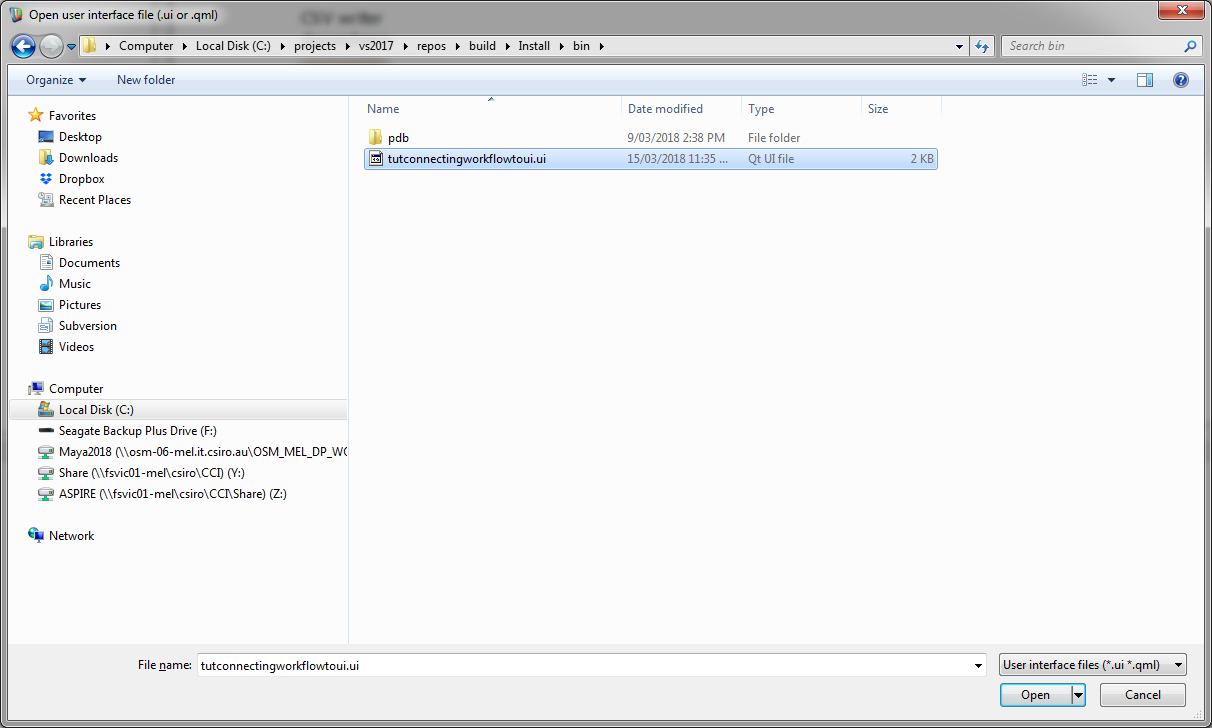
Open user interface file
- Select the "Render chart to image" operation so that the operation's inputs and outputs can be viewed in the "Operation Editor".
- Run the workflow.
- Position the main window UI such that you can view the values in the UI as well as in the "Operation Editor".
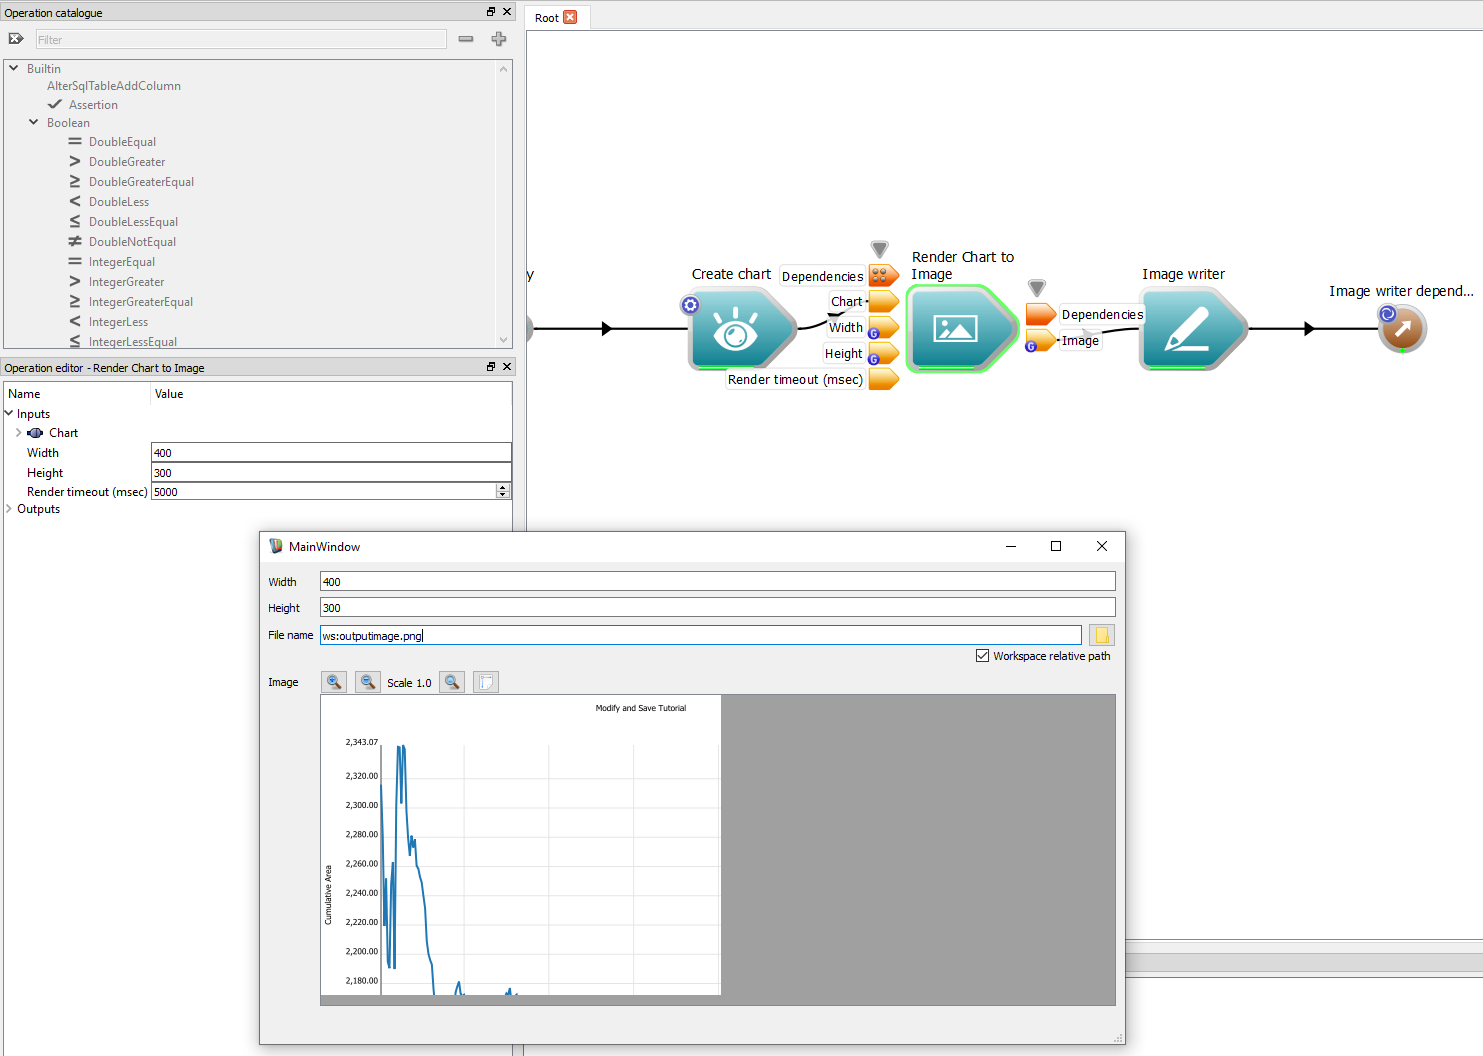
- Note that the values seen in the "Operation Editor" and "MainWindow" are the same:

MainWindow reflecting input values
- Now change the values of "Width" and "Height" in the MainWindow.
- You can see the corresponding values changing in the "Operation Editor":
Input values changed in UI
Summary
This concludes the tutorial on connecting a workflow to a user interface. You should now know how to:
- Launch Qt Designer from the Workspace editor
- Create a simple main window using Qt Designer
- Assign global names to inputs and drag and drop them on to UI elements
- Change input values from a user interface