Introduction
When positioning objects in a scene, it is often useful to position objects relative to another object's coordinate frame, for example, the rotation of an arm in a skeleton model must be set to rotate about the shoulder joint. Workspace helps users to achieve this by allowing them to create Transforms (objects that contain rotation, scale, shear and translation information), and composite them in a hierarchy. It is then possible to create complex scenes composed of large numbers of models, each transformed relative to their parent element.
This tutorial will help you to understand:
- How to create Transform objects and add them to a scene
- How to attach other types of scene items to transforms
- How to create a hierarchy of transforms
A sample workflow has been provided for this tutorial.
Prerequisites
This tutorial assumes that you have completed the first two tutorials: Basic Rendering and Modifying a Model's Appearance. The steps in the tutorial build upon the workflow completed in the Model Appearance tutorial - if you did not complete this tutorial, please use the sample workflow for tutorial #2 as the basis to begin this tutorial.
1. Creating transform objects
The first thing we're going to learn in this tutorial is how to create a transform object and add it to the scene. In this scenario, we're going to rotate our model 90 degrees.
To do this in the workspace editor:
- From the
Scene section of the Operation Catalogue, drag a TransformBuilder operation onto the workspace convas.
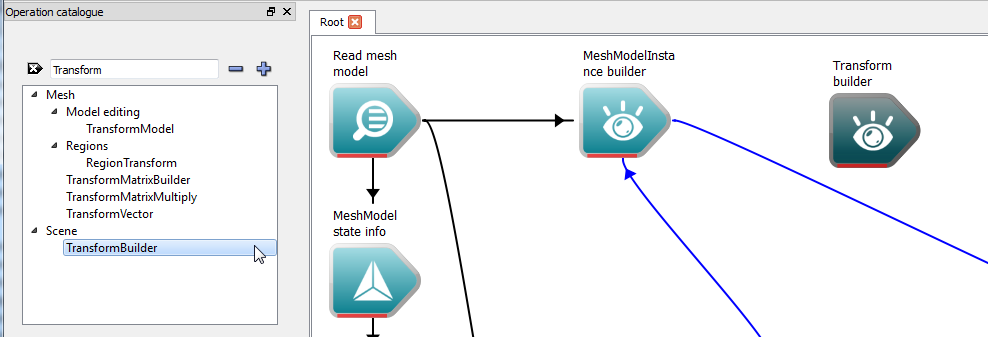
Creating the transform builder
- Disconnect our MeshModelInstanceBuilder from the SceneBuilder. We're going to insert our transform between the model and the scene.
- Connect the Mesh model instance output of the MeshModelInstanceBuilder to the Child scene items array input of the TransformBuilder.
- Connect the Transform output of the TransformBuilder operation to the Scene items array input of the SceneBuilder operation.
- Click on the TransformBuilder to view its properties in the Operation editor. In the Operation editor, instead of the regular input / output tree, a custom widget will be created:
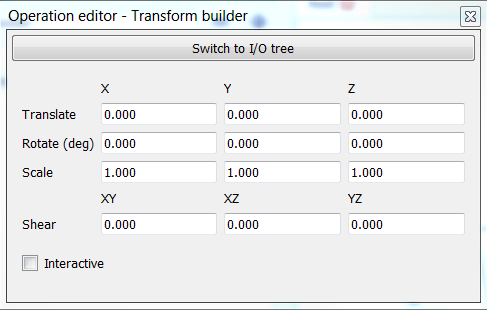
The custom transform widget
- In the Rotation group box, enter 90 in the X component as shown below.
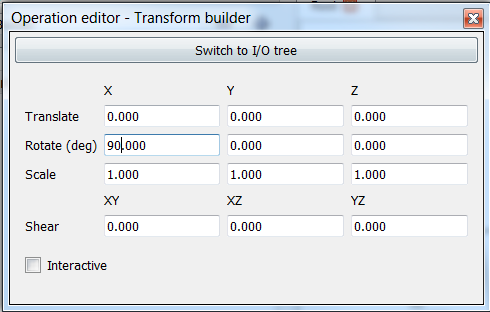
Editing the transformation details
- Ensure the workflow is executing.
Now, in the WSGLWidget, the model will appear rotated similar to the image below.
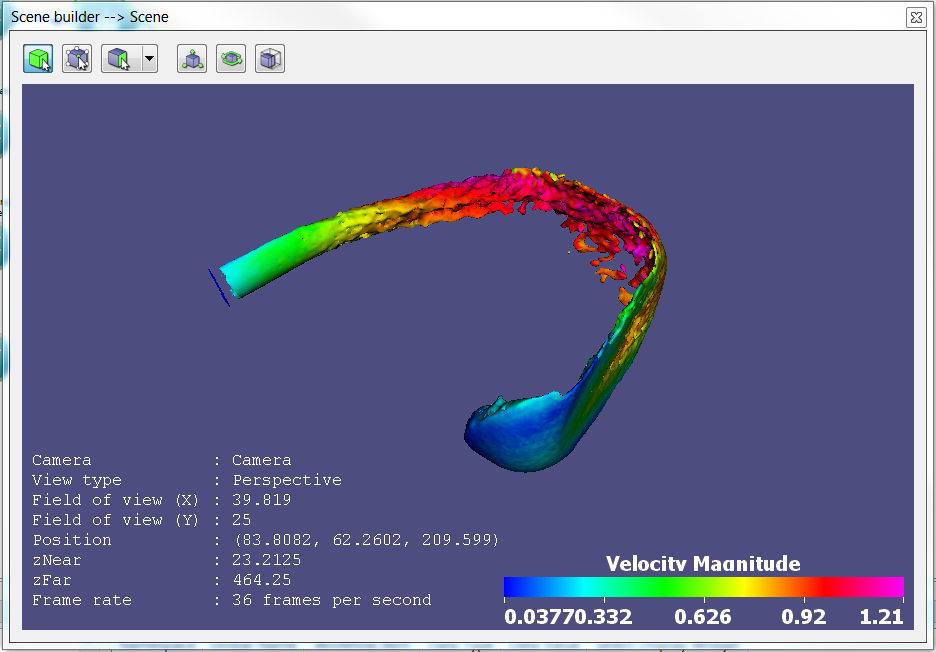
The water model rotated by 90 degrees about the x-axis
NOTE: The TransformMatrix applies transforms in the following order:
- Shear
- Scale
- Rotate
- Translate
2. Attaching other types of scene items to transforms
Workspace allows any type of SceneItem to be attached as a child of a Transform, including lights and cameras. Although you may not realise it, this is already occurring in the workflow you have created! To investigate further:
- Find the Create camera with attached light operation on the workflow (it should be bright blue). As discussed in the previous tutorial, this is a special type of operation known as a Nested workflow. Double click it to open its contents.
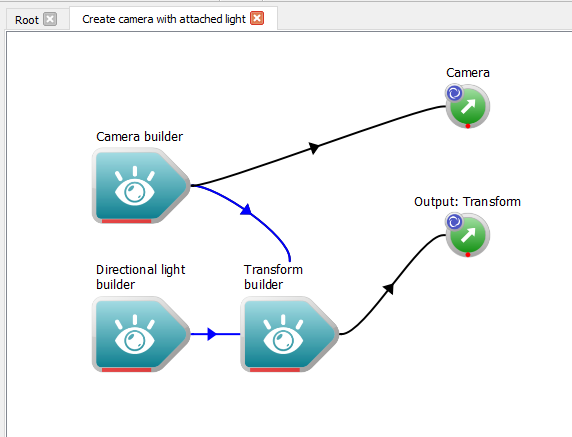
Camera with attached light
As we can see, in this workflow, our existing camera and light are both connected to a single transform. When we interact with the camera, we are in fact moving this transform around, thus, the light and camera move together.
- Note
- A special mechanism is used here to allow user interaction to be 'captured' by the transform instead of the camera. If you hover the mouse over the connection between the camera and the transform, you will see that there are actually two connections; one connecting the camera as a 'child' of the transform, and another connecting it as a camera.
3. Creating a hierarchy of transforms
Using the operations we have created in the previous step, we can create a complex hierarchy of transformations; each node in the hierarchy transforming its attached scene item relative to its parent node. In this tutorial, we will set up an example of such a hierarchy.
Firstly, we need to understand how to create multiple instances of a single MeshModel. The easiest way to do this in the workspace editor is as follows:
- Navigate back to our 'Root' workflow by clicking the 'Root' workflow tab above the canvas.
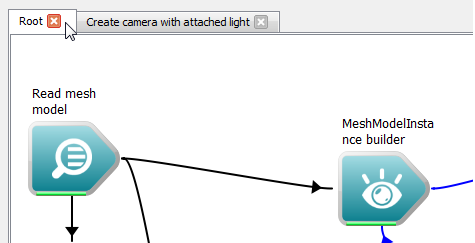
Navigating to the root workflow
- Click on our MeshModelInstanceBuilder operation to select it. In the Properties window, enter the text "Model1" for the Model ID input.
- From the Operation catalogue, drag another two MeshModelInstanceBuilder operations onto the workspace canvas.
- For each of the new MeshModelInstanceBuilder operations, enter the same text, "Model1", into their Model ID input in the properties widget.
Changing the Model ID in this way indicates to our MeshModelInstance which MeshModel it is an instance of.

MeshModelInstances referring to the same model
Now we need to attach these models to a new parent transform.
- Click on the TransformBuilder operation we just created earlier to select it.
- Using the keyboard, enter the command
CTRL + C to copy the operation. Alternatively, click the Edit > Copy menu item in the top-left corner of the screen.
- Using the keyboard, enter the command
CTRL + V to paste the operation onto the workspace canvas. We now have another TransformBuilder object which we can use to transform our new ModelInstances.
- Connect the Mesh model instance outputs of our new ModelInstance operations to the Child scene items array input of our new TransformBuilder operation.
- Connect the Transform output of our new Transform Builder operation to the Child scene items array input of our original Transform Builder operation.
We should now have a setup that looks like this:
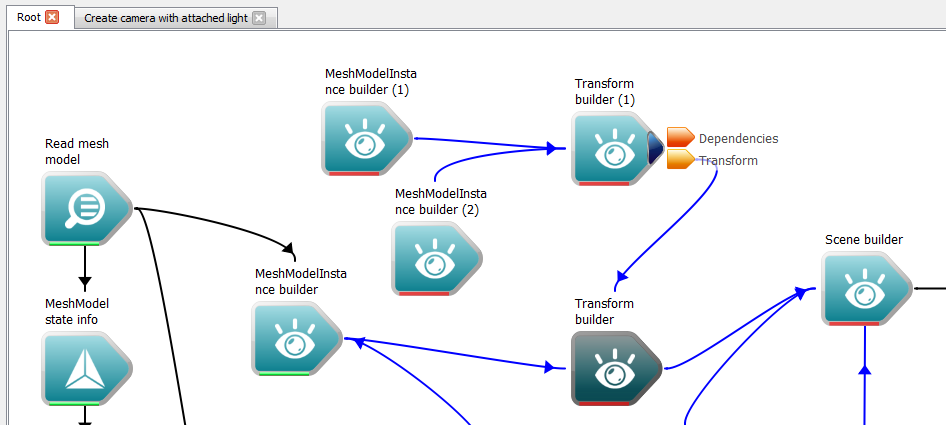
ModelInstances under different transforms
Now, we can modify the transforms so that our new models are positioned relative to our original model:
- Click on the first new MeshModelInstance operation to select it.
- In the Operation editor, against the Transform matrix input, change the rotation to 90 about the X component.
- Click on the second new MeshModelInstance operation to select it.
- In the Operation editor, against the Transform matrix input, change the rotation to 270 about the X component.
- Click on the Transform Builder 2 operation to select it.
- In the Operation editor, against the Transform matrix input, change the translation to 50 for the Z component.
- In the Operation editor, against the Transform matrix input, change the rotation to 0 for all three components.
- Click on the original Transform Builder operation to select it.
- In the Operation editor, against the Transform matrix input, change the rotation to 0 for all three components.
Your scene should now appear similar to the screenshot below:
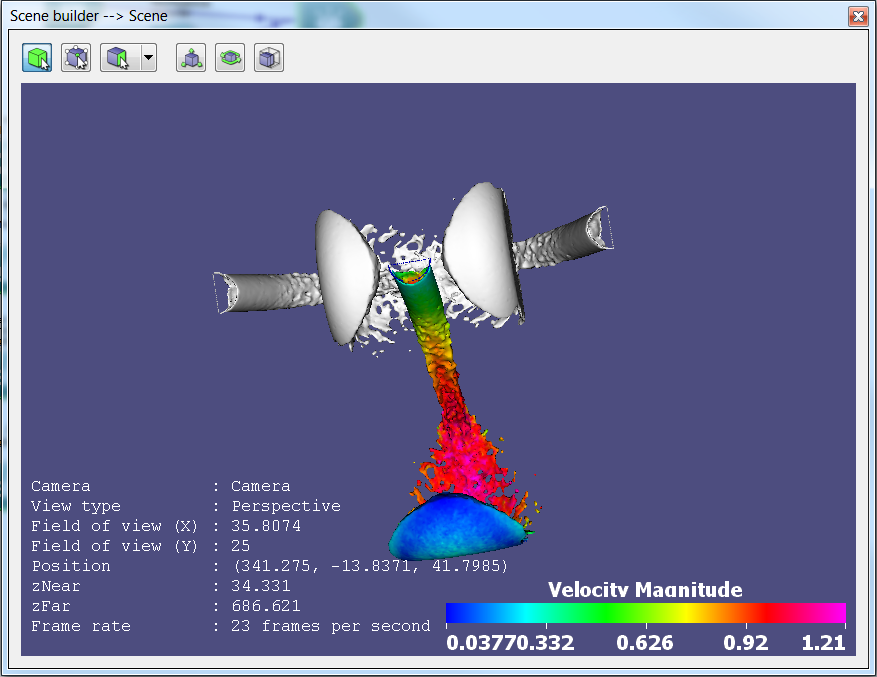
The three models set up with different translations
If you now select the original Transform Builder and change any of its transformation inputs, you will notice that they apply to all of the models. If you select the Transform Builder 2 operation and change any of its transformation inputs, you will notice that they apply to the two new models.
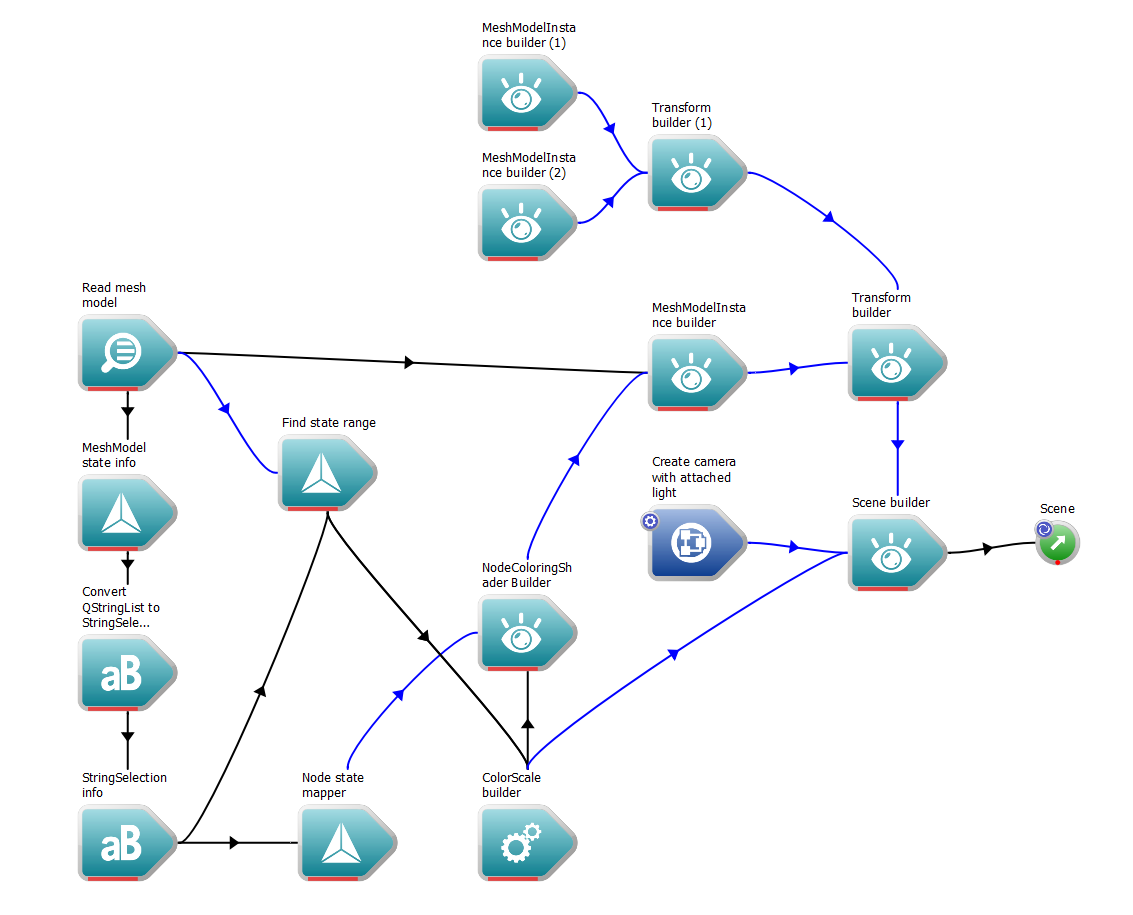
The completed workflow
Summary
This concludes the tutorial on applying transformations in scenes. You should now have an understanding of:
- How to create and apply transforms to adjust the positions of models and other entities in your scene.
- How to use transforms to group objects together so that their positions are governed by a parent transform.
Next Steps
The next tutorial in this series will explain how to perform off-screen rendering of your scene using Workspace.