Introduction
As well as being able to create and run workflows both from the command line (via workspace-batch), and from within the Workspace editor, it is possible to build arbitrarily-sized standalone applications using a workflow and your own Qt user interface (UI). This tutorial shows you how to get started by using the Workspace's simple application generation wizard to create a basic application. The example provided is quite basic but should demonstrate enough to allow you to attempt something more complex. We are going to generate an application that utilises elements from earlier tutorials - we will create a standalone rectangle area calculator.
Contents
Pre-requisites
Before using this wizard, and to follow this tutorial, you should have generated the Simple plugin following the previous tutorials. Note: Before proceeding, it is wise to backup your existing code. If anything goes wrong you can then reinstate this backup and restart.
Sample files used in this tutorial
Workflow to be used by the application
Before we proceed with the generation of the application, we create a workflow that we will use to drive it.
- Launch the Workspace editor application as usual
- We will need to create a CalculateRectangleArea operation:
- Find the CalculateRectangleArea operation in the catalog and drag it onto the canvas
- On the "Rectangle" input, right-mouse-button to open the context menu and select "Compose object group"
- To drive the workflow create an output:
- Expand the master output rack
- Right mouse button click on the output called "Area" to show the context menu
- Select "Create workspace output"
- The workflow should now look like this:
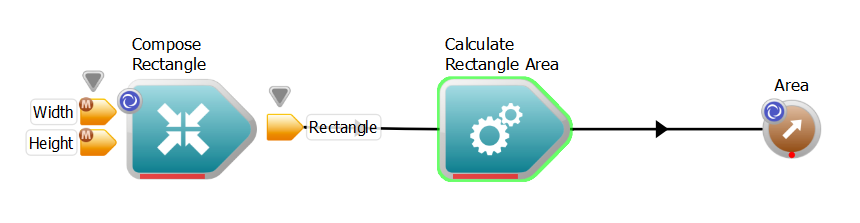
Workflow
- We now need to assign global names to the relevant inputs and output. Doing this allows us to connect the data in the workflow to the UI elements:
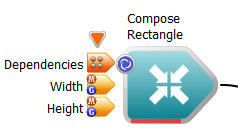
- On the newly created "Compose Rectangle" operation:
- Right mouse button on the "Width" input and select "Assign global name"

Assigning a global name to Width
- Set the global name to "width"
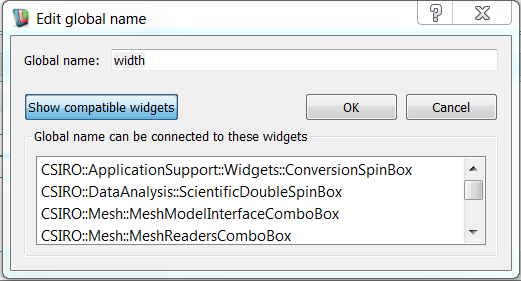
Global name dialog
- Similarly, for the "Height" input, assign a global name called "height"
- Also assign the global name "area" to the output "Area" on the "Calculate Rectangle Area" operation
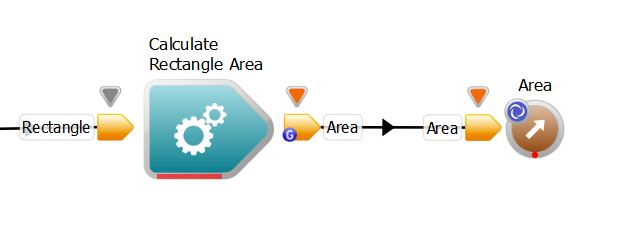
Global name on area output
- Pin the Input and Output racks by clicking on the triangle above them
- The workflow should now look like this (note the indicator G on the items with global names):
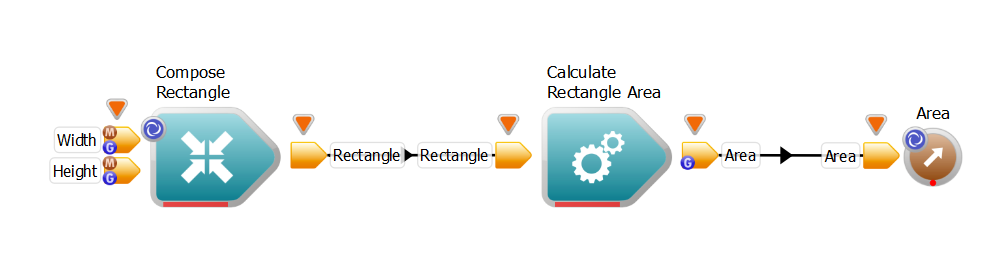
Workflow
- The workflow is now ready to be used in our application. Make sure you have saved it in a known location. NOTE: The workflow will be copied to a new location (<plugin directory>/Application/Resources) - make any changes to this copy.
Using the "Create simple application" code wizard
We now move on to creating the application code, along with the widget .ui file and associated code. To start the wizard:
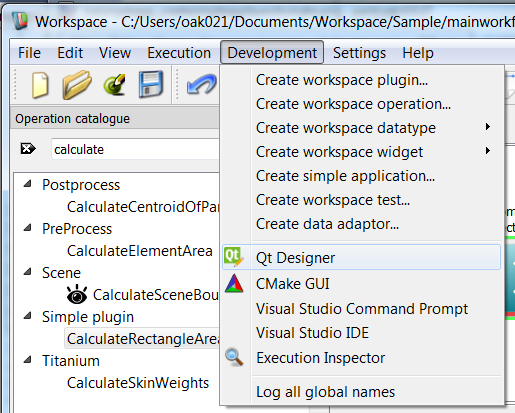
- Navigate to the "Development" menu and select "Create simple application...":
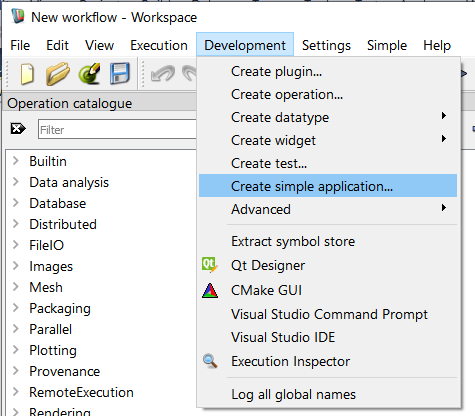
Finding the code wizard
- A window will be displayed that looks like this:
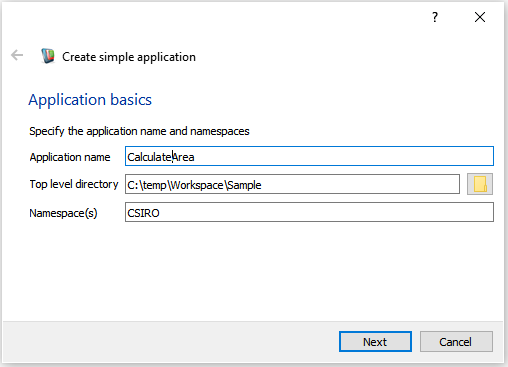
The first page of the wizard
This wizard will generate the skeleton code required for a standalone application. The code generated expects the plugin code generated by the associated wizard to already have been created. If you have not done this, then the wizard will not be able to function correctly. We now fill out the fields:
- Application name:The name for the application. This will also determine the name of the directory under your top level project and executable name.
- Top level directory: The top level directory for your plugin. Point this to the same location as your plugin source.
- Namespace(s): The namespace to be used for the widget class.
-
Click Next to show the next wizard page: This page allows you to specify whether to create a new UI file (which will be blank), or to base the UI on an existing widget. You must also specify a class name for the widget - use the usual naming convention to specify this class name. If you choose to import an existing ui file - specifically, the rectanglewidget.ui created in the last tutorial, click on the folder icon to open a dialog and navigate to where your rectanglewidget.ui file was created (this will be in the top level of the plugin area):
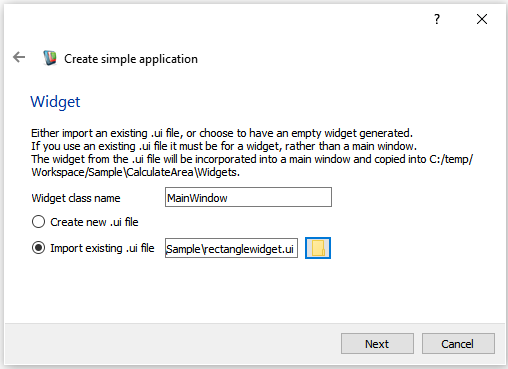
The second page of the wizard
-
Click Next to show the next wizard page: We now point the wizard to the workflow we created at the beginning of this tutorial:
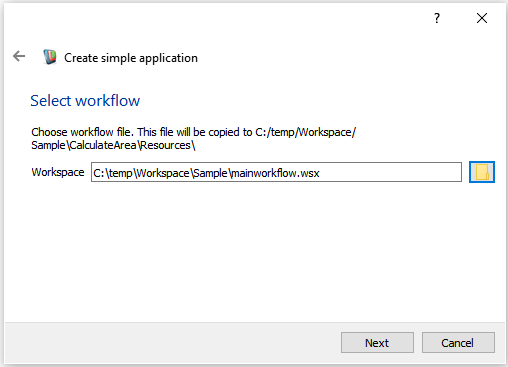
The third page of the wizard
Recall that this workflow will be copied to a new location (<plugin directory>/Application/Resources) and any future development of your workflow should take place on this copy.
-
Click Next to show the next wizard page: We can now choose which menu items to include in our application:
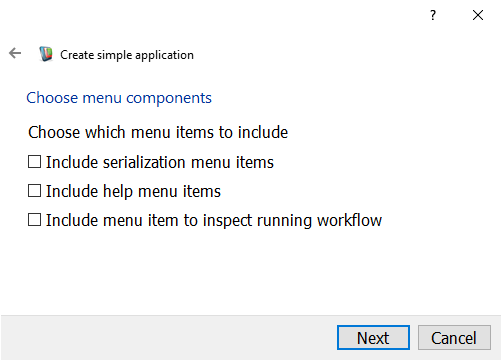
The fourth page of the wizard
The three options are:
- "Include serialization menu items" - this adds Save and Load functionality to the application. This serialization will record the value of all global names associated with inputs (outputs are not recorded as they are calculated as a result of executing a workflow).
- "Include help menu items" - this adds the option to display an about box, the contents of which can be set in the
MainWidget::onHelpAboutTriggered method in the new mainwidget.cpp source file.
- "Include menu item to inspect running workflow" - this will add a menu option that opens an embedded version of the Workspace editor canvas attached to your application workflow. This allows you to inspect and debug the running workflow during execution of your application.
-
Click Next to show the next wizard page: We can now choose which libraries / plugins we will depend on. Since we are using the code generated from previous tutorials, we need to ensure that we check the option to include the "Simple" plugin:
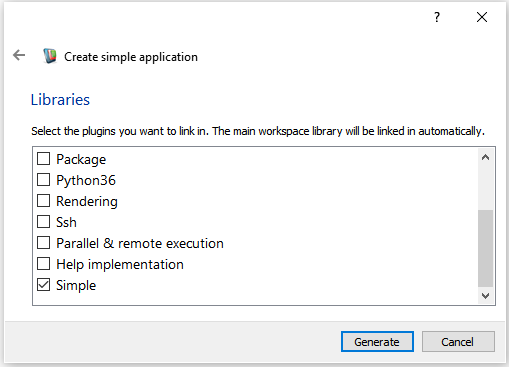
The fifth page of the wizard
No other plugins are required for this example.
-
Click Generate to show the final wizard page, which should look like this if all has gone well:
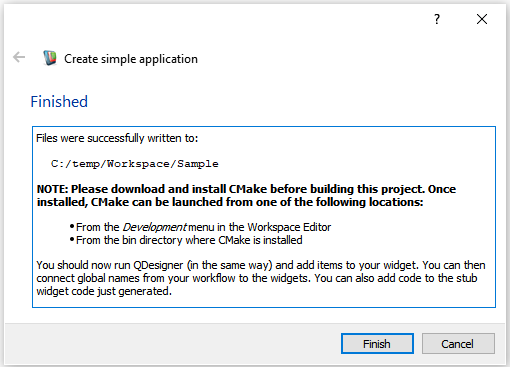
The sixth page of the wizard
At this stage, the code has been generated in the same location as your plugin. You should see the following file and directory structure:
- <top level project source area>
- CalculateArea
- Resources
- calculatearea_application_resources.qrc
- CMakeLists.txt
- mainworkflow.wsx
- splashscreen.png
- app-logo.ico
- Widgets
- CMakeLists.txt
- main.cpp
- Designer
- CMakeLists.txt
- simpleplugindesigner.cpp
- simpleplugindesigner.h
- simpleplugindesigner_api.h
- calculaterectanglearea.cpp
- calculaterectanglearea.h
- CMakeLists.txt
- pkg-simpleplugin.cmake
- rectangle.cpp
- rectangle.h
- rectanglewidget.cpp
- rectanglewidget.h
- rectanglewidget.ui
- rectanglewidgetconnector.cpp
- rectanglewidgetconnector.h
- rectanglewidgetfactory.cpp
- rectanglewidgetfactory.h
- simpleplugin.cpp
- simpleplugin.h
- simpleplugin_api.h
We can now build the application.
Building the application
At this stage, the purpose of building the application is to ensure the files have been set up correctly. If we then run the application, we will not have a useful UI since we have not connected up the workflow elements, nor is the UI complete.
To build the application, follow exactly the same procedure as in Writing a Simple Workspace Plugin. In summary:
- From the "Development" menu, launch "CMake GUI":
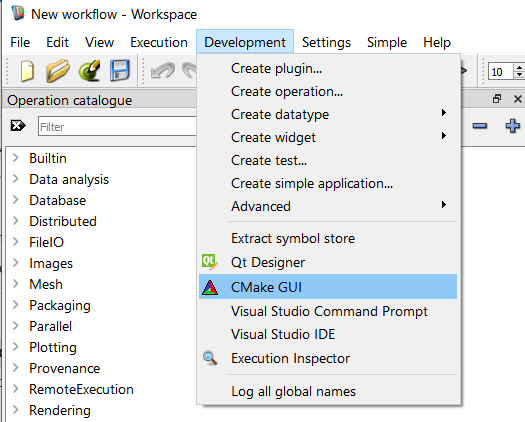
Launching CMake GUI
- Click "Configure"
- Click "Generate"
- Return to the Workspace editor, launch "Visual Studio IDE" from the "Development" menu and build (or build however you have configured it - e.g. with makefiles).
If everything built without error you can move on to the next section. You can also check the application runs correctly.
Finalizing the UI and connecting the workflow elements
We now need to edit the UI and connect various elements to the workflow.
-
Launch the Workspace editor
-
Launch Qt Designer from the "Development" menu:
Launching Qt Designer
-
Now we open the .ui file created by the wizard earlier. This is located in below the top level plugin directory here: Application/Widgets/mainwidget.ui. In this example it is called mainwidget.ui. The UI widget we use here is the one we created as a blank one:
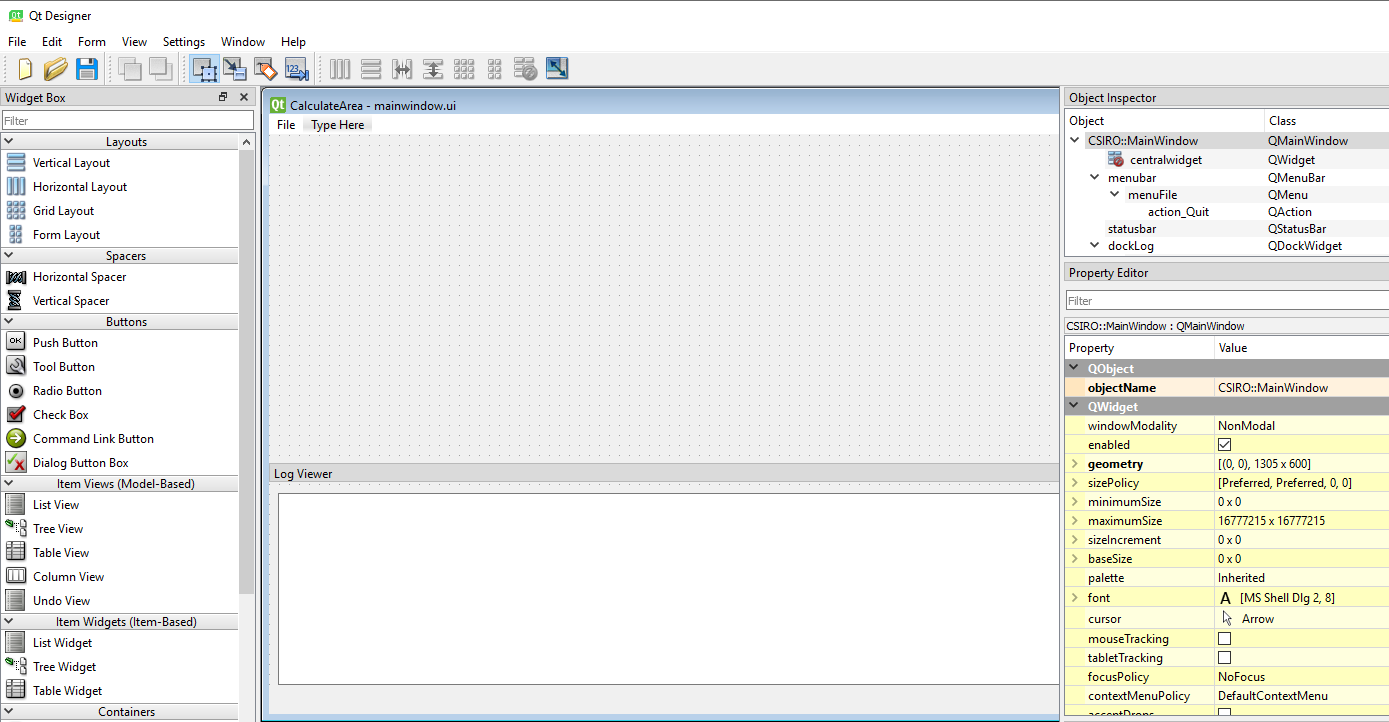
The UI as it is before any changes
-
Add some new UI elements :
- Create a new "Label" with the text "Width".
- Create a new "Double Spin Box".
- Repeat the previous steps for "Height" and "Area" as well.
Updated main window
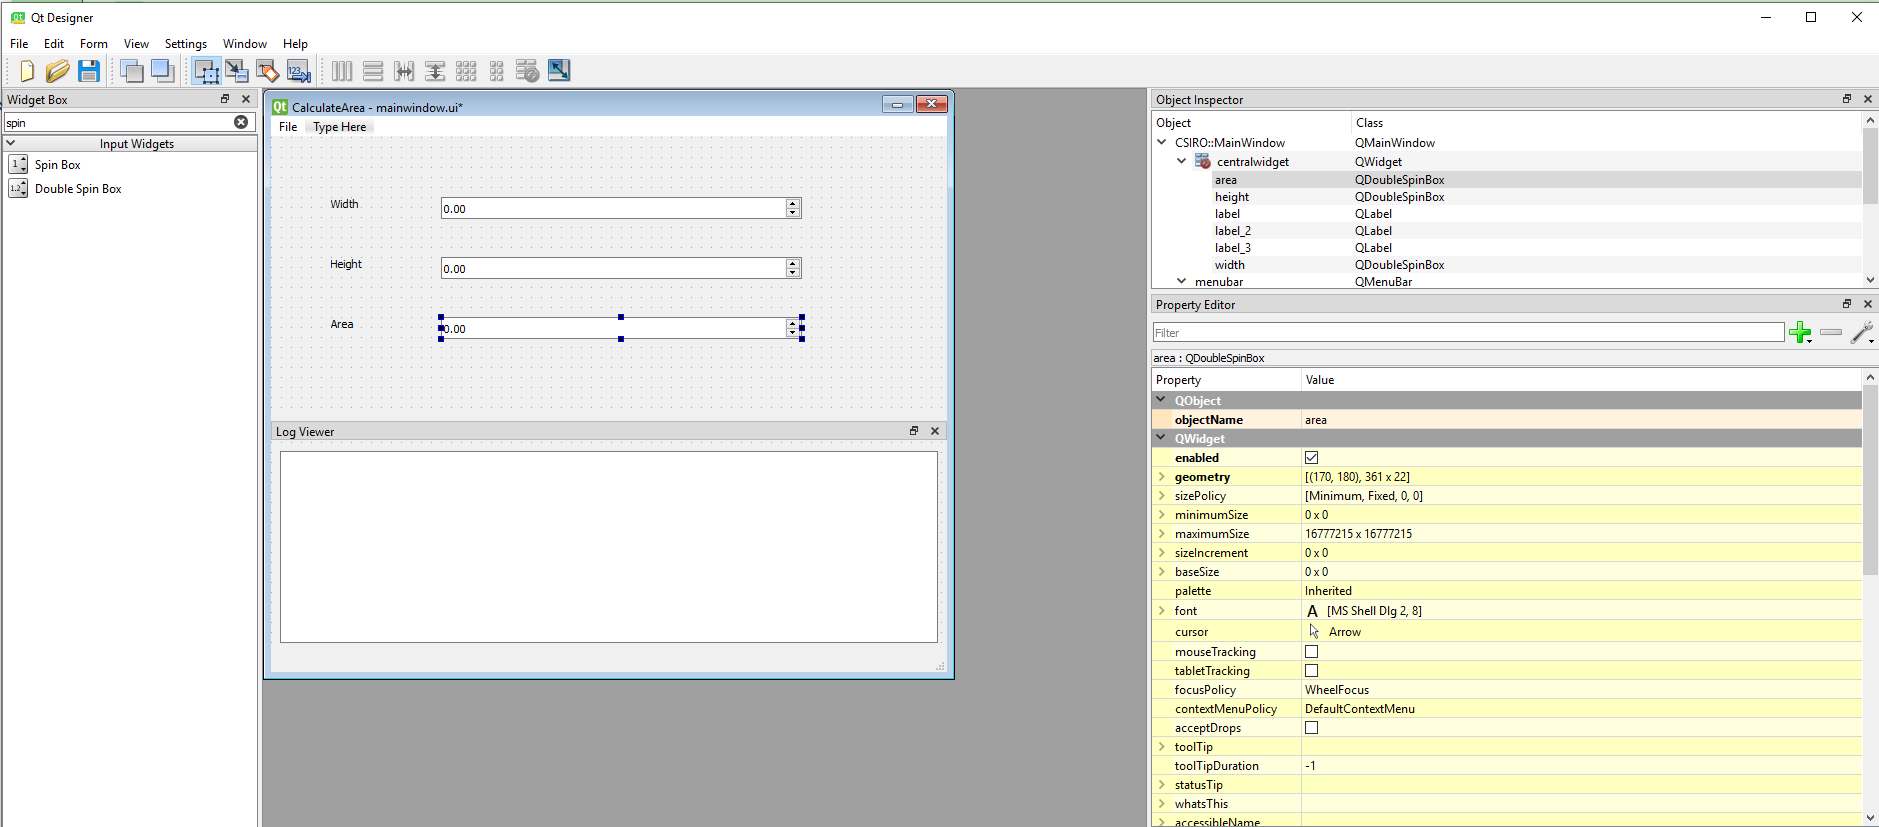
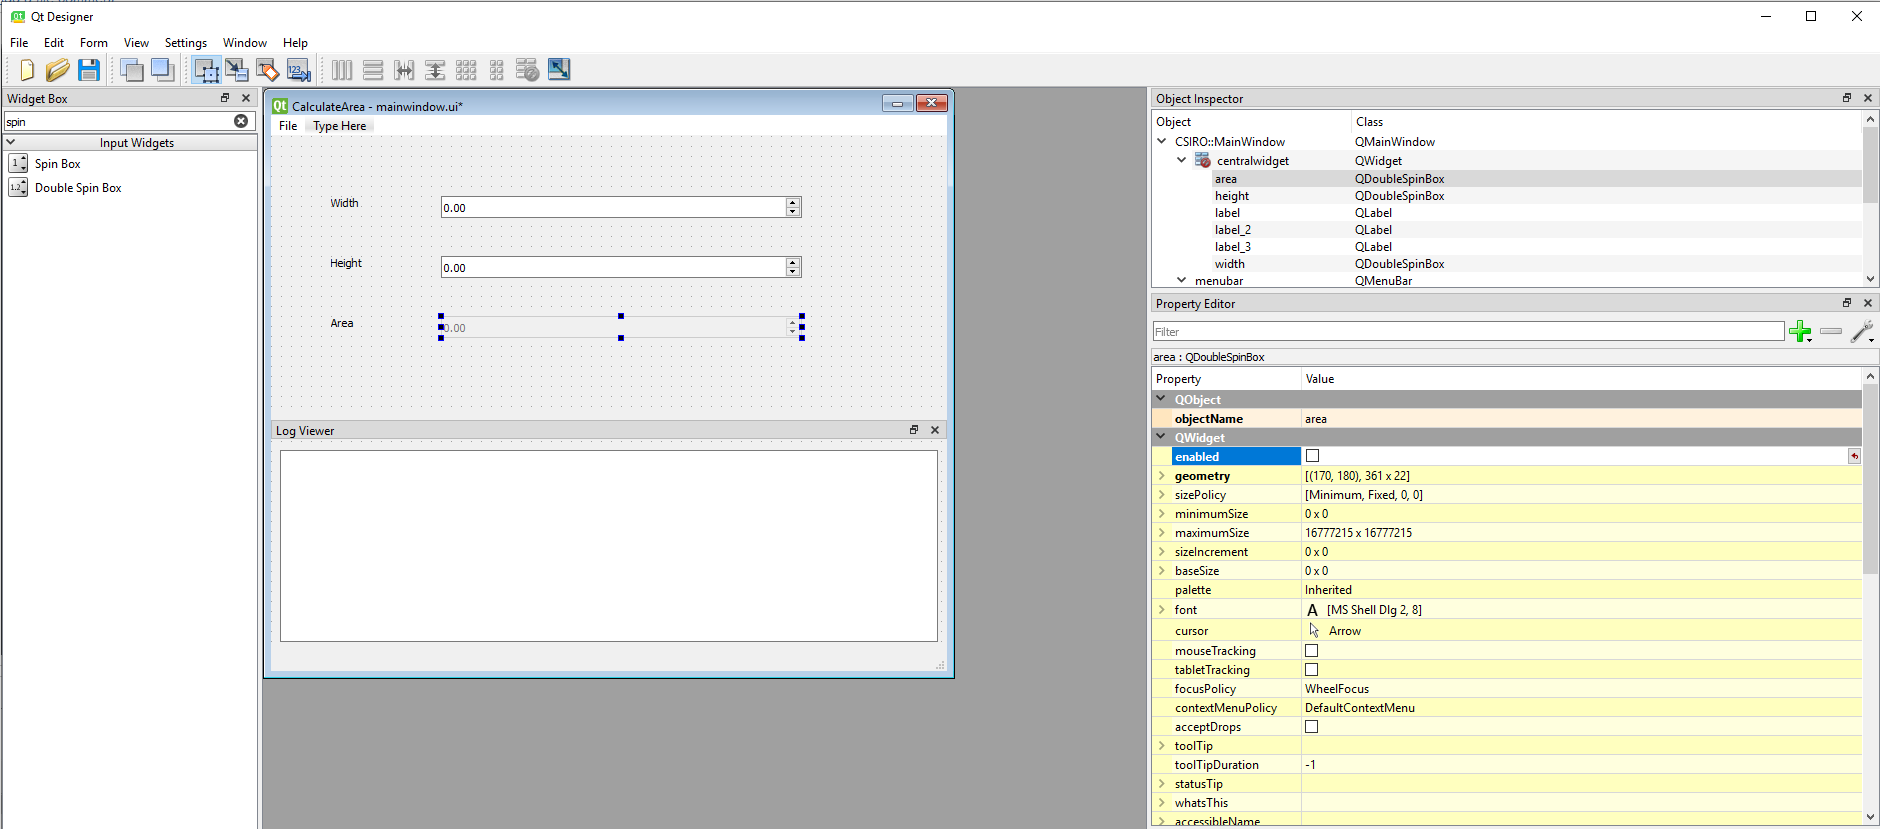
- Set the "objectName" property of each "Double Spin Box" to "width", "height" and "area" to aid in identifying it in the Qt Designer "Object Inspector":
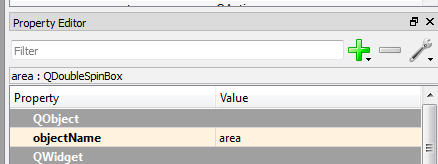
Spin box name changed
- Uncheck the "enabled" property of "area" in the "Property Editor":
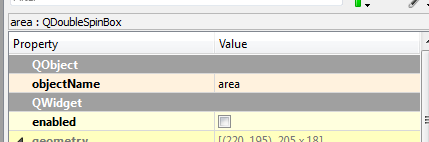
Unchecked "enabled" spin box property
This will reinforce to the user that this is a read-only item in the UI. You can also choose to remove the spin buttons or align them differently (these are other properties that you can find in the objects properties window). Also ensure that the "maximum" property is set to 999999999.000000 (the highest number it will display). The widget should now look like this:
Main window widget
-
Now we connect the workflow elements to the UI using the global names:
- Back in the Workspace GUI, load the copied version of the workflow we created at the start of this tutorial - this will be located below the top level plugin directory here: Application/Resources/mainworkflow.wsx.
- Left-mouse button on the height input and drag onto the height double spin box in Designer's "Object Inspector":
Global name "height" on workflow
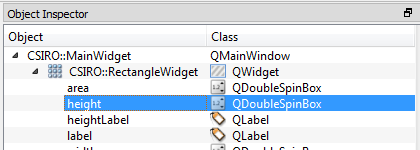
"height" spin box in "Object Inspector"
- Select "Global name: height" from the context menu:
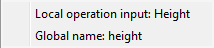
Context menu
- Repeat for:
-
Quit Qt Designer and Workspace Editor
Rebuilding the application
To rebuild the application, repeat the procedure in Building the application.
Running the application
You should now be able to launch the executable from 'Your_build_directory\Install\bin' directory (this will ensure that the environment is correctly set up). The application should have been installed in the directory specified by the CMake variable CSIRO_INSTALL_AREA (you can see this in the "Ungrouped Entries" section when you run CMake GUI):

Install area
The application should look like this:
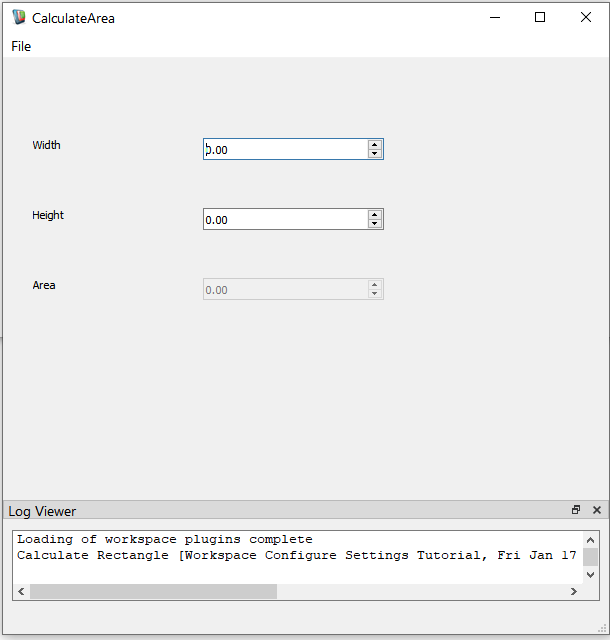
The application
If you want to run it from inside Visual Studio, make sure you launch the Visual Studio IDE from the Workspace editor's "Development" menu. This will ensure that the correct environment variables are set for the run.
What next?
- Read up on what you can do with Qt Designer. See the Qt Designer documentation at http://doc.qt.io/qt-5/qtdesigner-manual.html.
- The layout of the UI elements is not ideal in this application. You can use spacers and layouts to affect the positioning of the elements.
- It is possible to use the RectangleWidget directly, with just the one global name used to connect it. To do this in Designer, it is necessary to tell Designer about this widget. This is beyond the scope of this tutorial - see http://doc.qt.io/qt-5/designer-creating-custom-widgets.html to get started.
- Please see Removing file menu options from a Simple Workspace Application if you would like to deliver the application without the "Inspect Workflow" or "Execution Profiling" options in the File menu (assuming you have included them when creating the application).
- Read up on programming with Qt. See the documentation at http://doc.qt.io/qt-5/index.html.
- Whilst the application generated above is overkill for such a simple operation, it does demonstrate the power of coupling a workflow to an easily generated UI. Consider what scripts you may be using from the command line that could be usefully wrapped up in a workflow and presented to a less-informed user with an intuitive UI.