Introduction
In addition to enabling creation of a standalone application, Workspace also provides operations to create a workflow for packaging the standalone application. This tutorial shows you how to create a packaging workflow for a standalone application created by Workspace in Windows. The example provided is based on the application generated from earlier tutorials - the standalone rectangle area calculator.
Contents
Pre-requisites
- The standalone rectangle area calculator application If you have been following the previous tutorials, you should have generated and built the standalone rectangle area calculator already. Otherwise:
- navigate to your workspace installation directory (eg username\Documents\csiro.au\workspace\)
- copy the directory "doc/Workspace/Examples/SimpleApplication" to a local path
- follow the directions in Building the application (you don't need to edit the code, or follow the directions in "Finalizing the UI and connecting the workflow elements")
- check that all is in order by running the application, see Running the application
- You need to add CMake to your system environment variable "Path".
- In Windows, you also need to install NSIS.
Sample files used in this tutorial
The workflow we are using in this section can be found in:
Create packaging workflow
To be able to run the packaging workflow later, we need to run vcvarsall.bat and launch Workspace from the command prompt, this is to make sure that the environment variables for CMake can be properly set.
- Launch the Command prompt and navigate to the Visual Studio Command Prompt tool vcvarsall.bat. This is usually located under "your_visual_studio_installed_dir\Professional\VC\Auxiliary\Build".
- Run the proper command according to your platform, e.g. "vcvarsx86_amd64.bat".
- Launch Workspace using the command "workspace-batch --launch workspace-gui": you might need to navigate to the Workspace installation directory before doing so.
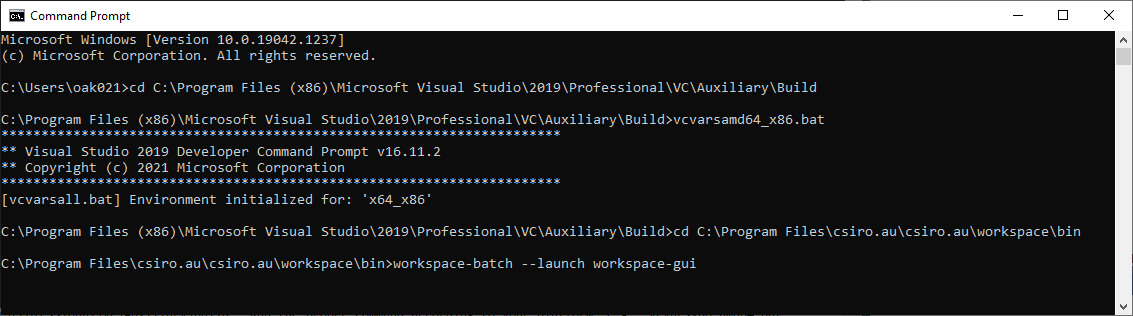
Launch workspace-editor from the Command prompt
- In the packaging workflow, we firstly need our executable. To add the executable file:
- drag the PackageExecutable operation to the canvas and
- change its label to "calculatearea exe"
- In the operation editor:
- set "Source directory" to "lib",
- set the "Source base executable" to the name of the executable, in our case "calculatearea"
- set the "Destination directory", "Name in menu" and "Description".
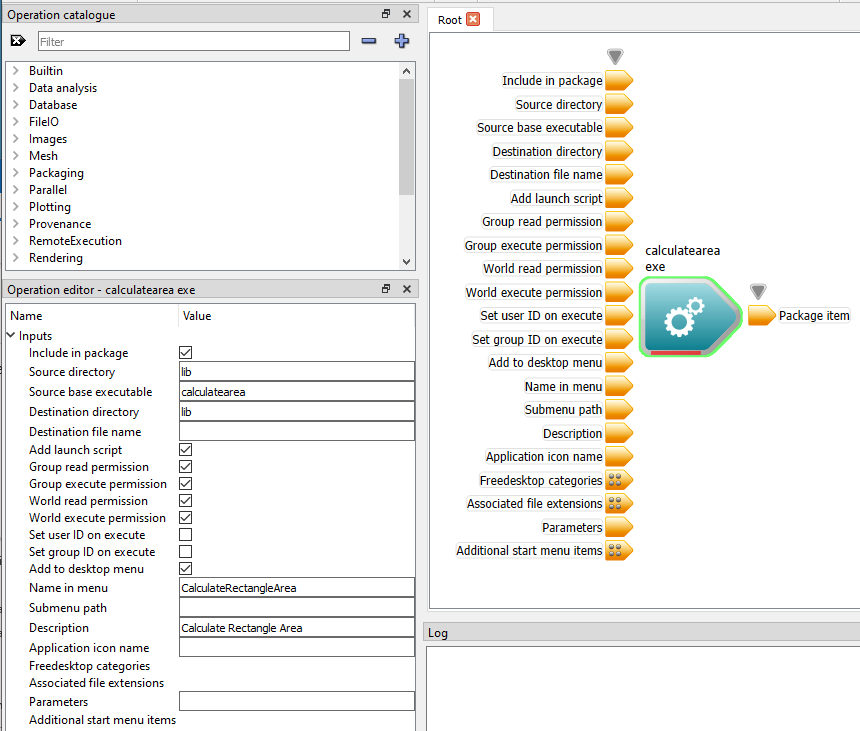
PackageExecutable settings
- Drag the CreateInstaller operation to the canvas:
- in the operation editor, set the "Package base name" and "Summary", as well as the version details and Menu group name.
- connect the "Package item" output of PackageExecutable to the "Package items" input of CreateInstaller.
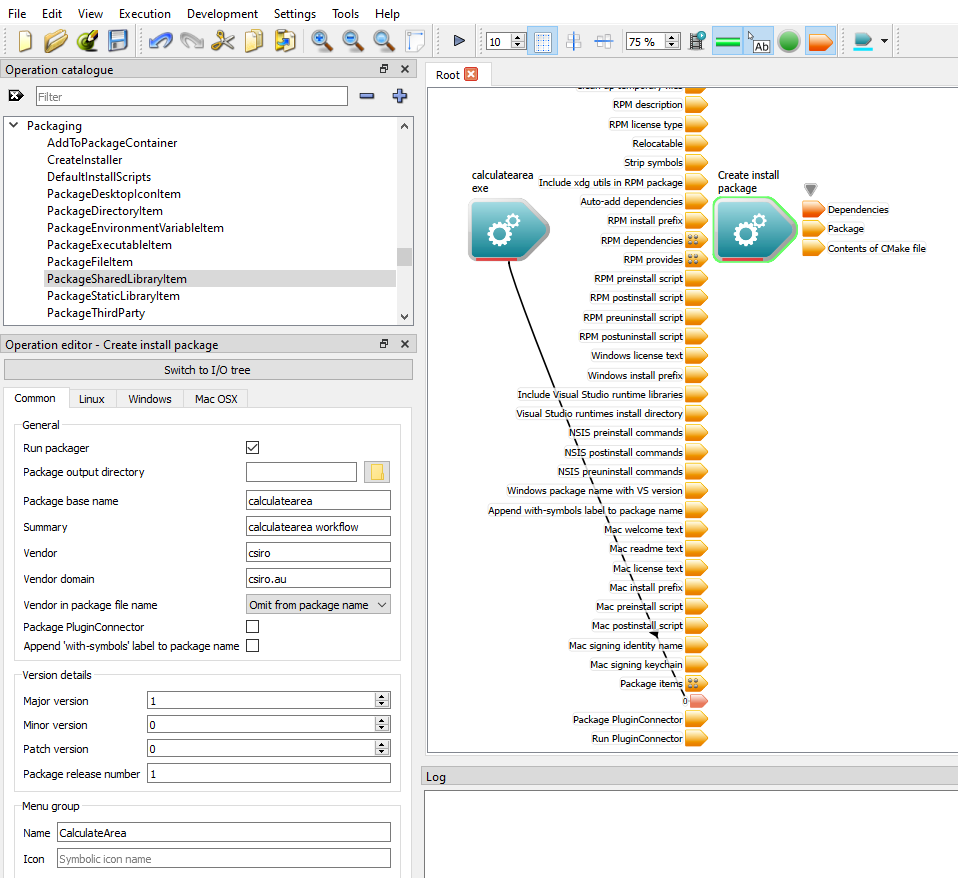
CreateInstaller settings
- Then we need to add the necessary library files. In our case, it includes simpleplugin.dll, workspace.dll, authentication-common.dll, and some third-party DLLs. To add the libraries
- drag the PackageSharedLibraryItem operation to the canvas
- change the label to "simple plugin"
- set the Library base name to "simpleplugin"
- set the source directory to the directory of the plugin
- set your Destination directory, e.g. "lib/Plugins"
- connect the "Package item" output to the "Package items" input of CreateInstaller.
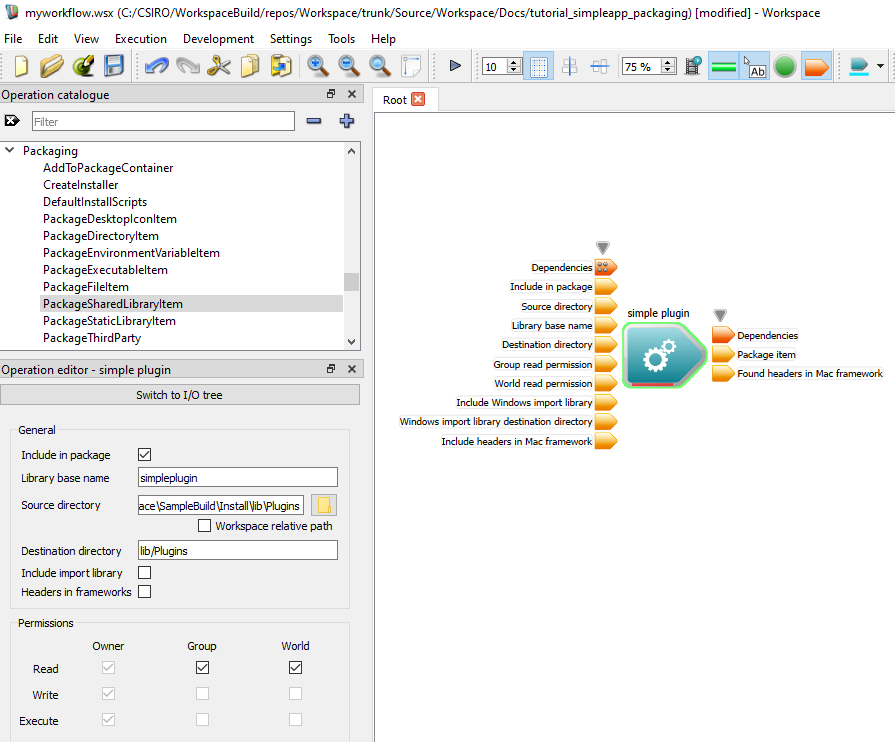
Package for simple plugin
- Drag another PackageSharedLibraryItem to the canvas:
- change the label to "Workspace library"
- set the Library base name to "workspace",
- set the source directory to the "lib" directory under your workspace installed directory
- set your Destination directory to "lib" and
- connect the "Package item" output to the "Package items" input of CreateInstaller.
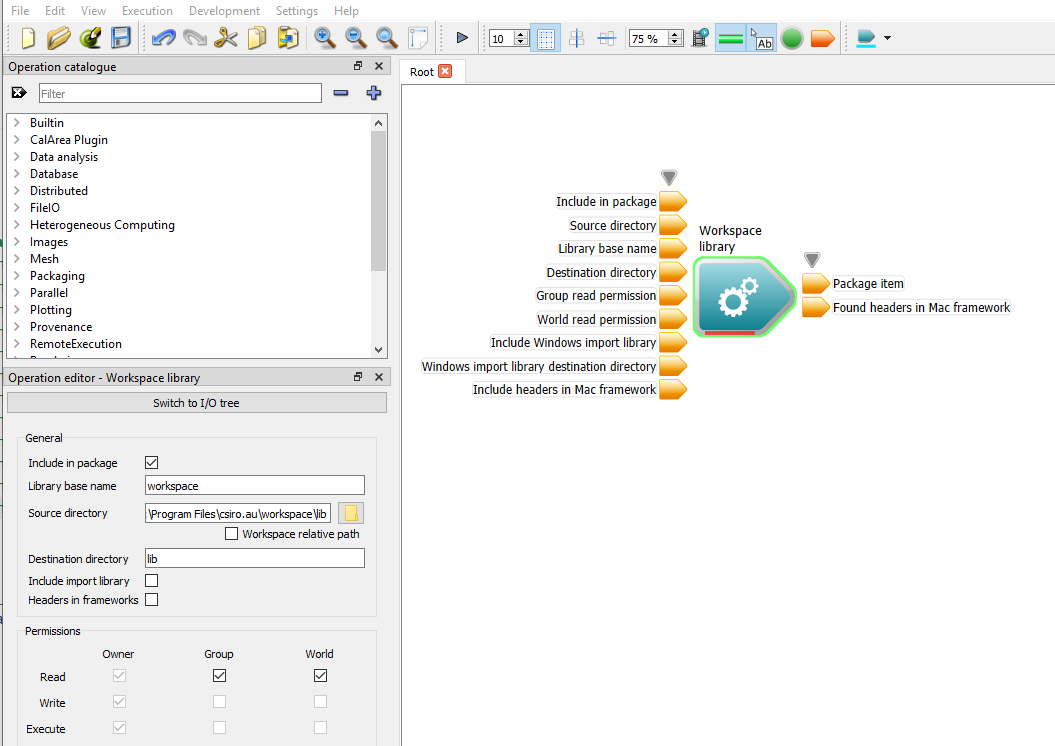
Package for workspace library
- Drag a third PackageSharedLibraryItem to the canvas
- change the label to "authentication-common"
- set the Library base name to "authentication-common",
- set the source directory to the "lib" directory under your workspace installed directory
- set your Destination directory to "lib"
- connect the "Package item" output to the "Package items" input of CreateInstaller.
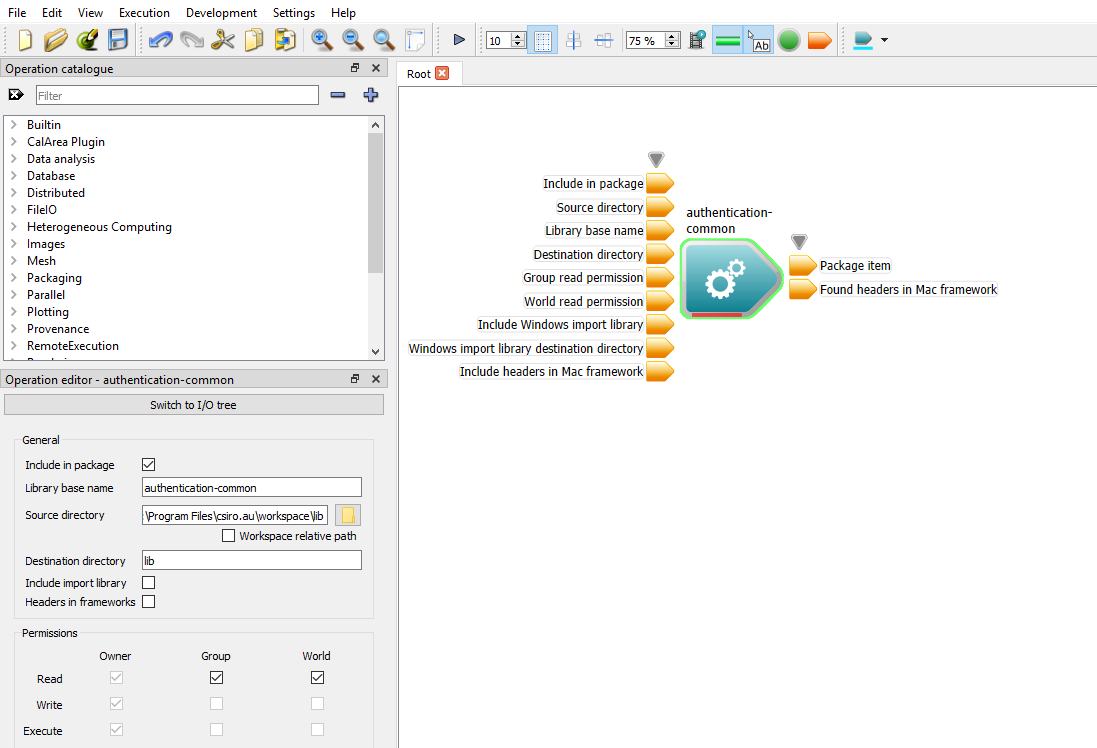
Authentication library
- Drag the PackageThirdParty operation to the canvas
- change the label to "ThirdParty libraries"
- select any third party libraries you want to include in your package, in this example you need to at least include "Qt5Core.dll", "Qt5Gui.dll", "Qt5Widgets.dll". For now, you can leave the defaults.
- connect the "Package item" output to the "Package items" input of CreateInstaller.
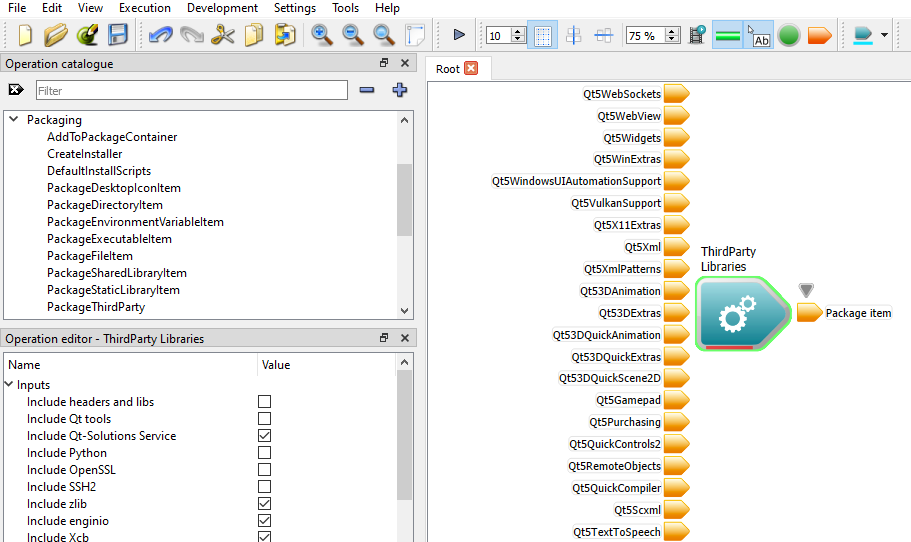
ThirdParty libraries
- Create a "Workspace output" for the "Dependencies" output of CreateInstaller.
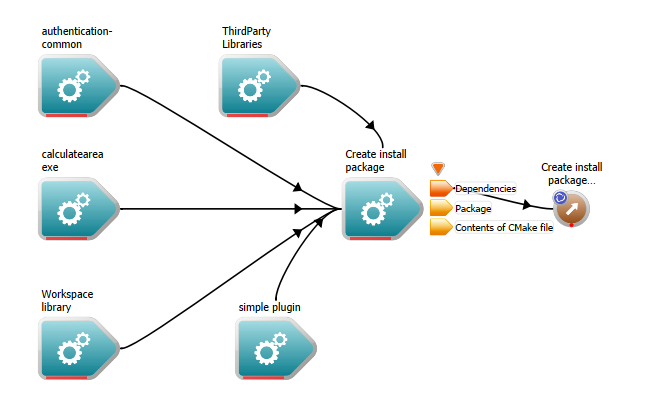
The final workflow
- In the Workspace menu, select "File->Change directory" to change directory to the "build/install" directory of the rectangle area calculator.
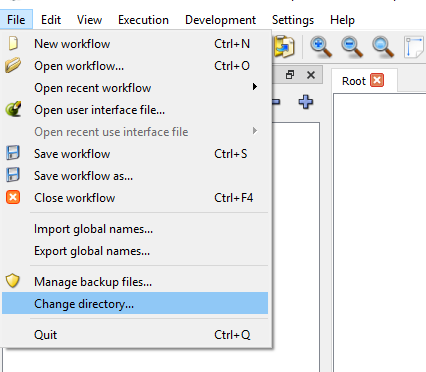
Change directory
- Set the directory

Choose directory
- Run the workflow. The log should provide information about the install package location - it will be located in your working directory.
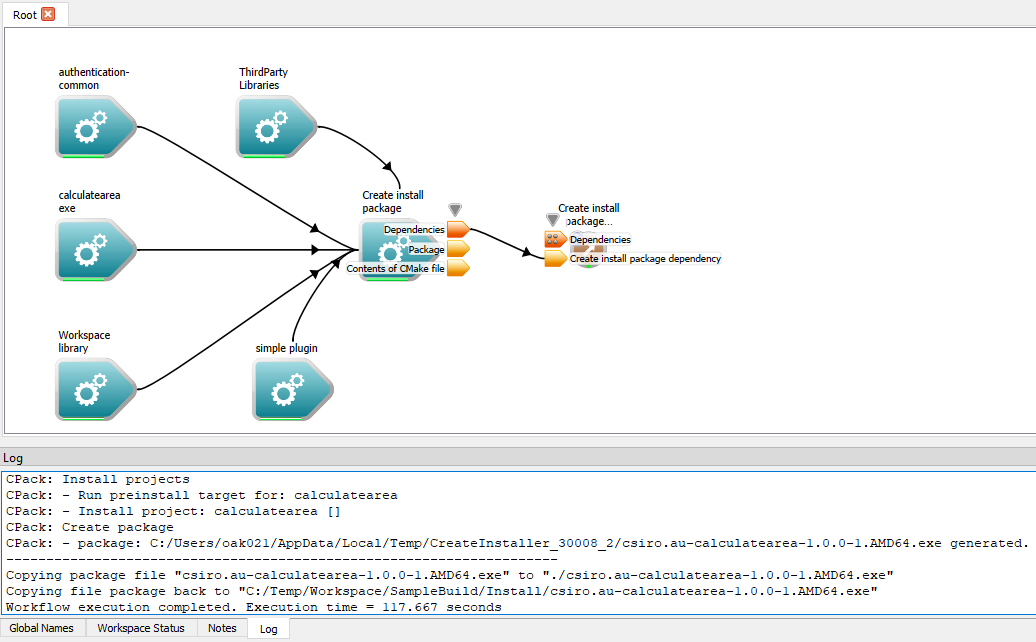
Execute the packaging workflow
Troubleshooting
If you stopped partway through and restart, you may have missed one of these steps that are described above:
- If you encounter a "nmake" error, ensure that you launched the Workspace editor from the command line, and ran vcvarsall.bat first
- If the editor cannot find your executable, make sure that you have changed directory (or give the source library in your PackageExecutable operation a full path)
- If the editor cannot find "emptyfile", check that the Source directory for your "simple plugin" operation is correct and reset the 'ThirdParty Libraries' operation
Install and run application
Now we can run the installer. Navigate to the install package location and double-click on "csiro-calculatearea-1.0.0-1.AMD64.exe" in our example. Follow the instructions to install the "calculatearea" application to your computer.
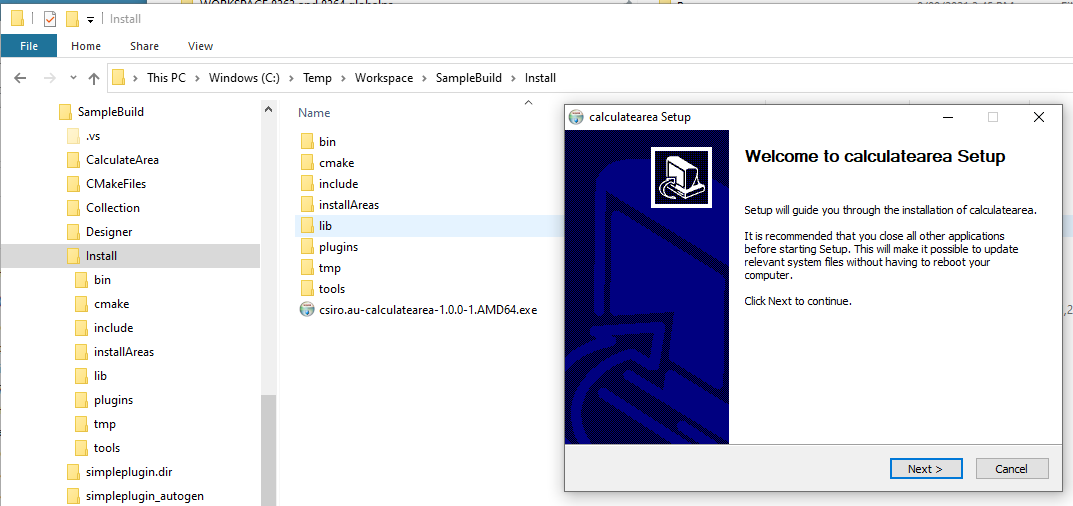
Install the application
After installation, you can run the application from the start menu or navigate to the installed directory and run it.

Run the installed application
Summary
This concludes the tutorial on creating a workflow for packaging a standalone application and generating an installation package for it.