Introduction
You can use the Workspace wizard to integrate a custom menu for your plugin into the Workspace editor. This means that your plugin can add function to the Workspace editor that is not tied to a particular workflow. In this tutorial we will show show to add a menu and item that opens up a web page in the default browser.
By the end of the tutorial we will:
- Understand how to use the built-in code wizard to create a stub menu in the Workspace editor
- Understand how to edit your plugin code to replace the stub with a plugin-specific menu
- Understand how you can vary the menu name and placement
Contents
Sample files used and modified in this tutorial
Using the "Create custom plugin menu" code wizard
In this tutorial, we're going to use the Create custom plugin menu wizard to add a menu stub to the Workspace editor that is managed by our simple plugin. To start the wizard:
- Navigate to the
Development
menu and select Integrate plugin into Workspace Editor -> Create custom plugin menu...
Finding the code wizard
- A window will be displayed that looks something like this:
The create custom menu wizard
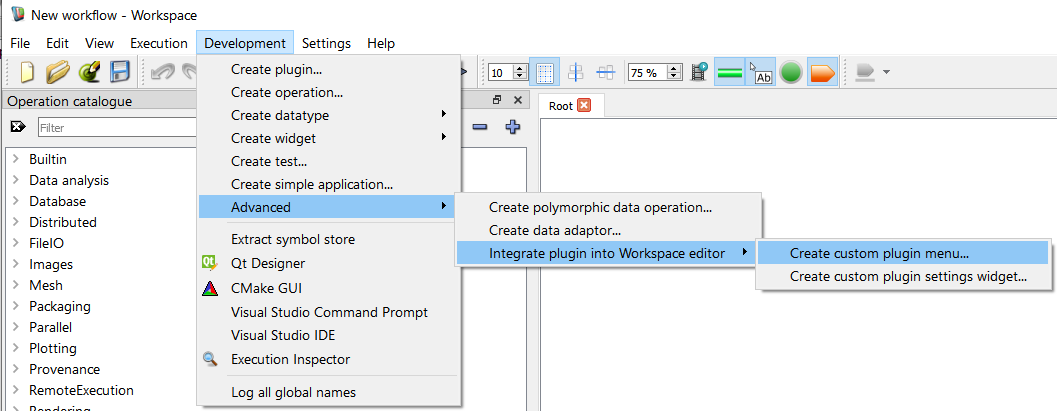
We can use this code wizard to generate the skeleton code required for a stub integrated menu. The only thing we will do here is set up the plugin name.
- Directory: The directory in which our widget source files will be created. Point this to the same location that your plugin source is located.
- Namespace(s): The namespace used for the class. We will use
CSIRO
as we did in the previous tutorial.
- Brief description: This will appear in the code as a short comment describing kind of menu you are planning. we will enter the text,
"Open Url in default browser"
- Plugin class name: The fully-scoped name of the plugin class that will contain this widget. We're going to use the plugin we created previously,
CSIRO::SimplePlugin
.
- Plugin header: The header that contains the definition of the containing Workspace plugin. Again, we refer to the file we generated in previous tutorials:
simpleplugin.h
- Note
- At any time you can check the purpose of these fields by hovering over them with the mouse and reading the tooltips (as shown above).
Our form will now look something like this:
Our values entered into the wizard
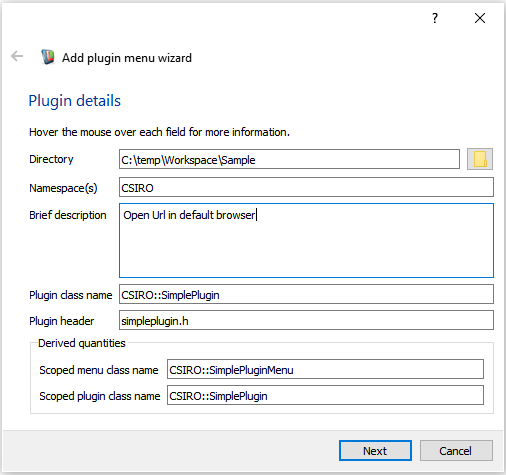
If we now look at the bottom of the plugin wizard, we will see some derived values. Workspace is showing us the name of the scoped class name of the new widget, as well as the scoped class name of the plugin that it is going to add it to. Next:
- Click the Continue or Next button
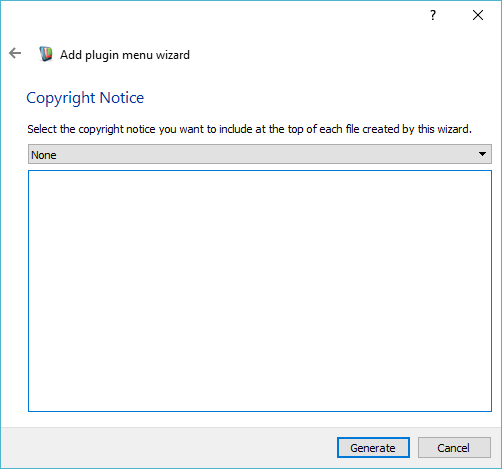
As we did with the data type wizard, we now get to select a copyright notice.
Select none for this tutorial
Workspace will now generate the code for our new widget and place it in the directory that we selected earlier (the same directory into which we generated our plugin). If the plugin already has menu stub then no code will be generated. Otherwise, If you navigate to this directory, you'll see that it has the following contents:
The contents of the plugin directory after generating the menu stub
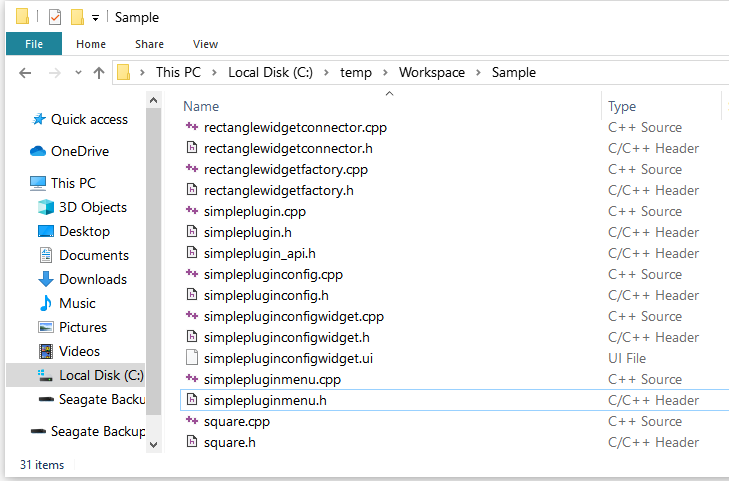
The new files added are:
- simplepluginmenu.h This file is the C++ header for the plugin-menu-workspace interface. It contains a class that extends the Application::PluginMenu base class
- simplepluginmenu.cpp This file contains the C++ source for the plugin-menu-workspace interface It contains the definition of the class declared in simplepluginmenu.h
The existing files modified are:
Rebuilding
Now that we've added our new files to the plugin, we will need to take the steps we did in the previous tutorial to compile our tutorial:
- Launch CMakeGui from the Workspace's Development menu
- Click Configure
- Click Generate
- Following the steps from the Writing a Simple Workspace Plugin tutorial, recompile your plugin for your target platform
Editing the Plugin Code
First we'll add a new slot to the simplepluginmenu.h file.
public slots:
void openUrl();
Now look at the simplepluginmenu.cpp file The first function you can edit is the menu name displayed. We will leave this as the default plugin Display name for the tutorial
QString SimplePluginMenu::getMenuName()
const
{
return QString(CSIRO::SimplePlugin::getInstance().getDisplayName());
}
The second function is the creation of the menu itself, here will add a single menu action which uses the QDesktopServices::openUrl function to open up a web page in the default browser. as well as create the QMenu items and actions
void SimplePluginMenu::createMenu()
{
QMenu* mainMenu = mainMenu_.get();
mainMenu_->setObjectName("simplepluginmenu_menu");
QAction* searchAction = new QAction("Open Url", mainMenu_.get());
searchAction->setObjectName(QString::fromUtf8("openUrl"));
searchAction->setStatusTip(tr("Displays a URL in the default browser"));
connect(searchAction, SIGNAL(triggered()),
this, SLOT(openUrl()));
mainMenu_->insertAction(0, searchAction);
}
Also we need to add implementation of openUrl()
void SimplePluginMenu::openUrl()
{
bool ok;
QString link = QInputDialog::getText(0, tr(
"Open Url"), tr(
"Url:"), QLineEdit::Normal,
"https://research.csiro.au/workspace", &ok);
if (!ok)
return;
QDesktopServices::openUrl(QUrl(link));
}
We will leave the default implementation of isTopLevelMenu(). This means that the plugin menu will be placed directly in the Workspace editor menu header. If we were to set this to false, it would be placed as a sub-menu inside a Plugins menu (which will be created if necessary)
bool SimplePluginMenu::isTopLevelMenu() const
{
return true;
}
Lastly, we need to add some Qt headers
#include <QDesktopservices>
#include <QInputdialog>
#include <QMenu>
#include <QUrl>
Now that you've done that, recompile the plugin and restart the Workspace editor. Notice that the new menu item has been inserted into the menu bar as Simple.
Our new menu item
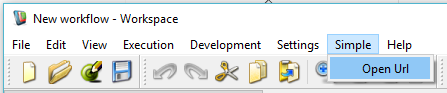
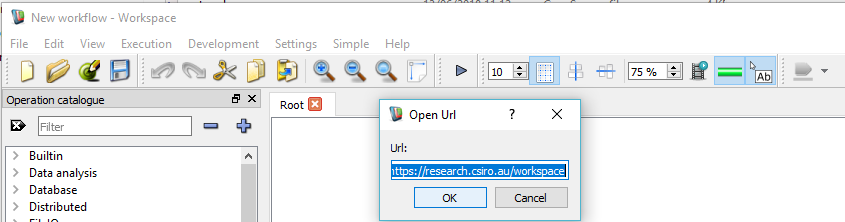
Navigate to Simple -> Open Url and , leaving the default url as the Workspace home, click on Ok
Choose the web page you want
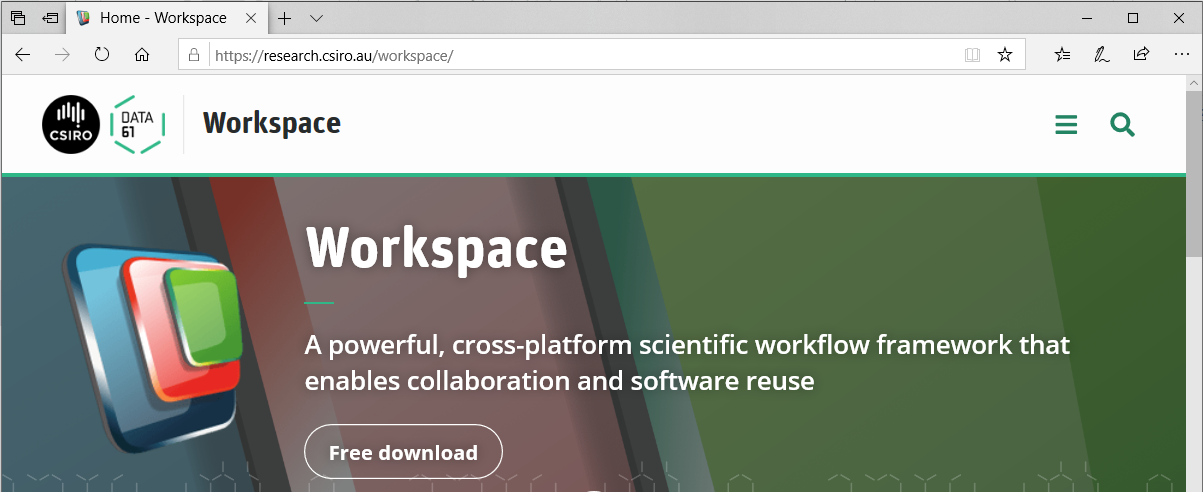
The selected web page is opened in your default Url
The selected web page is opened in your default browser
Summary
You can use the Create custom plugin menu... wizard to automatically insert the stub of a plugin-specific menu into the Workspace editor. Edit the generated simplepluginmenu.cpp file to
- set the name of the menu inserted
- determine if it is placed at the main menu bar level, or as a sub-menu of a Plugins menu
- create the menu that you want inserted
Next steps
The following tutorial is suggested as the next step: