Here are a few Tips and Tricks for getting started with using the Workspace editor. The tips are divided into two sections:
- Workspace UI/UX elements
- Workspace settings
Workspace's UI/UX elements are the visual elements you interact with inside the Workspace editor, these may be classified as its “look and feel” and its behaviour. The Workspace settings are found and modified through a Configure Application dialog.
Tutorial contents
Workspace's UI
When you first start Workspace you should take a few moments to find these elements:
- Menus are located at the very top starting from the left (File, Edit, View ...)
- Toolbars are located immediately below the Menus, look for the icons that are shortcuts to various actions (you can hover over these icons and brief tooltips will describe their functionality)
- Operation Catalogue is located near the top left - this is where you find all the available operations
- Operation Editor is located near the bottom left - this is where you edit the inputs of the currently selected operation (at this point no operation may be selected so this area may be disbaled/greyed out)
- Workspace canvas is located in the centre and is the largest element - this is where you build your workflows
- Log window is located below the canvas - this is where output messages from Workspace are display (the area that the Log window sits in has tabs and can be used to display other information)
- Workspace tree is located on the top right
Your screen may vary slightly to this description but these essential elements should be easy to find. A default install of Workspace would produce an initial application screen something like this:
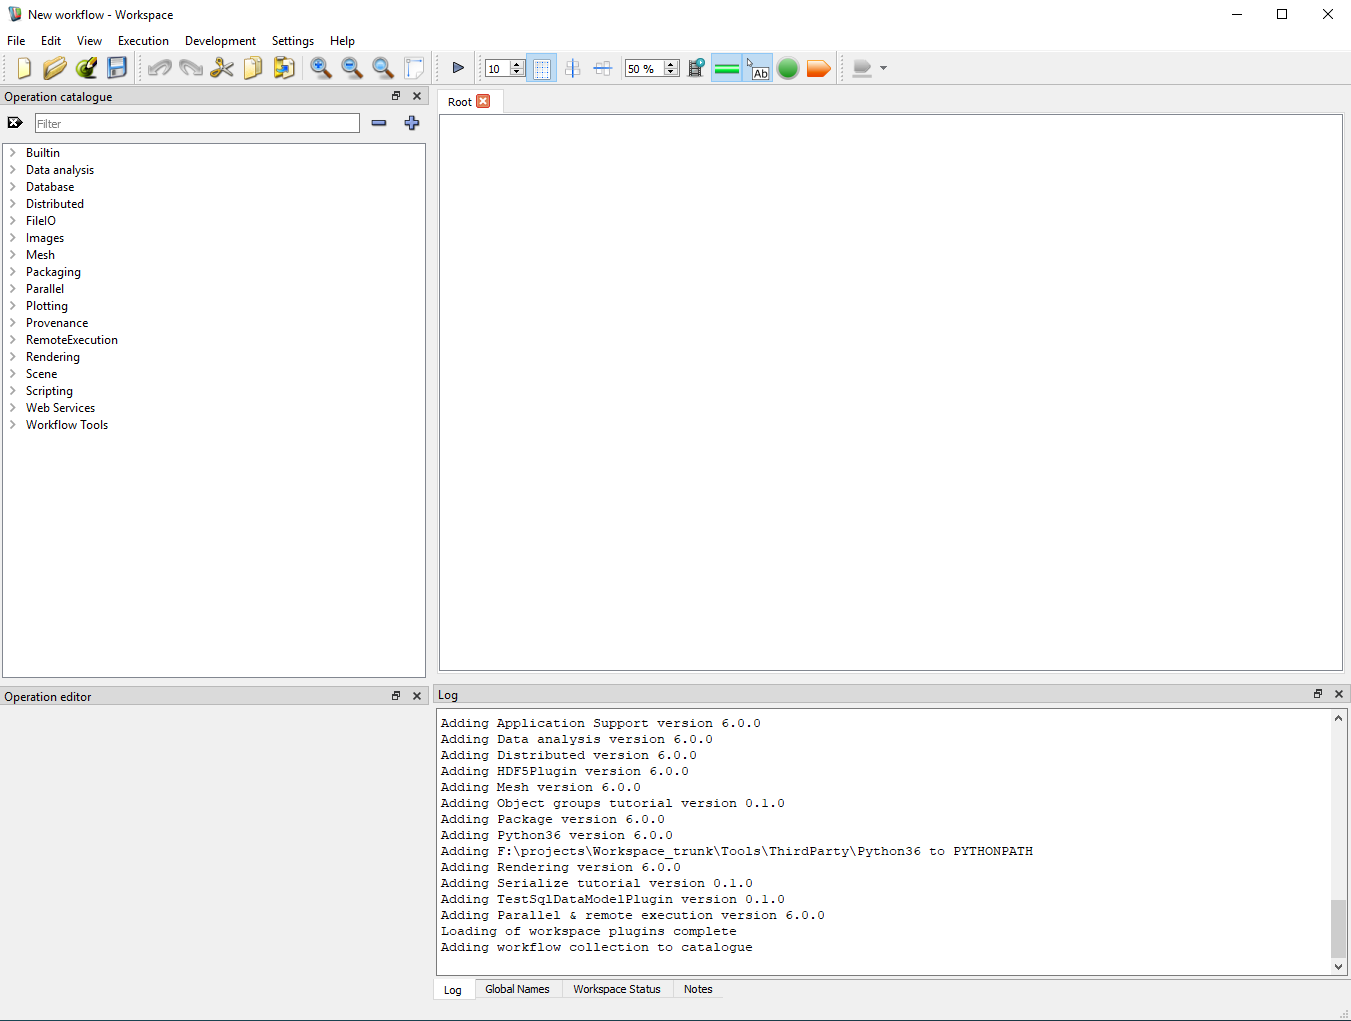
A default install of Workspace
Revealing and hiding Docks and Toolbars
One main reason your version of the Workspace editor may vary from the image above is because different Docks and Toolbars may be visible. You can use the View menu item to make Docks and Toolbars visible and invisible. This is very useful when you accidently close a Dock or Toolbar and need to reinstate it.
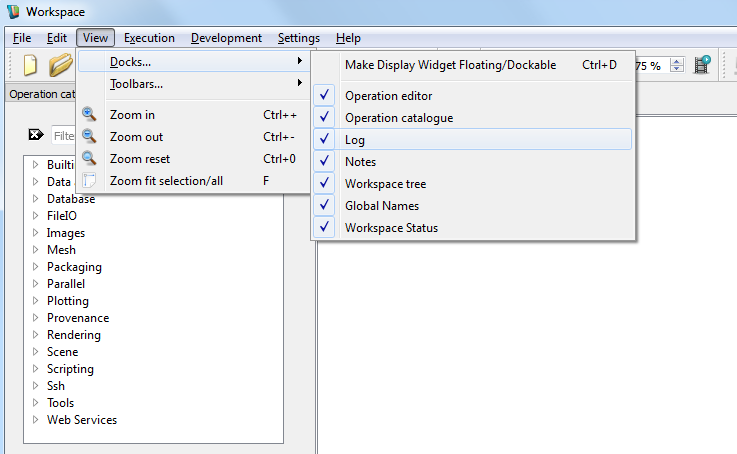
Revealing and hiding Docks and Toolbars
The available docking tools are:
Zoom fit selection/all
The View menu has another useful selection option shown in the screenshot above, "Zoom fit selection/all". Essentially this option zooms the canvas to show either
- a selected number of operations (this could be described as a zoom in on selection operations)
- zoom out to show all operations
Apart from activating "Zoom fit selection/all" from the View menu, you can also use the shortcut key 'F' or Right Mouse Button (RMB) click on a blank part of the canvas and select the "Zoom fit all" option from the context menu. When working with large workflows with numerous operations, these zooming options provide an easier way to navigate a complex canvas.
Using Workspace's editor to create a very simple workflow
Now it is time to perform a simple interaction with the Workspace editor.
- Go to the Operation Catalogue and type ImageR in the search box
- As you type the characters entered will dynamically filter the Operation Catalogue to provide operations with ImageR in their name
- Select the ImageReader operation by placing your mouse over the operation's name or icon and drag it on to the canvas, dropping the operation onto the canvas by releasing the mouse
- You should now have an ImageReader operation on the canvas
- Left Mouse Button (LMB) click on the ImageReader operation to select it and note what happens to the operation's background colour and in the Operation Editor
- Mouse over the Operation to display the operation's inputs and outputs
- A tooltip for the operation may also appear at some point
Your screen should look something like this:
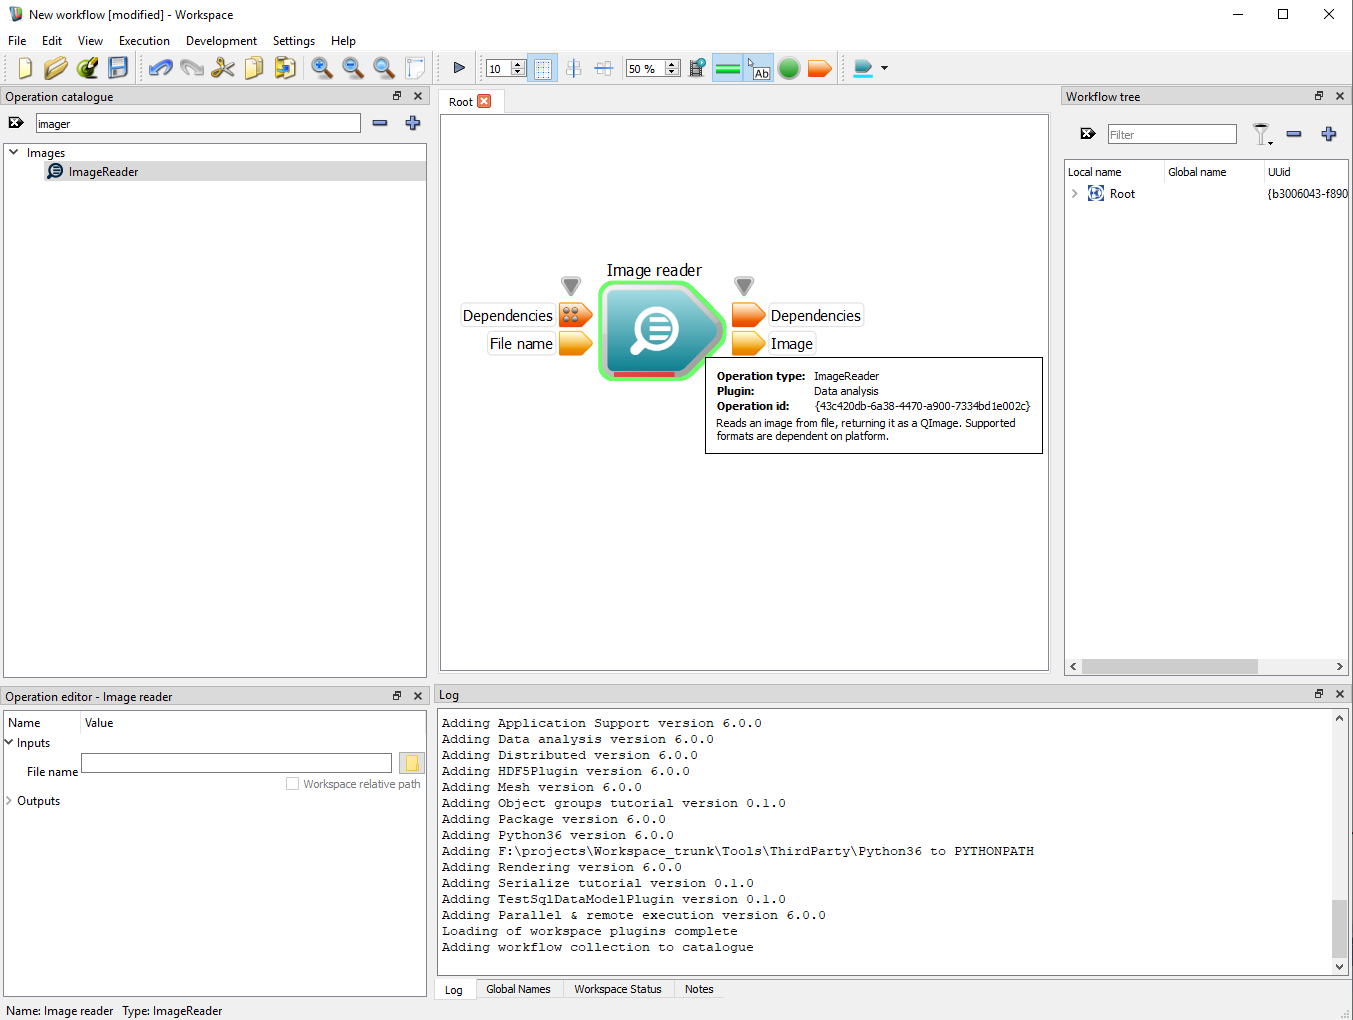
Workspace editor after selecting the ImageReader operation
Now we will setup a very simple workflow and execute it.
- Enter this URL into the "File name" input in the Operation Editor: https://research.csiro.au/static/workspace/docs/workspace-logo-256.png. If you are not connected to the internet you could use the file browser button and select a local image file. You may use a value such as: C:/Program Files/csiro.au/workspace/images/Workspace/workspace-logo.ico - depending on your platform this filename may need to be updated
- Right Mouse Button (RMB) click on the Image output and select "Display with ImageWidget", as shown here:
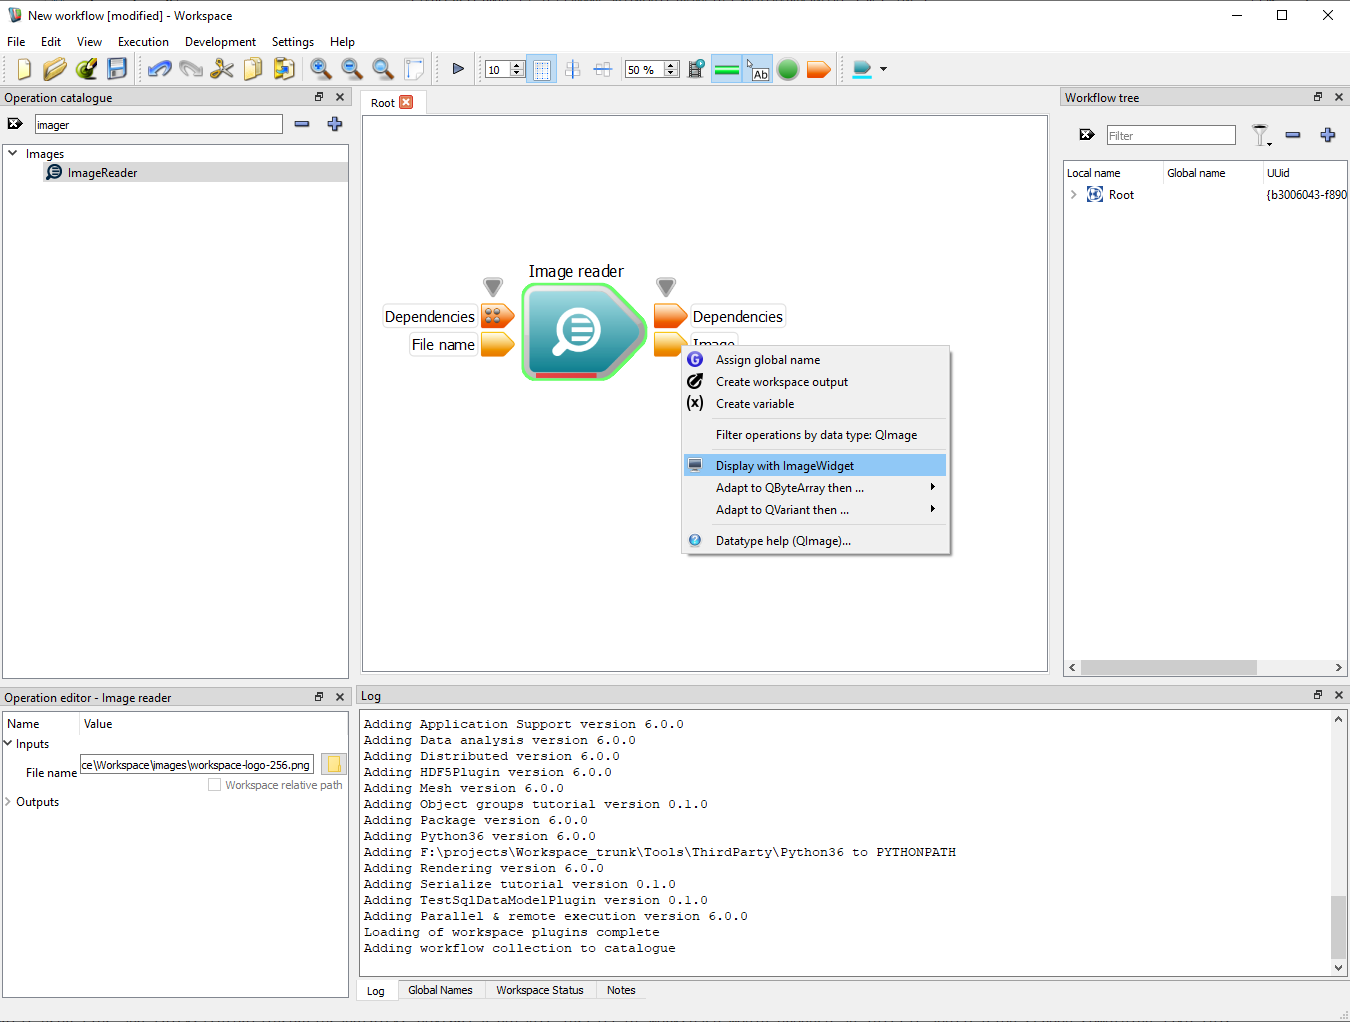
Display image with ImageWidget
Your Workspace editor should look like this image:
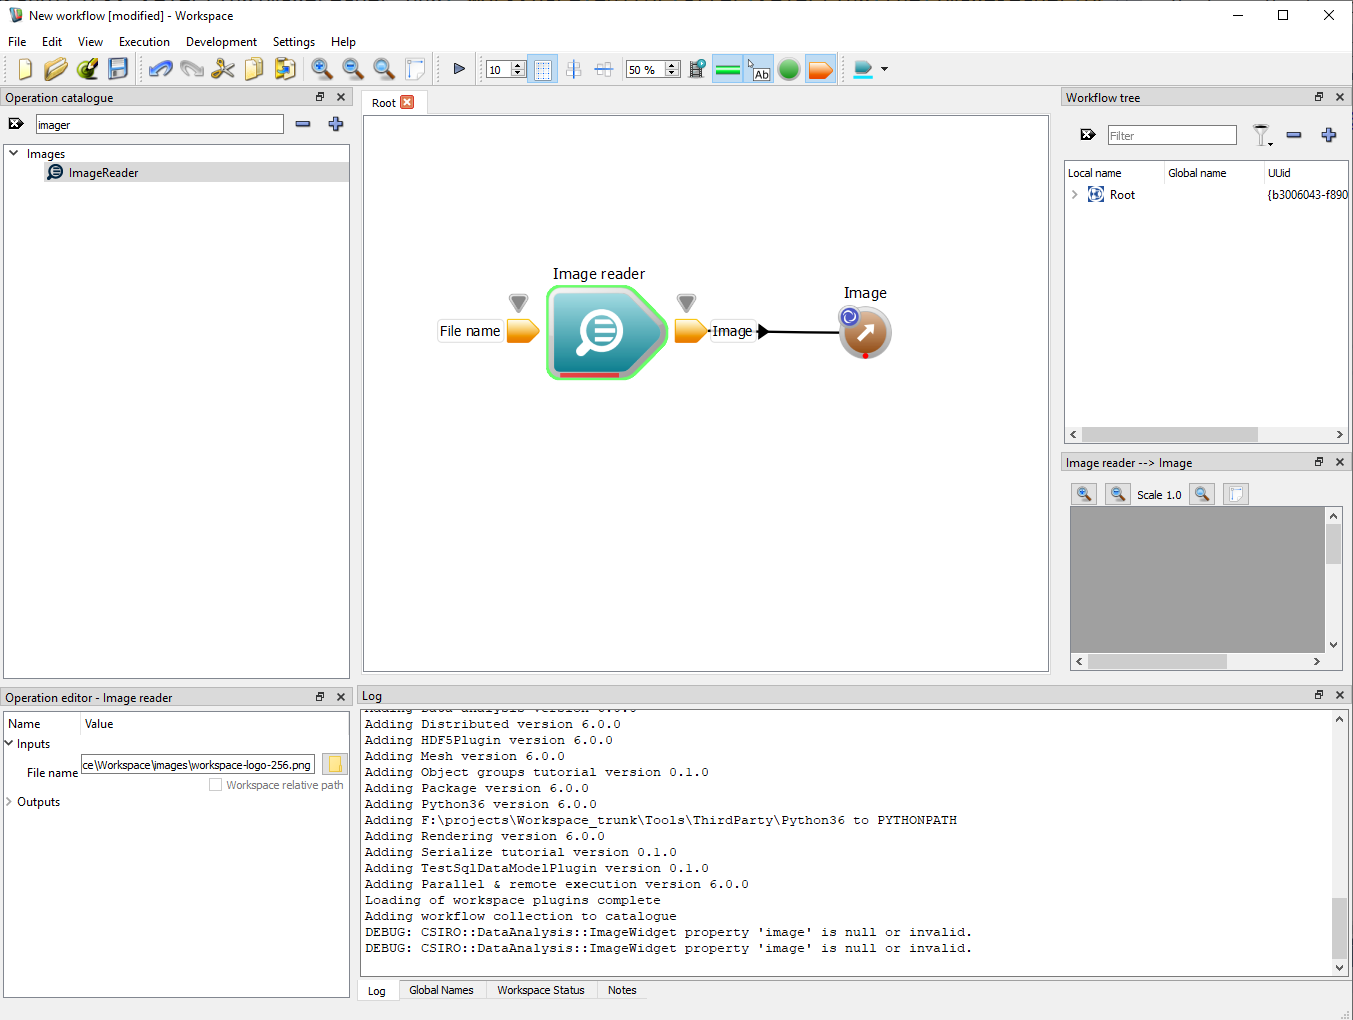
A simple first workflow
- Note
- Depending on your current default setting the widget will be either floating or docked. We will cover how to change this setting in Enable/Disable docking of display widgets
-
To dock a floating widget, select the widget and type CONTROL+D
-
To float a docked widget, grab the widget by its title and drag it to wherever you want it
You can now run your first workflow by clicking on the "Execute" button and assuming you are connected to the internet the image will be downloaded and your Workspace editor will look something like this (again, if you are not connected to the internet you can set the input to a local file):
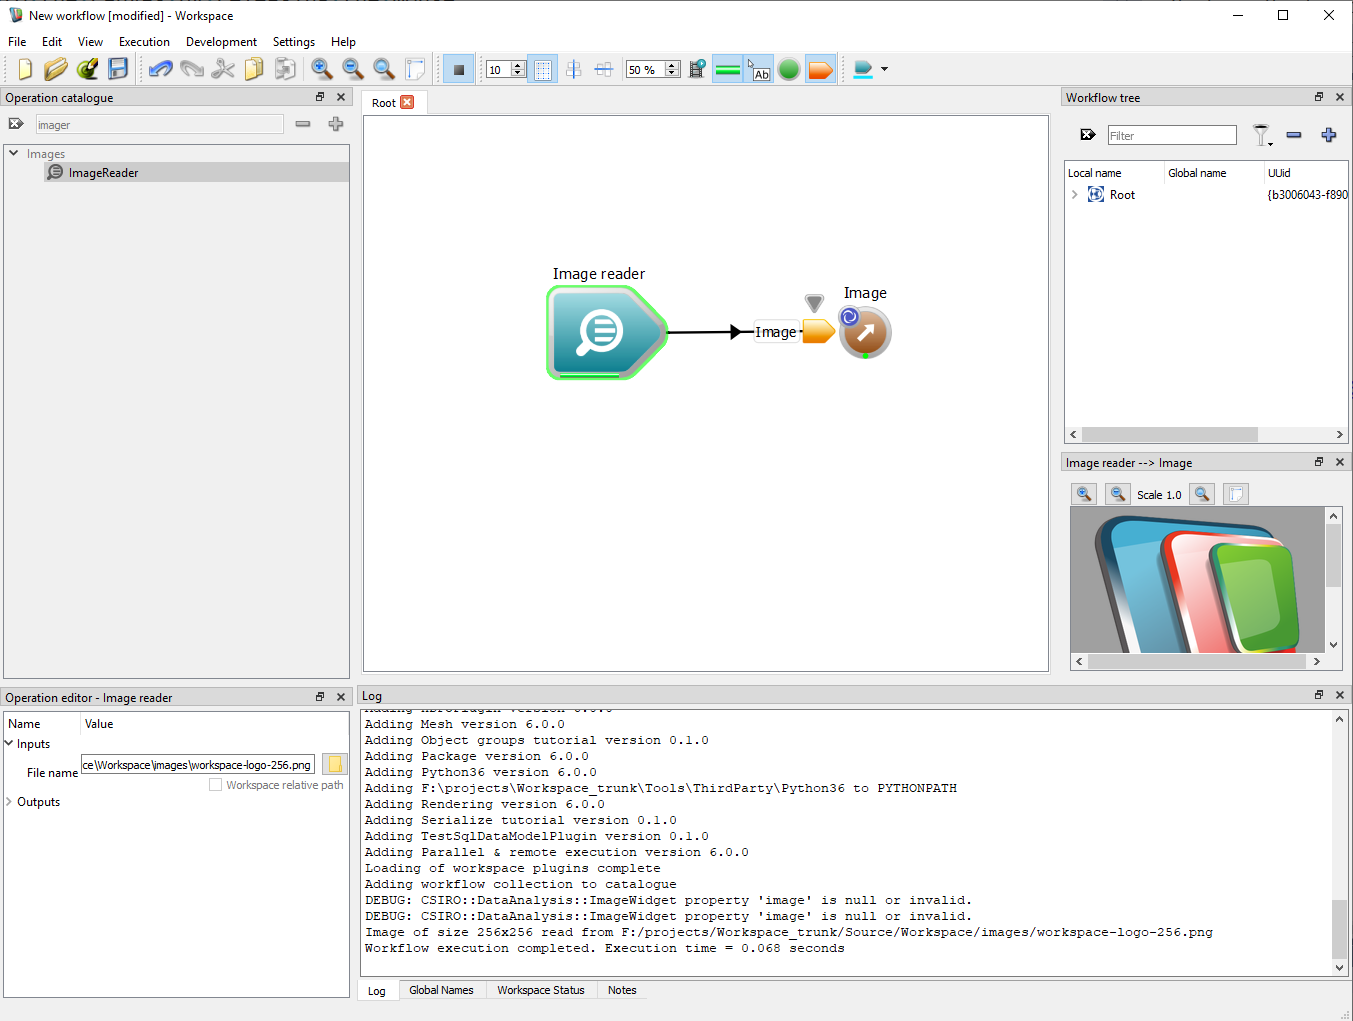
Executing your simple first workflow
There are many things to be aware of when running your workflow, a couple of the most important points are:
- Your workflow stays running, so if you change the value of an input, you will immediately see the effect of the change. For example, change the filename to select another image from either the internet or your hard disk and see the image widget update.
- You cannot change the architecture of the workflow, for example the Operation Catalogue is greyed out to prevent adding new operations until you stop executing your workflow.
- As the ImageReader operation executes, the progress bar on the bottom of the operation animates. Once completed it changes to green.
A workflow with a single operation is relatively pointless, please remember that this exercise is more of an introduction to the Workspace Editor's UI and UX. Further tutorials will should you how to build real-world workflows.
Congratulations, you have started mastering Workspace! There is a lot more to learn but at this stage you just need to understand the basic concepts, further tutorials will go into a lot more detail.
Changing Application Settings
A number of Application Settings can be set from within Workspace editor using the Settings --> Configure Application dialog.
- Note
- Some of the options contained on this dialog are for Advanced Users and others for Developers. In this section we will look at some options that are applicable for beginners. Do not worry if we skip some options on the Dialog now, we will cover most of them as we work through the tutorials.
To bring up the Configure Application dialog, select "Settings" and "Configure application..." from the menu, like this:
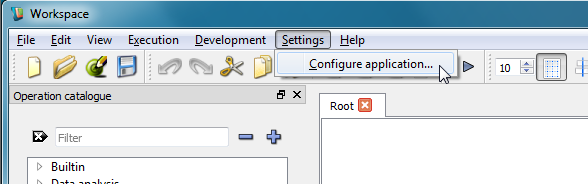
Selecting Settings, Configure Applcation from the menu
Setting User Interface settings
There are a number of User Interface seetings you can configure. In summary:
- "Check for announcements on startup" really does what it says. On startup Workspace will look for new announcements on the Workspace website.
- "Mouse wheel direction for zoom in" really does what it says. It sets which motion on the mouse will cause the canvas view to zoom in (and therefore the opposite motion will zoom out).
- "Auto display operation properties" requires some explanation. Basically this setting determines if the dropping of an operation from the operation catalogue on to the canvas will automatically cause its Properties dialog to be opened. Automatically opening the Properties dialog can be useful if the operation has properties that should/must be set before it can be successfully used. However many operations do not require any properties to be set before they can be used - and therefore automatically opening the Properties dialog for all operations can be a nuisance. The recommended setting is User-configurable operations only – as these will require the properties to be edited. You can read about User-configurable operations on this page Polymorphic Operations.
- "Show deprecated operations in the catalogue" really does what it says, and it is recommended that it be set off to avoid adding deprecated operations to your workflows.
- "Connection port display trigger" determines when operation racks should appear.
- "Dependencies" determines if Dependencies are hidden by default for inputs, outputs and variables.
- "Enable docking of widgets" determines if newly created widgets will be Floating or Docked. Although this is the default setting, you change the position for an individual widget between floating and docked at any time.
- Note
- To dock a floating widget, select the widget and type CONTROL+D
-
To float a docked widget, grab the widget by its title and drag it to wherever you want to place it
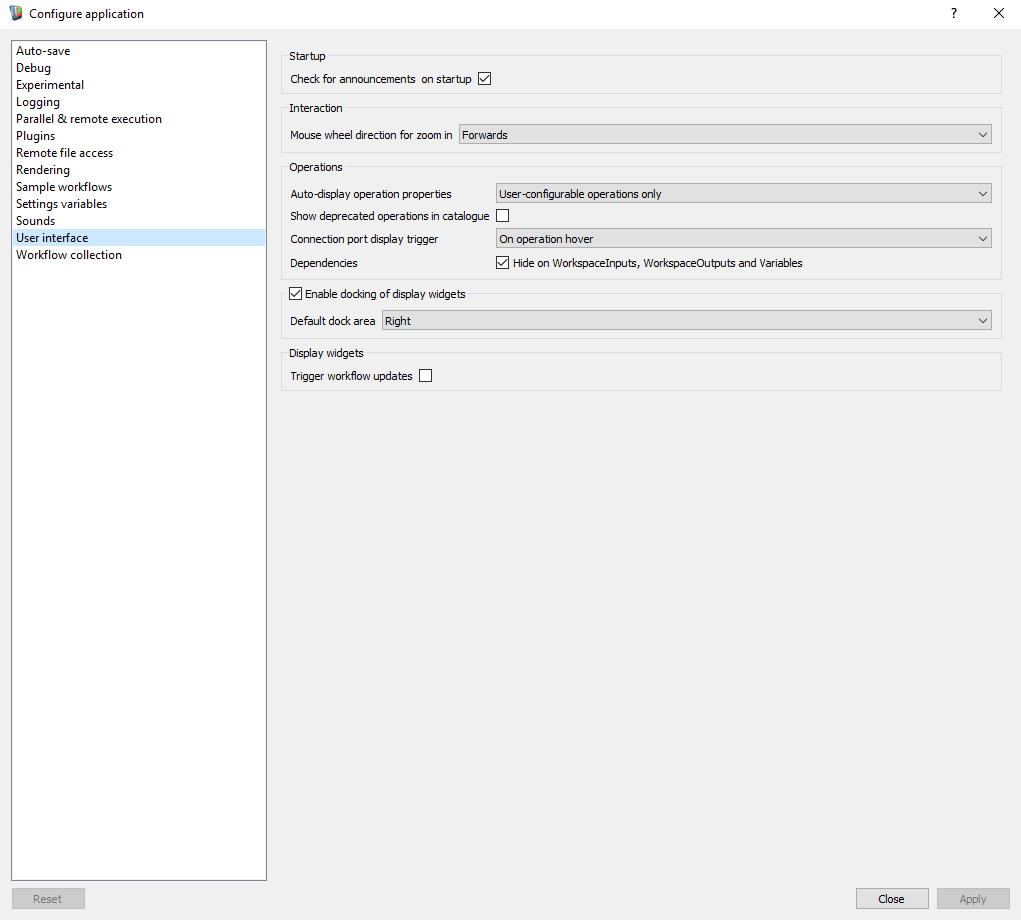
Setting User Interface Settings
More about Dependencies
Showing/Hiding Dependencies can be controlled via a toolbar button:

Dependencies display toolbar button
When the Dependencies toolbar button is disabled, dependencies will only be shown on operations with no other inputs/outputs.
Dependencies visible on operation with no other inputs/outputs
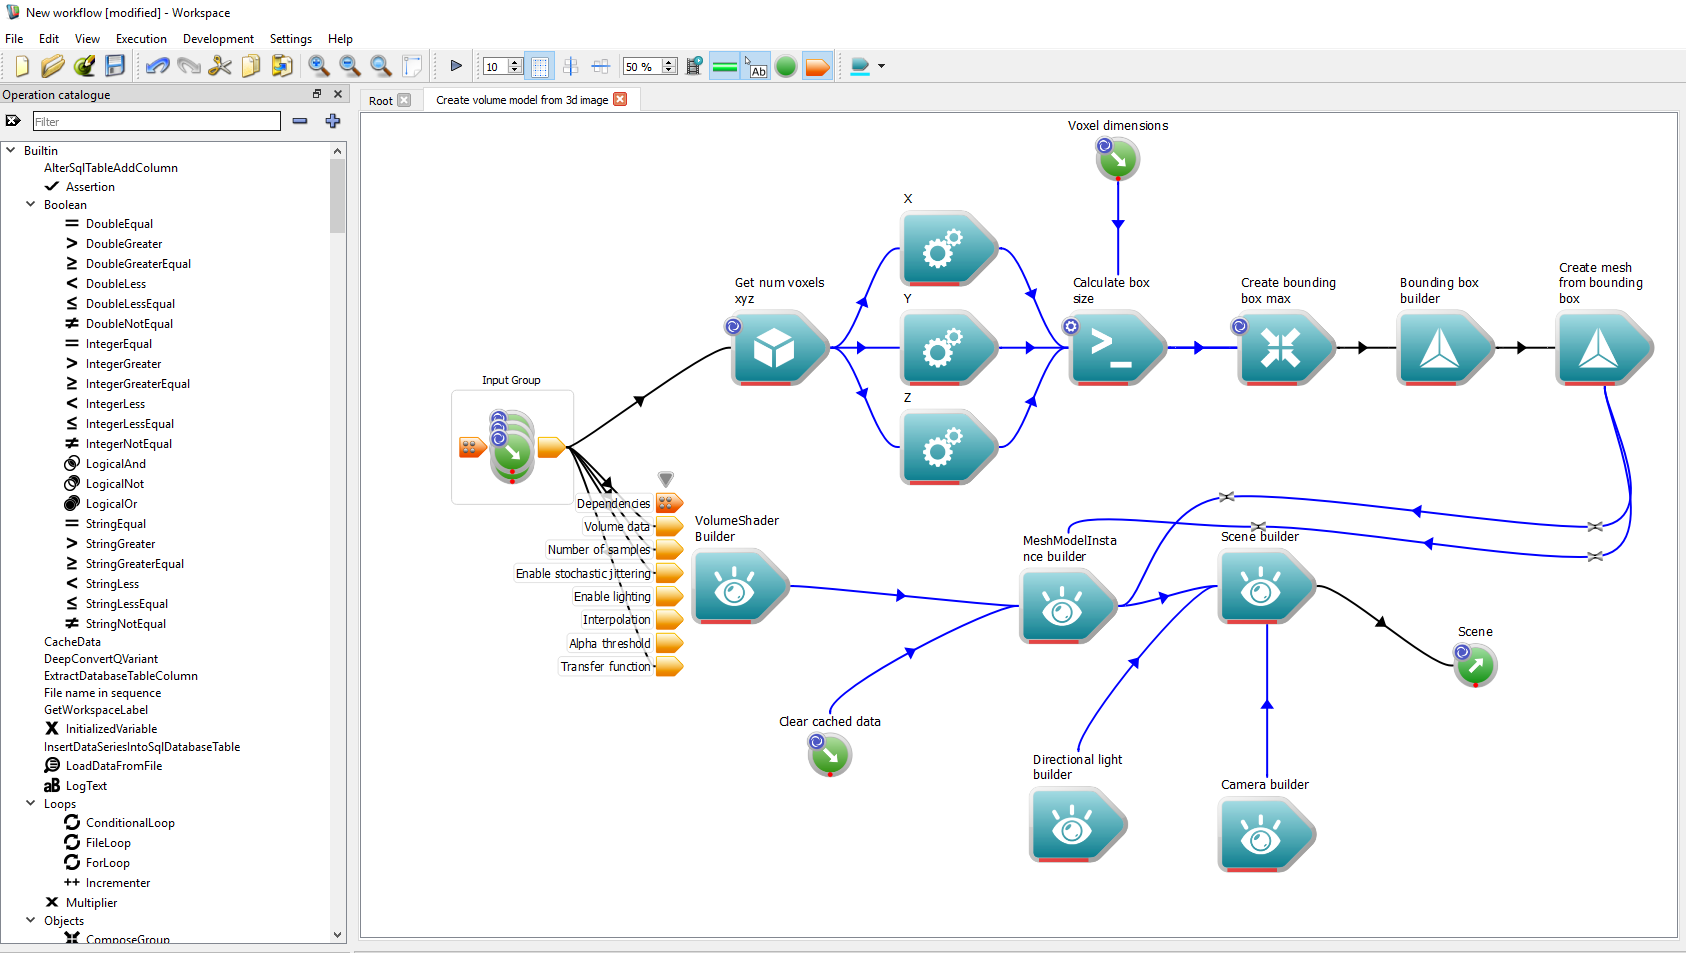
With Dependencies hidden, the appearance of some operations is as shown below:
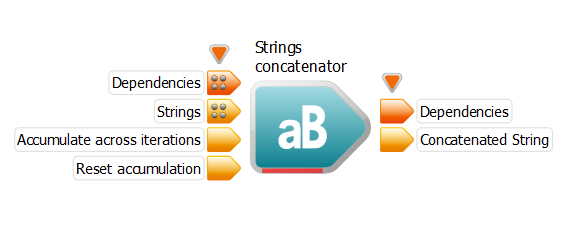
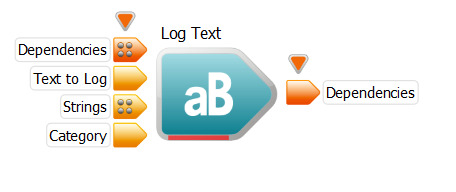
Operation (Dependencies hidden)
LogText operation showing a Dependencies output in the absence of other outputs
Workspace input (Dependencies hidden)
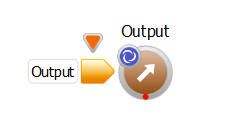
Workspace output (Dependencies hidden)
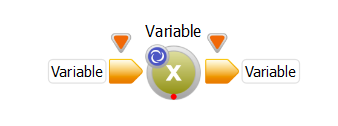
Variable (Dependencies hidden)
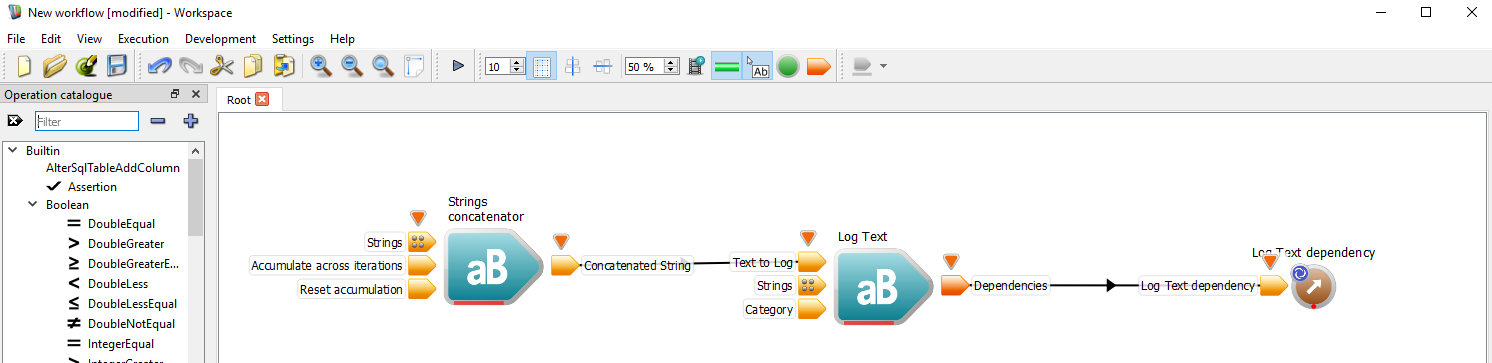
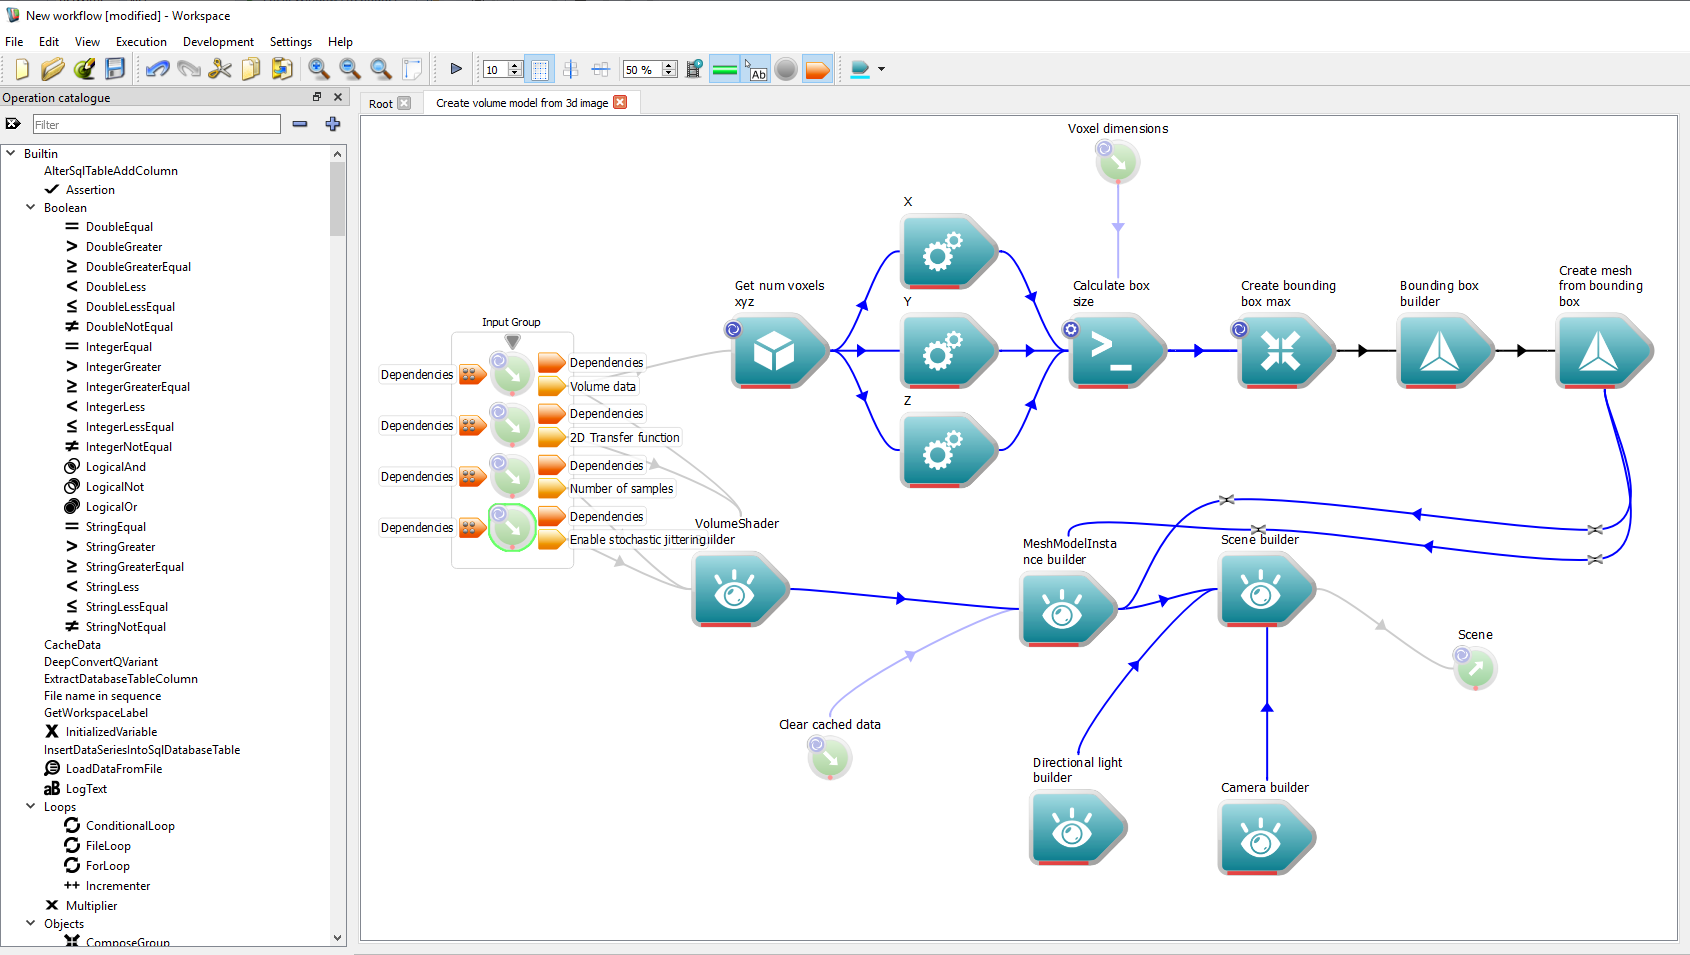
When the Dependencies toolbar button is activated, all dependencies will be visible.

Dependencies visible
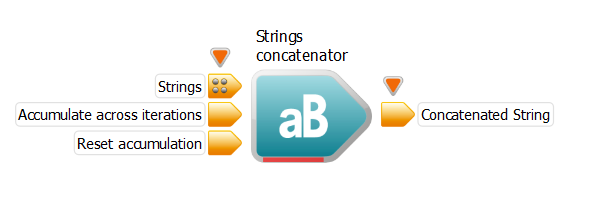
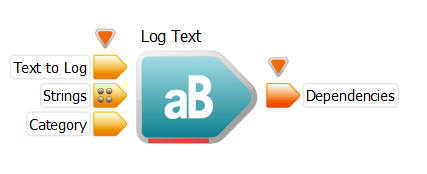
With Dependencies visible, the appearance of some operations is as shown below:
Operation (Dependencies visible)
LogText operation showing a Dependencies input and output
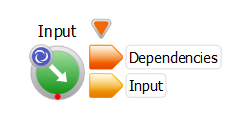
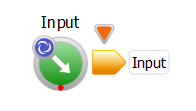
Workspace input (Dependencies visible)
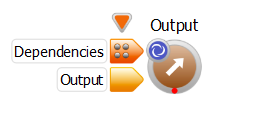
Workspace output (Dependencies visible)
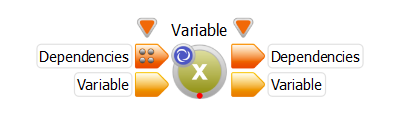
Variable (Dependencies visible)
- Note
- Your operations and workflow may appear different to the examples and screenshots in the tutorials depending on the Dependencies setting.
Setting Auto display to User-configurable Opertions only
Generally most users will set "Auto display operation properties" to "User-configurable Operations only". Doing so will mean that if you drag a User-configurable operation, such as ComposeGroup onto the canvas its Properties dialog will appear, as shown here:
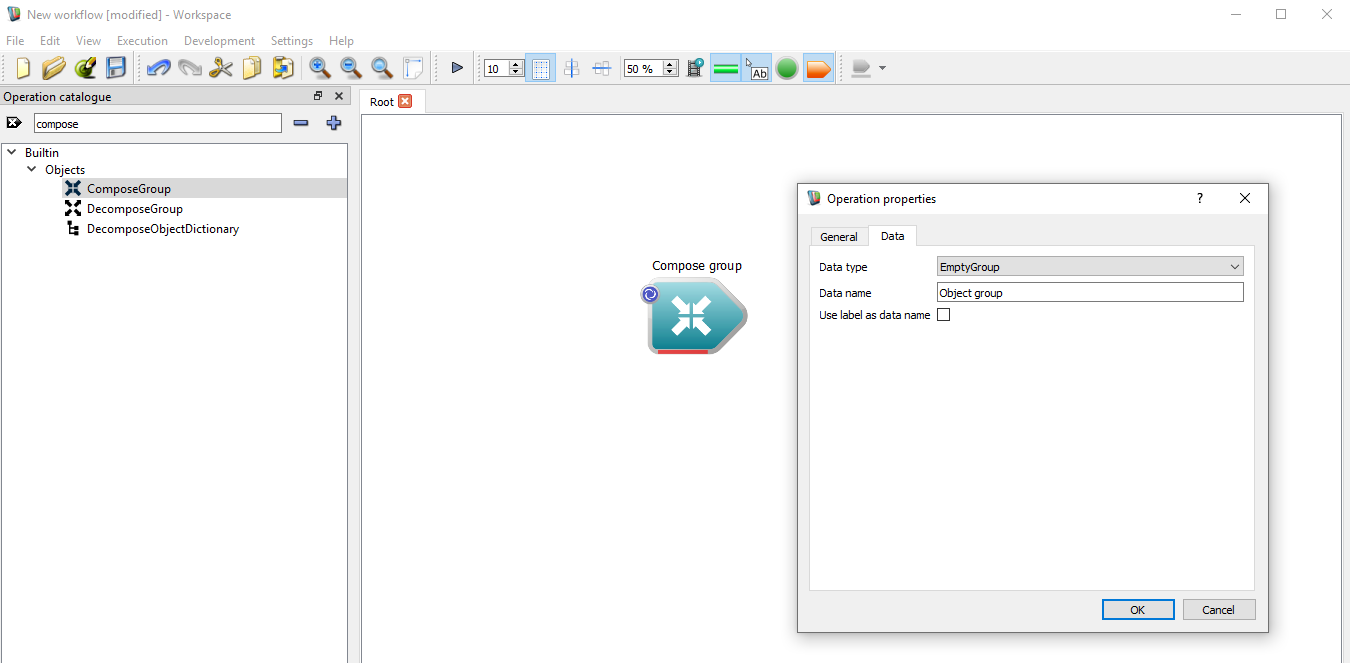
With Auto display operation properties set to User-configurable Opertions only
Enable/Disable docking of display widgets
When any widget is created it will either be Floating or Docked by default, and you set your default on the Configure Application dialog under User interface. Regardless of its initial location, any widget can be floated or docked at any time.
In the image below you should notice that:
- The Integer input on the IntToString operation currently has three widgets attached to it, yes you can have multiple widgets attached at any one time.
- You can see what the widget is attached to by looking at its title, in this case all three have the same title, Integer to string --> Integer (that is, operation name, arrow and input/output name).
- One widget is Floating, one widget is Docked and one docked widget is being dragged so it can either be moved to be floating or docked in another location. Also please note in the picture that the location where the widget will be docked , if immediately dropped, is shaded blue.

Widgets that are currently Floating, Docked and being dragged
Setting an Auto-save frequency
Workspace allows you to enable Auto-save and set an Auto-save frequency. With Auto-save enabled a backup of your workflow will be saved periodically.
- Note
- The backup copy will be saved in a special default location and therefore it will not overwrite your current workflow file.
Enable Auto-save by selecting the Auto-save dialog in the Configure Applcation dialog. You can then enable/disable Auto-save and set a frequency.
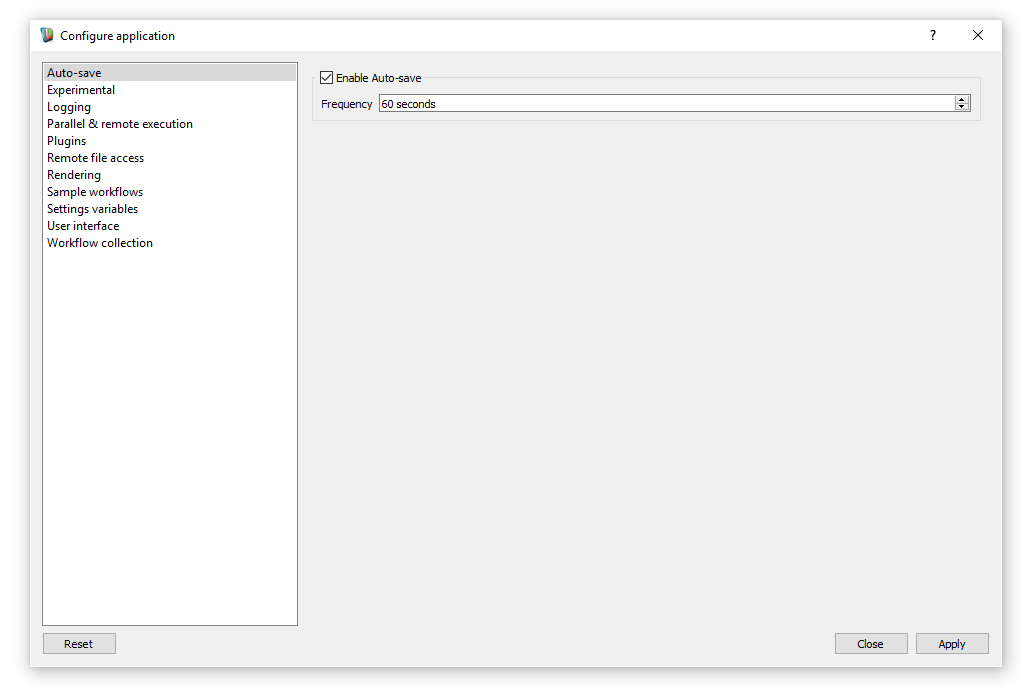
Enable and disable Auto-save and set a frequency
.
Mini operations
Mini operations are miniaturised inputs, outputs and variables which reduce clutter on the workflow and help you to focus on the core functionality of your workflows.
Grouping miniaturised operations
Miniature operations can be grouped together in collapsible racks using drag-and-drop.
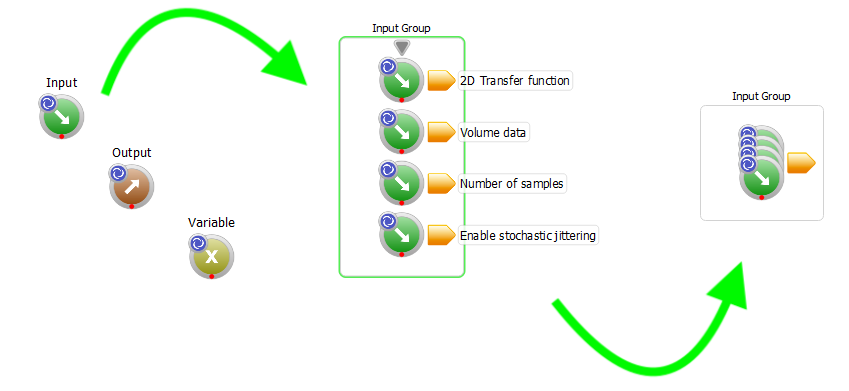
Input rack
Fading or hiding miniaturised operations
The miniaturised inputs, outputs and variables can be faded or hidden allowing you to focus on the core of your workflow.
The fading or hiding can be achieved by using a convenient toolbar button:

WorkspaceInput/WorkspaceOutput/Variable visibility policy toolbar button
.
You can set the visibility of mini operations according to your preference.
Mini operations visible
Mini operations faded
Mini operations hidden
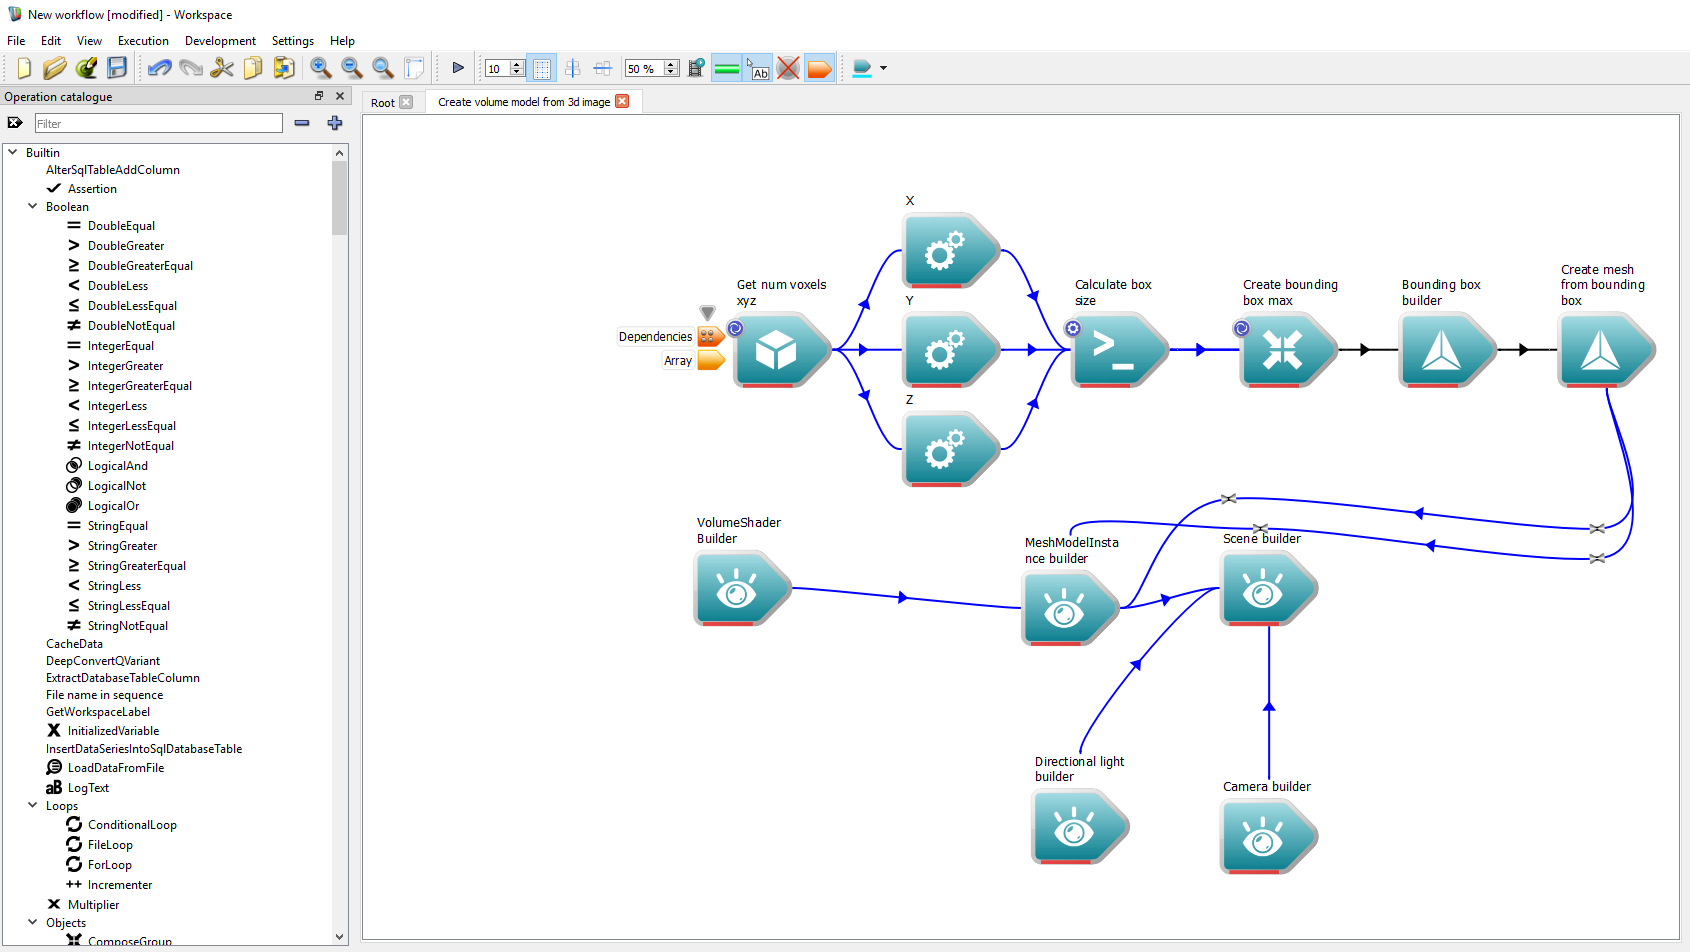
The Workspace tree
The Workspace tree is a tree-based widget that lets you see the nested structure of your workflow and search for operations by text generally, or specifically by label, global name, guid or operation type.
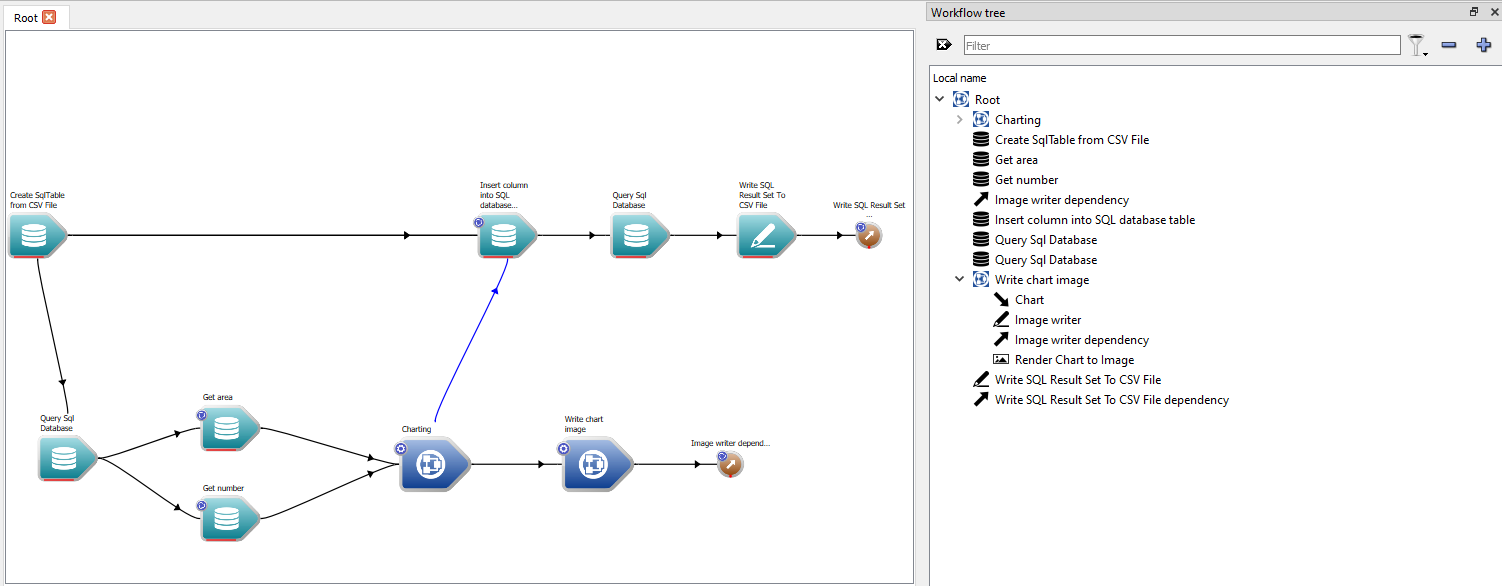
The Workspace tree
- By default, it will display one row per operation; each nested workflow is represented by a branch with the operations inside it as children. The figure above illustrates a workflow where the root workflow has two nested workflows, the "Write chart image" branch has been expanded.
- To search for a particular operation, enter part of its label inside the line editor and press Enter: the tree will be expanded to ensure any rows with matching items will be visible while any non-matching operations will be hidden.
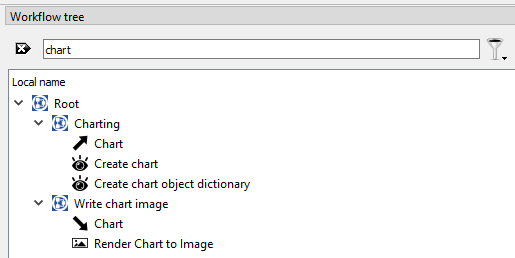
Looking for any operations with text containing 'chart'
You can expand this tree to show inputs and outputs using the filter menu, to the right of the line editor. You can toggle between showing/hiding inputs and outputs, where dependencies are treated independently of other IO. Show Operations toggles between showing or hiding operations that are not nested workflows. You cannot hide nested workflows by default. They will be shown if they or any of their visible children are matches.
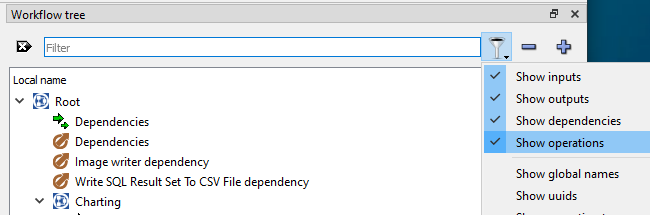
Expanding the workspace tree to show inputs and outputs
You can also expand the workspace tree to show more information about the workflow operations, including global names, uuids, operation types and external file paths.
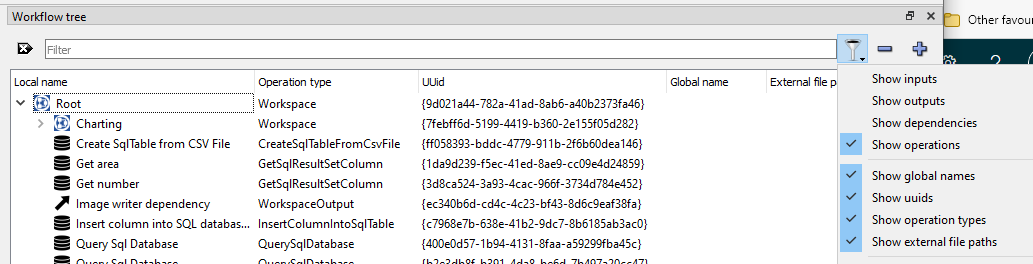
Showing operation types, uuids, operation types and external file paths
By default, the search function will find items that match the line editor text in their global name, uuid, type or file path as well as their labels. You can restrict this if you are looking for something specific by changing the match filter type. In the figure below, operations are only shown if their types contain "chart"; their labels are ignored.
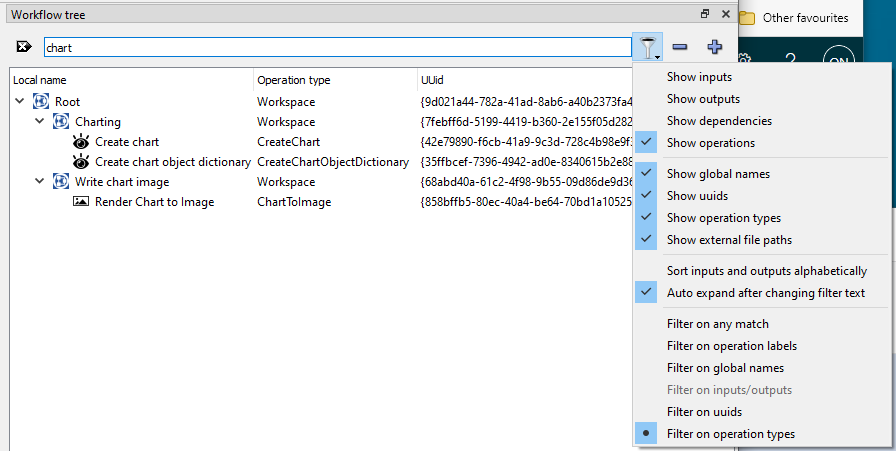
Looking for any operations with type containing 'chart'
This concludes our introductory tutorial on using the Workspace editor. It has barely touched the surface but has, hopefully, given you a solid starting position from where you can embark on the user tutorials.