Introduction
Workspace can be used to distribute aspects of a workflow. In this tutorial we will cover the following:
- Understand how to distribute work to a PBS/SLURM based compute cluster
- Understand how to make PBS/SLURM scheduling fault tolerant
- Note
- These instructions work on a CSIRO compute cluster. They may be useful to demonstrate the process for non-CSIRO users however you fill need to use site specific values in your configuration.
Contents
Create ssh key and distribute work to a cluster
Now that we've successfully executed our workflow in parallel on our local machine we are going to distribute some of the iterations to a cluster.
Before being able to do so, we need to fist create passwordless ssh key to connect to the server.
Create passwordless ssh key
Please note that the following steps are for users connecting to Linux based server.
- Log in to your server and run command : ssh-keygen, you'll be prompted to choose the location to store the keys. The default location is good unless you already have a key. Press Enter to choose the default location. And then you'll be asked to choose a password, make sure to use no password. The generated id_rsa is your private key(don't give it to anyone!) and id_rsa.pub is your public key.
- Run command: ssh-copy-id your_username@your_server, and your public key will be copied to the server.
- Copy the private key .ssh/id_rsa to your local machine.
- If your local machine is Windows based, make sure to change the permission for the private key by right clicking on the file properties, then select "Security->Advanced", changing the owner to you, disable inheritance and delete all permissions.
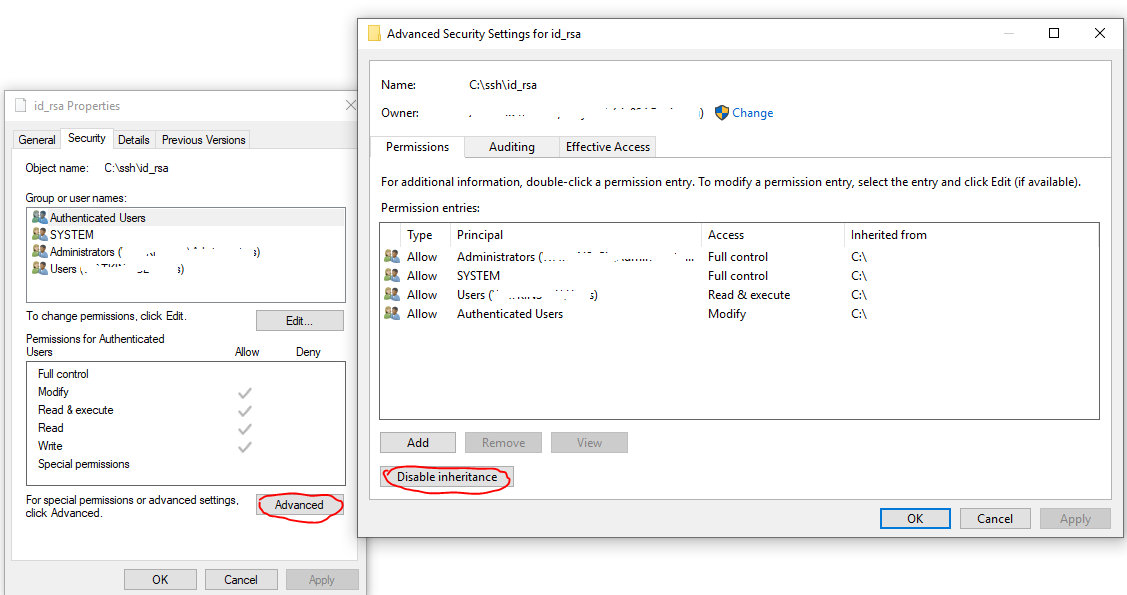
Disable Inheritance
Then grant yourself "Full control".
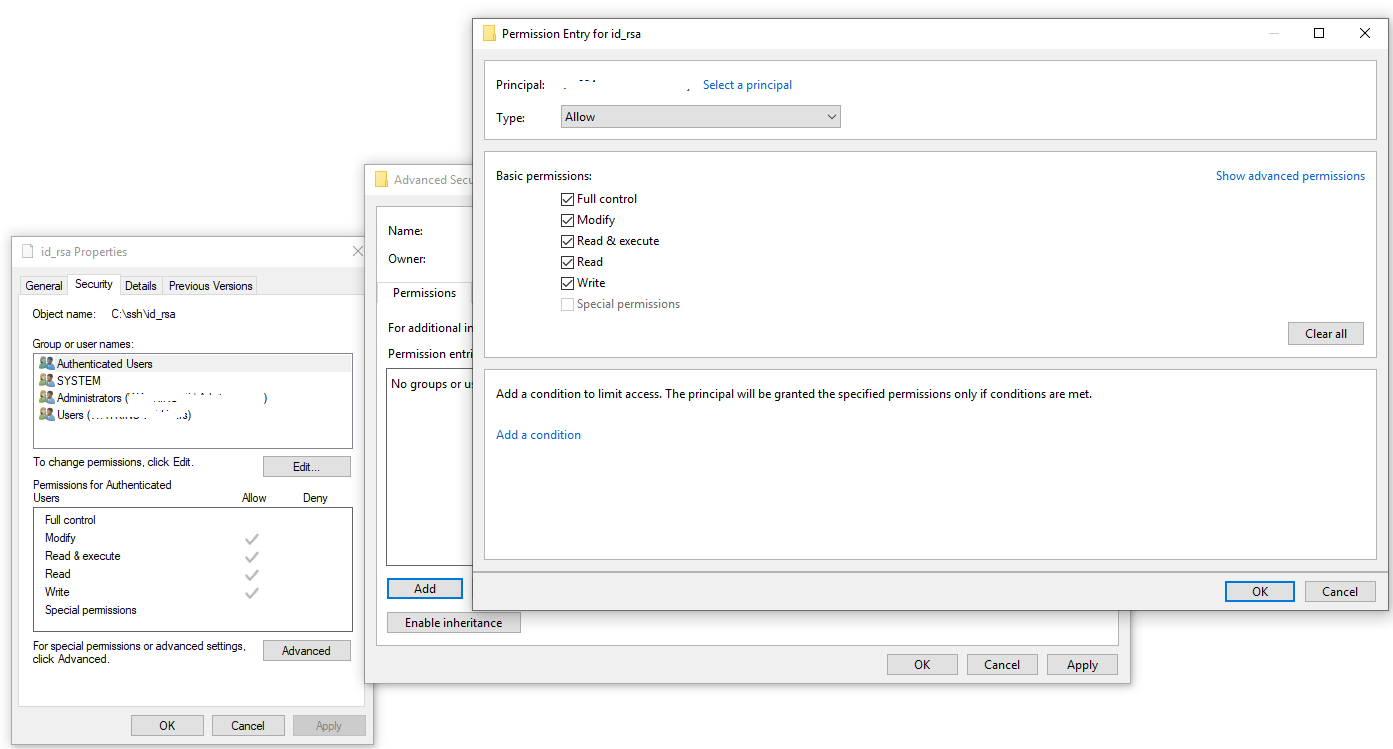
Grant yourself "Full control"
- Now you can try to log in using private key without the password : ssh -i your_private_key_location/id_rsa your_username@your_server
Distributing work to a cluster
- Within the workspace editor, select the "Settings" menu from the menu toolbar beneath the application's title bar and choose the "Configure application..." menu item.
- Select the "Parallel / Remote execution" entry from the left hand configuration panel.
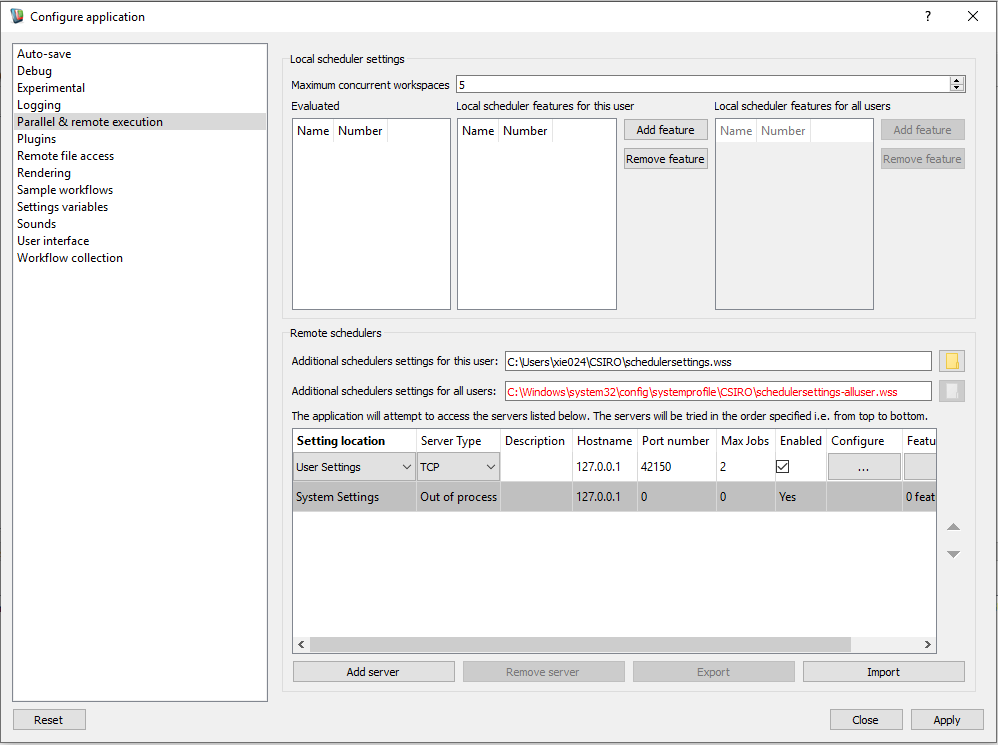
Parallel / remote execution configuration
- Click the "Add server" button in the servers area.
- Select the server type, for this example select "Slurm".
- Change the host to the name of your server.
- Change the port number to an appropriate port (port 22 for our SLURM based servers but if in doubt please refer to your server administrator).
- Set the field labelled "Max jobs" to the maximum number of iterations you want to perform in parallel on the server.
- Ensure the server is enabled by ticking the "Enabled" field.
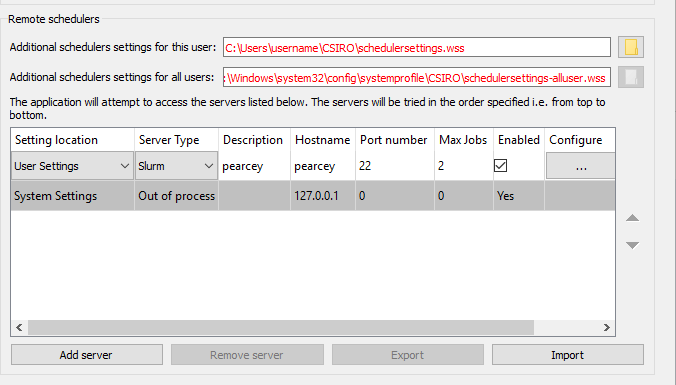
Newly added cluster server
- Click on the button in the column labelled "Configure" to launch the SLURM specific configuration options dialog.
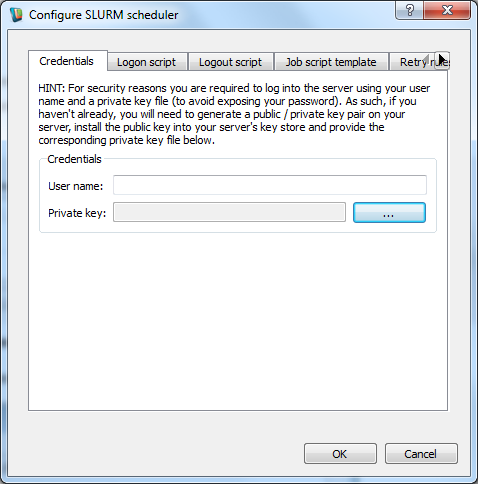
The SLURM server configuration dialog
- In the SLURM configuration dialog on the Credentials tab enter your network user name and private SSH key that you have created / added to your ssh key store on this server. Also make sure you have write permission to your home directory in the server. To check if you have write permission to your home directory, run command "ls -ld $HOME", "w" means you have write permit, otherwise you can try to grant yourslef write permit by command "chmod 600 $HOME"
username@hostname:~> ls -ld $HOME
drwx------ 5 username sc 4096 Feb  2 09:59 /home/username
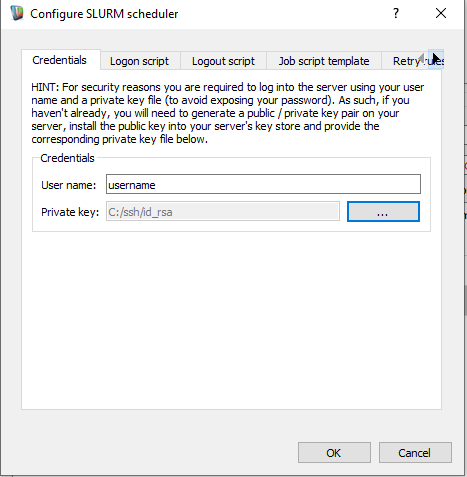
User name / SSH private key to use when connecting to our newly added server
- Close the SLURM configuration dialog by clicking the OK button.
- Close the Settings screen by hitting the "Apply" button. You will be prompted to restart the workspace editor for your settings to take effect, do this now.
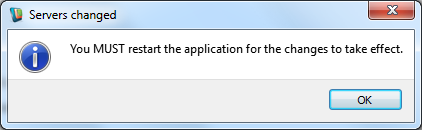
Restart the workspace editor
- Re-open your workspace editor and open the sample workflow from the previous tutorial.
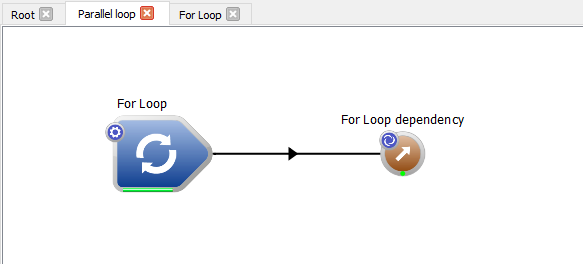
Our sample parallel workflow
- Ensure parallel execution of your loop is enabled (how to do this was covered in the previous tutorial).
- Run the workflow.
- The workflow will run and you should notice that your local machine processes some iterations and some iterations are now processed by the SLURM server. When a remotely executing iteration is complete, the output of the iteration is streamed from the SLURM server back to the workspace editor and is displayed in the workspace's log window. When iterations are sent to a SLURM server they are placed onto the SLURM server's work queue as such it can take an indeterminate amount of time until your remotely queued iterations are executed and complete so you may need to wait a minute or so to see your SLURM iteration output. The ForLoop operation's progress bar indicates how much work has actually completed.
- For further feedback on the status of individual iterations click on the Workspace Status tab (located in the bottome pane adjacent to the Log window)
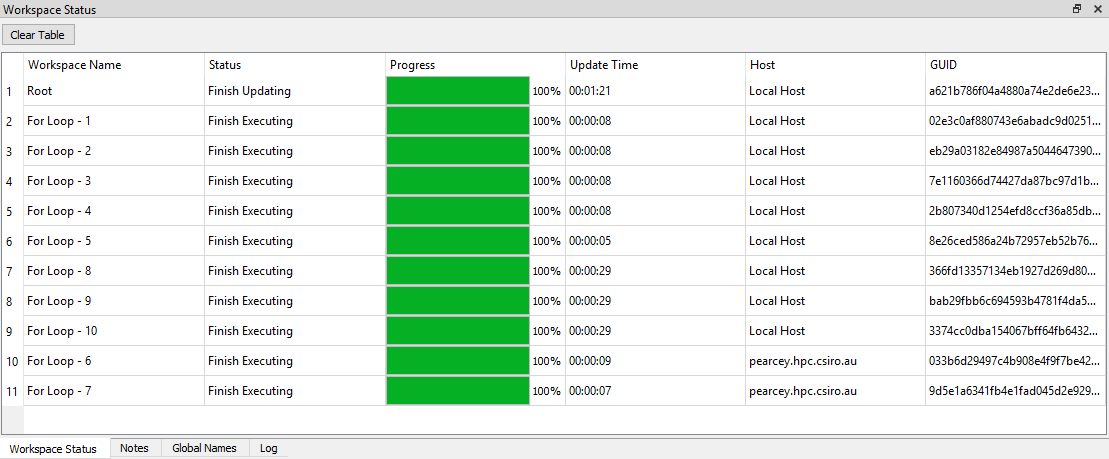
Workspace status tab - monitoring your iteration progress
Note: You can stop executing your workflow at any point by clicking the stop button. Any iterations dispatched to SLURM for execution will be notified of the stop and terminated. Once the workspace editor server has been notified that all SLURM iterations have stopped the workflow will stop execution.
Making the SLURM scheduling fault tolerant
We have now run our sample workflow both locally in synchronous and parallel mode in addition to running remotely on a cluster. When scheduling work to run on a SLURM batch system often you have to best guess the duration needed to run your work (known as its 'walltime') and the amount of memory your work might use. If running a large amount of iterations sometimes, despite best efforts, your specified walltime and memory turn out to be insufficient resulting in your work either not being queued or being terminated. As such, Workspace enables you to smarten up scheduling to help cope with these (and other) scenarios.
Some scenarios that may result in work not being executed (or terminated part way through) by a SLURM batch system include:
- Insufficient walltime has been specified
- Insufficient memory has been specified
- The SLURM server becomes disconnected
It would be a shame to have our workflow fail because a handful of iterations failed to either be completed in our specified time or using our specified memory allocation. As such, these scenarios are catered for within the workflow plus others of your own design by making use of Workspace's "Retry Rules" support and that is what we will explore below.
Automatically retrying iteration execution with more walltime
In order to test this feature we need to create a scenario whereby the walltime provided to run an iteration is less than the time it will take to run that iteration. To do this we will modify the default walltime within the workspace editor then modify our loop's body extending the runtime of an iteration to be greater than our default walltime.
- As before, within the workspace editor, select the "Settings" menu from the menu toolbar beneath the application's title bar and choose the "Configure application..." menu item.
- Select the "Parallel / Remote execution" entry from the left hand configuration panel.
- Click on the button in the column labelled "Configure" to launch the SLURM specific configuration options dialog for the server we created in the previous tutorial.
- Select the "Job script template" tab and set the default walltime to 0:0:1 i.e. 1 second.
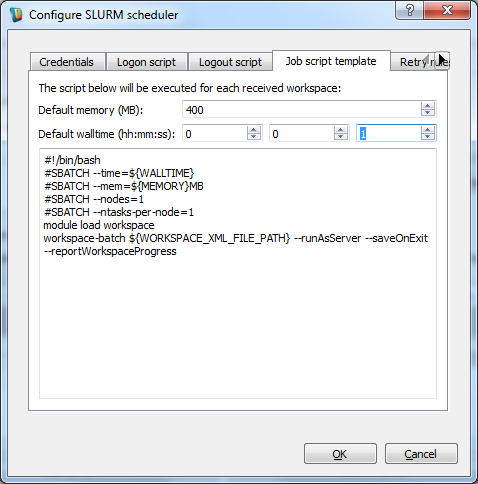
Modifying the default job template parameters
- Click the ok button to save our new default 1 second walltime.
- Click the Apply button.
- Restart the workspace editor for this setting to take effect.
- Load in the sample workflow and run it with parallel looping enabled.
- Your workflow should fail with some output similar to the following:
ERROR: PBS Job (1266577) - Exit code = 271
ERROR: PBS Job (1266577) - Job error file contents: =>> PBS: job killed: walltime 4 exceeded limit 1
ERROR: PBS Job (1266577) - Job has failed and no retry condition exists
ERROR: PBS Job (1266578) - Job has been stopped
ERROR: PBS Job (1266576) - Job has been stopped
ERROR: PBS Job (1266579) - Job has been stopped
ERROR: PBS Job (1266580) - Job has been stopped
Workspace execution aborted. Execution time = 0.003 seconds
- As described, PBS has killed one of our iterations because it has exceeded the walltime we alloted to it which in turn has resulted in our workflow being aborted. If we were running several thousand iterations and the required walltime for any given iteration varied then ideally we'd like to have our aborted iteration retried with more walltime and this is what we will now configure.
- As before, within the workspace editor, select the "Settings" menu from the menu toolbar beneath the application's title bar and choose the "Configure application..." menu item.
- Select the "Parallel / Remote execution" entry from the left hand configuration panel.
- Click on the button in the column labelled "Configure" to launch the PBS/SLURM specific configuration options dialog for the server we created in the previous tutorial.
- Select the retry rules tab.
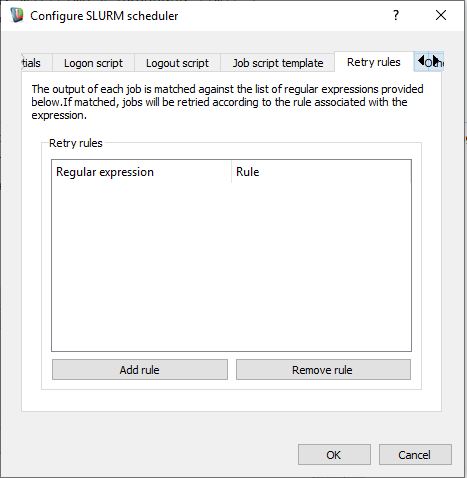
Server retry rule configuration
- Click on the add rule button.
- Click into the regular expression cell and enter a regular expression to match against any error output generated during the course of your remote iteration's execution. So in our case as a result of the previous scenario this would be:
walltime \d exceeded limit \d
- Select the "Retry with more walltime rule", your rule should look as follows:
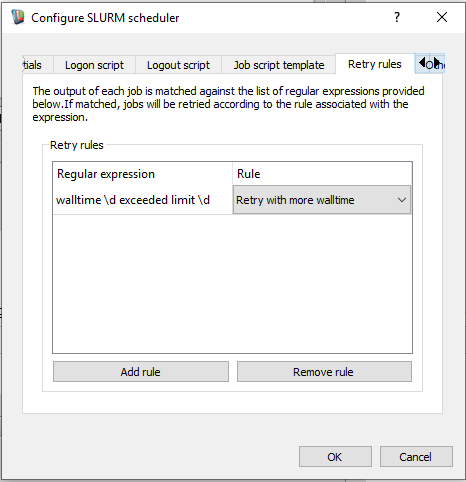
Adding a retry rule
- Click the ok button to save the rule.
- Click the Apply button.
- Restart the workspace editor to apply our settings.
- Load in the sample workflow and run it.
- The workflow should now complete all iterations without errors. Incidentally, the "Retry with more walltime" rule will retry any failed iteration with double the previous walltime and will continue to double the walltime until the iteration has completed.
- IMPORTANT! Don't forget to reset your default walltime back to a suitable default as it currently set to just 1 second as a result of this tutorial.
Automatically retrying iteration execution with more memory
As in the previous scenario, when running loop based workflows with one or more PBS/SLURM schedulers configured the iterations are dispatched to the PBS/SLURM systems in the form of workspace generated job scripts. The default parameters for these scripts i.e. the walltime and memory used are defined within the "Job script template" tab of the PBS/SLURM configuration screen. As before, the default memory can be modified and in addition, a retry rule can be configured to retry a failed iteration with double the previous memory based on a matched expression with the failed iteration's output as was the case in the previous tutorial.
Summary
This concludes the tutorial on the configuring Workspace to dispatch work to a cluster.
Next Steps
The next tutorial in this series is as follows: