|
Workspace 7.1.0
|
|
Workspace 7.1.0
|
There are many situations that arise when creating a workflow where data being passed from operation-to-operation is converted from one type to another. For example, in the previous tutorial (Looping), we converted an integer to a string in order to print it to the log. Automatic conversion between compatible types is a useful feature of Workspace, as it allows us to connect compatible operations without having to manually add purpose-built conversion operations.
This short tutorial will briefly cover how to customise the way that these conversions occur in a workflow. Just in case you get stuck, a sample workflow has been provided for you.
At the end of the previous tutorial, we had created a workflow with a loop in it, where the current loop counter was printed to the log during each iteration. The workflow looked something like this:
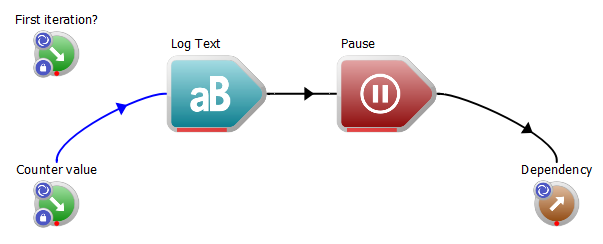
In a few steps, we're going to modify this workflow to change the way our integers are converted to strings. As you may know, a blue connection on the canvas indicates a connection that is converting from one datatype to another. In our workflow, there is only one such connection; the connection between the Counter value input operation and the Log Text operation. This connection converts the int output to a string input. By default, the string just contains the integer and is sized to its minimal length. E.g. the number 5 will appear as the string:
5
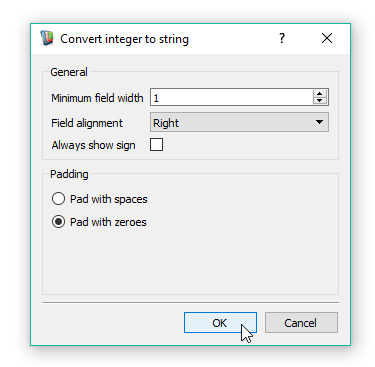
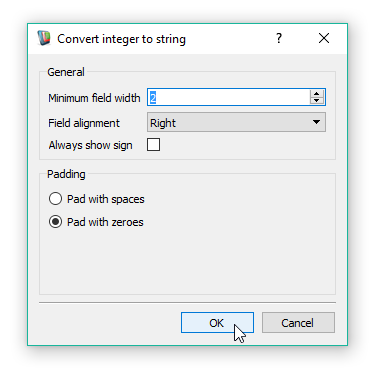
We want our string to be padded with zeroes so that all numbers are written as though they are two digits. E.g. the number 5 will appear as the string:
05
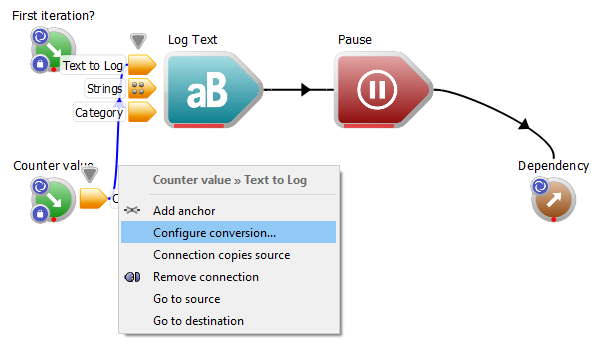
To do this:
If we execute the workflow, we will now see the following printed to the log:
00
01
02
03
04
05
06
07
08
09
Not all automatically converted datatypes in the workflow can be configured this way - in many cases there is nothing to configure when the datatype is converted, for example, when an integer becomes a double-precision floating point number.
This concludes the tutorial on datatype conversion. We have now learned how to:
A sample workflow for this tutorial can be found here.
The next tutorials in this series are: