|
Workspace 7.1.0
|
|
Workspace 7.1.0
|
The application workspace-merge is a three-way tool for merging two Workspace workflows derived from a common base workflow, The underlying differencing framework operates directly on the file xml code, but the application also displays all three workflows in the workspace format. It has a lot in common with out workflow comparison tool, and we strongly recommend you look at the workflow comparison tool tutorial before this Comparing two Workspace workflows .
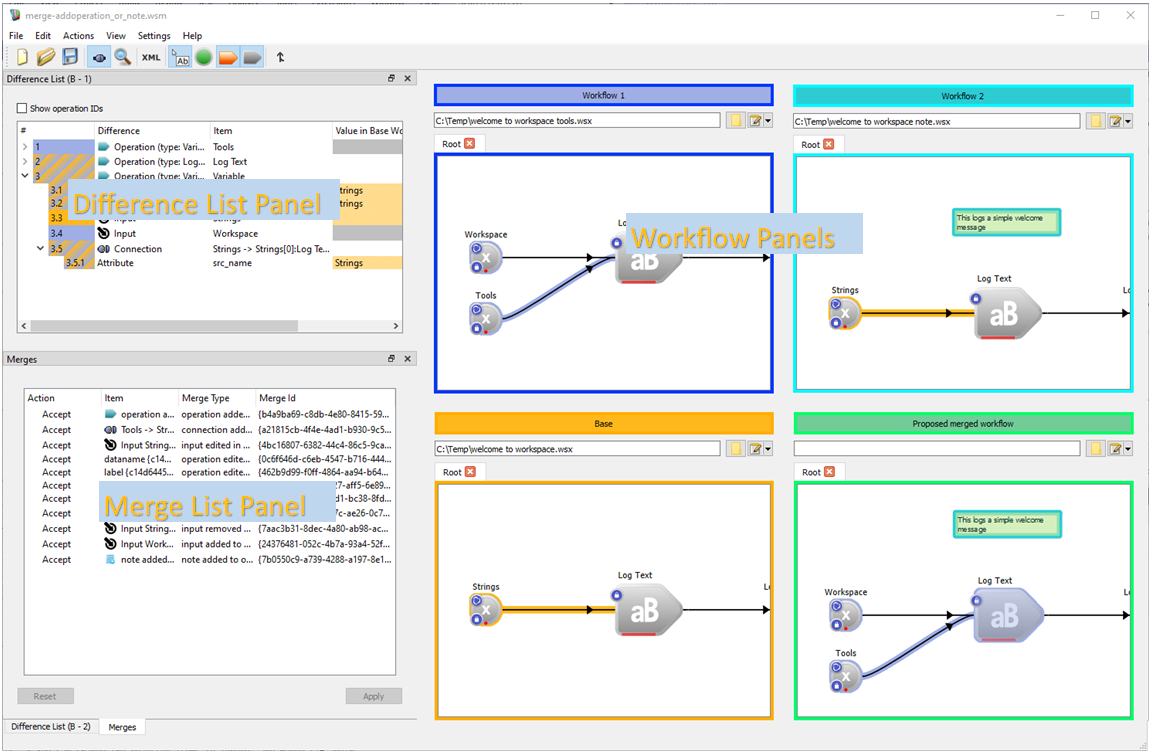
There are four main layout components to the application:
These are described in more detail later in the tutorial when we look at the tool
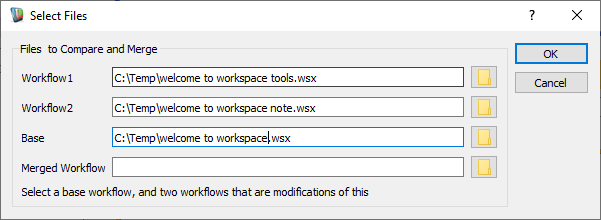
For the purposes of this tutorial, we are going to create two new workflows based on the welcome to workspace.wsx file we created in the diff tutorial. If you do not have this handy, then use the sample workflows Examples/WorkflowTools/welcome to workspace.wsx It is important that three modified files were all modifications to the same initial workflow file as the merge tool looks at the underlying operation ids. We will then look at how the merge tool treats the changes.

Open the merge tool workspace-merge (see Starting the application)
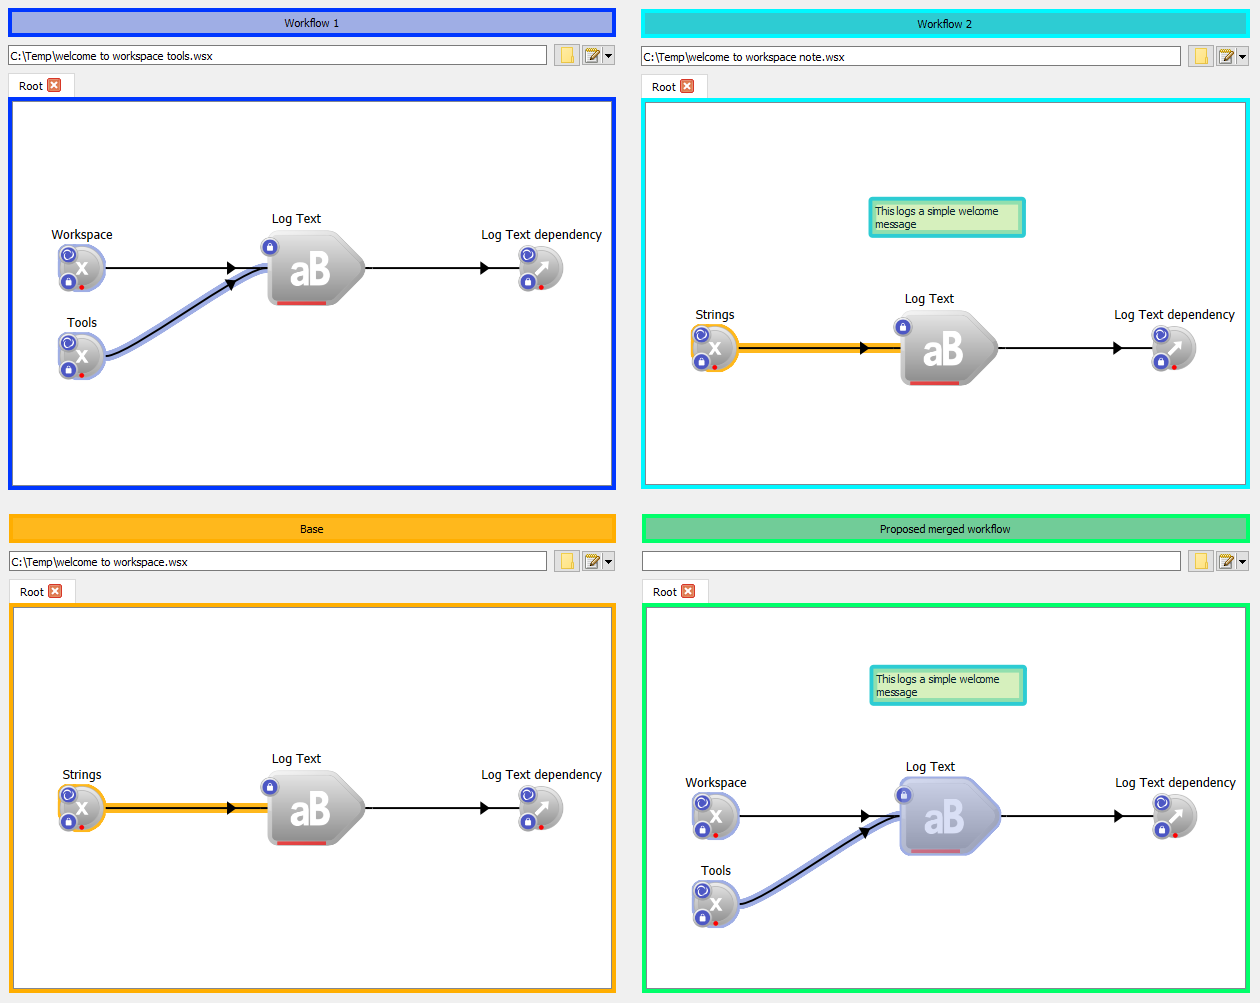
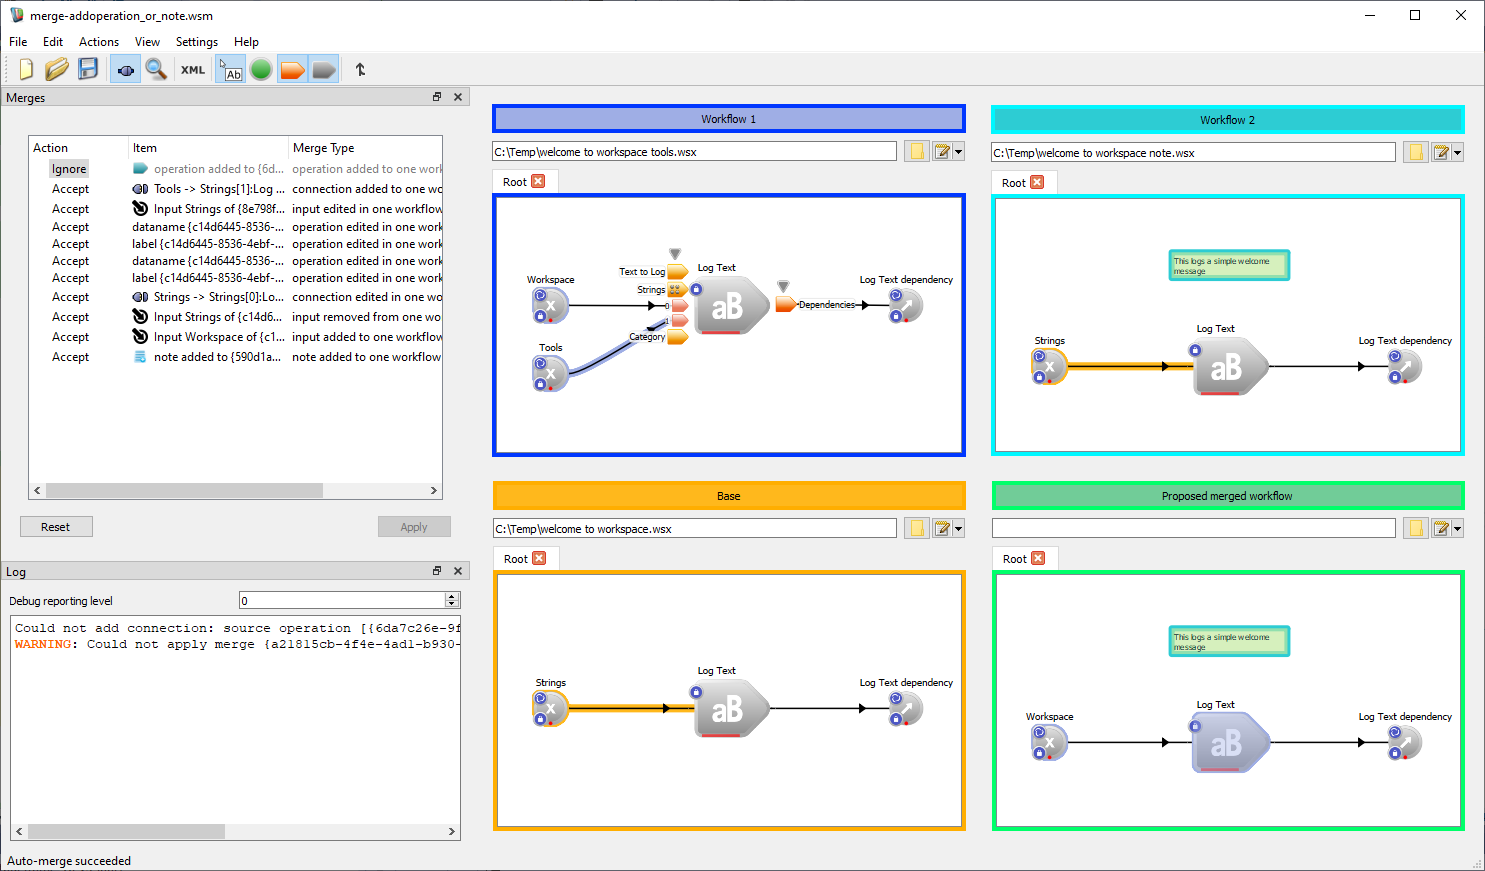
The merge tool is designed as a three-way merge tool where Workflow1 and Workflow 2 are both modifications of a common base workflow. The four workflow panels show the two modified workflows on the top row; with the original (Base) workflow on the bottom left. If the three workflows do not have a common ancestry in this way, then the tool will work in the same way, but you can expect the relationships to be very complicated! To make the colours easier to start, start by ensuring that the operation icons themselves are desaturated (this is a toolbar button toggle). The colours can then be understood as follows (whatever is true first applies).
For more details about the changes, open up at least one of the Difference List dock widgets View->Docks-> (see Looking at differences and merges) and click on the operation or connection you are interested in.
You can save the merged workflow by giving it a file name in the line edit under “Proposed merged workflow”
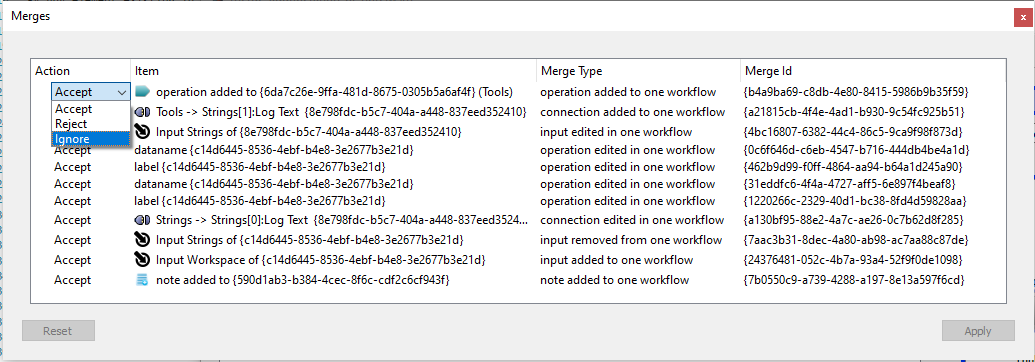
Open up the dock tool Merge (View->Docks->Merges). Each row of this table corresponds to something that will be merged into the base workflow. You can see that there are actually quite a few changes to be merged even in this simple example. You can stop changes from being applied automatically by clicking on the Action column of the item you want to block (see figure below) and changing it to Ignore. Try ignoring the note added operation added (top row). You will need to click on the Apply button to see the result Note that items are often linked: if you choose to Ignore adding the new Tools operation, then the new connection between Tools and Log Text won’t be made either. If this happens, there will be more details about it in the Log dock (see Looking at differences and merges).
Now click Reset and try “ignoring” the note added (bottom row)
Now we'll change workflow 2 to the welcome to workspace message.wsx workflow we created earlier using the line editor or browse button under the Workflow2 banner.

This time, the changes made to create the two modified workflows are incompatible, so the merge is rejected.
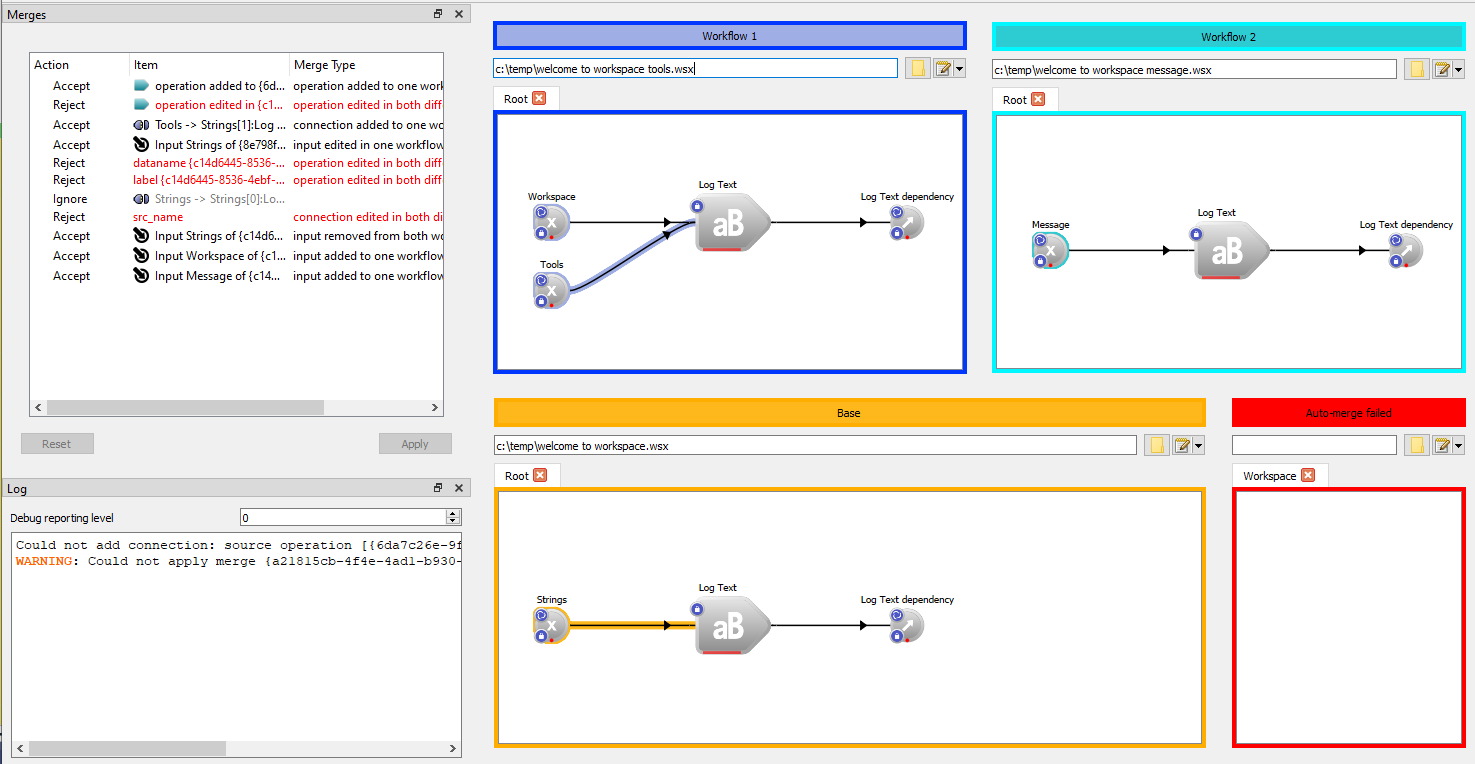
If you look at the Merges panel you can see the problem changes. Both workflows have changed the label and dataname of the WorkspaceInput. If they had happened to have used the same name, it would be updated, but as it is they are in conflict and there is no way to tell the tool which one you want. What you can do is “ignore” the conflicting changes and make any others.

Refer also to the entry Workflow merge in developer's tips and tricks