|
Workspace 7.1.0
|
|
Workspace 7.1.0
|
The workspace-analyse tool is an application that gives, for a given loaded workflow:
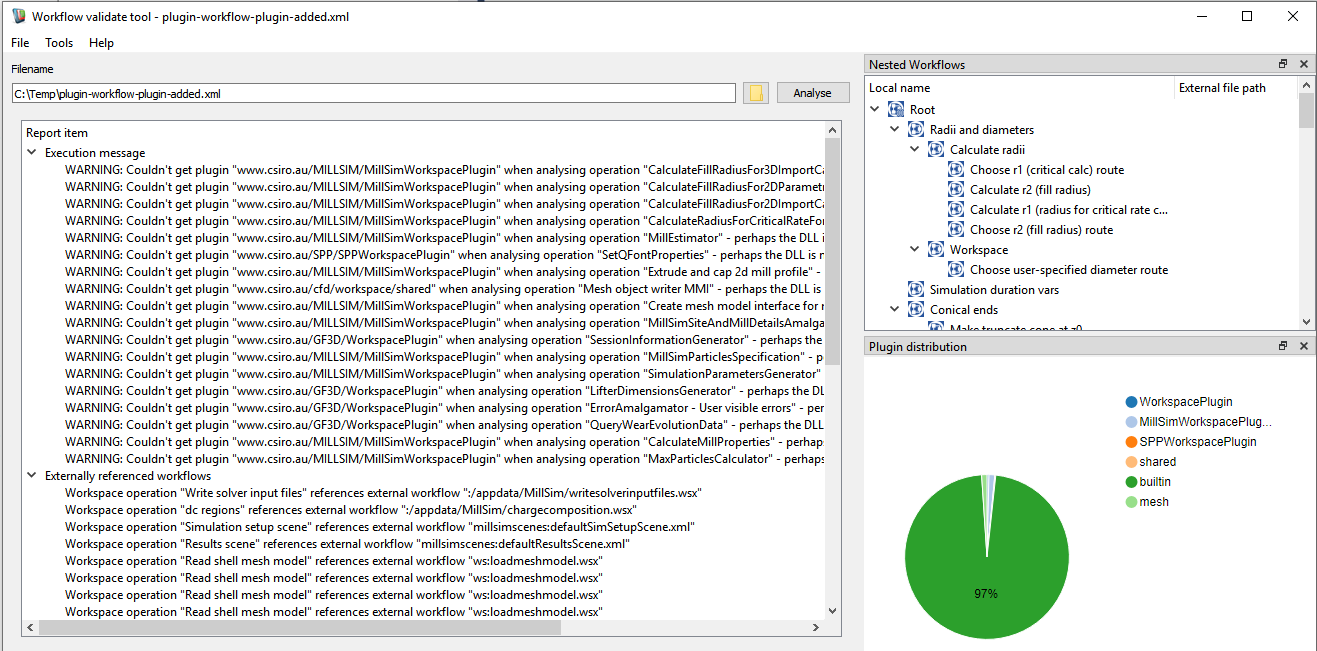
The workflow analysis application is shipped as part of a regular Workspace installation package. You can find it as Workspace analyse in your start menu. Enter a filename and press Analyse. You can also access it inside workspace-editor from the Tools menu (Open Analyse tool). It automatically inserts the current workflow if there is one loaded into the editor, but you need to click on Analyse in order to generate a report.
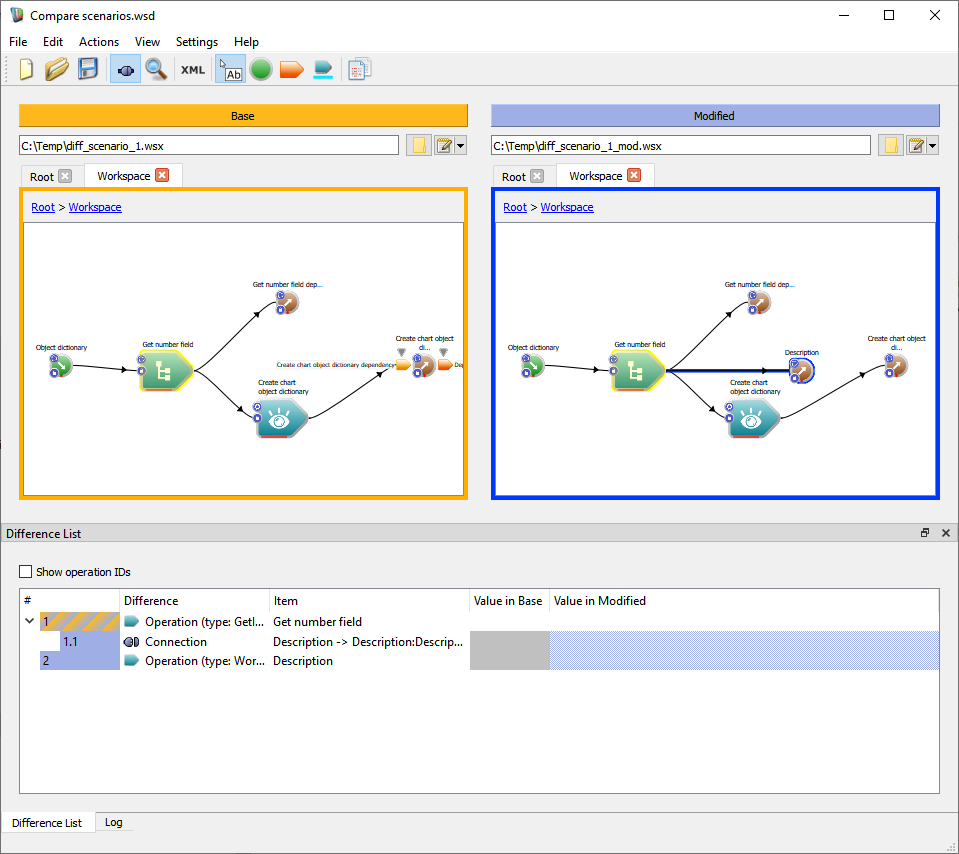
The application workspace-diff is a differencing tool for comparing two Workspace workflows, presenting differences visually so that they are easy to find and comprehend. It is most valuable when used to compare a base file with a modified version of it. The underlying differencing framework operates directly on the file xml code, but the application also displays both workflows in the workspace format so that you can connect the differences to the operations in a familiar format.
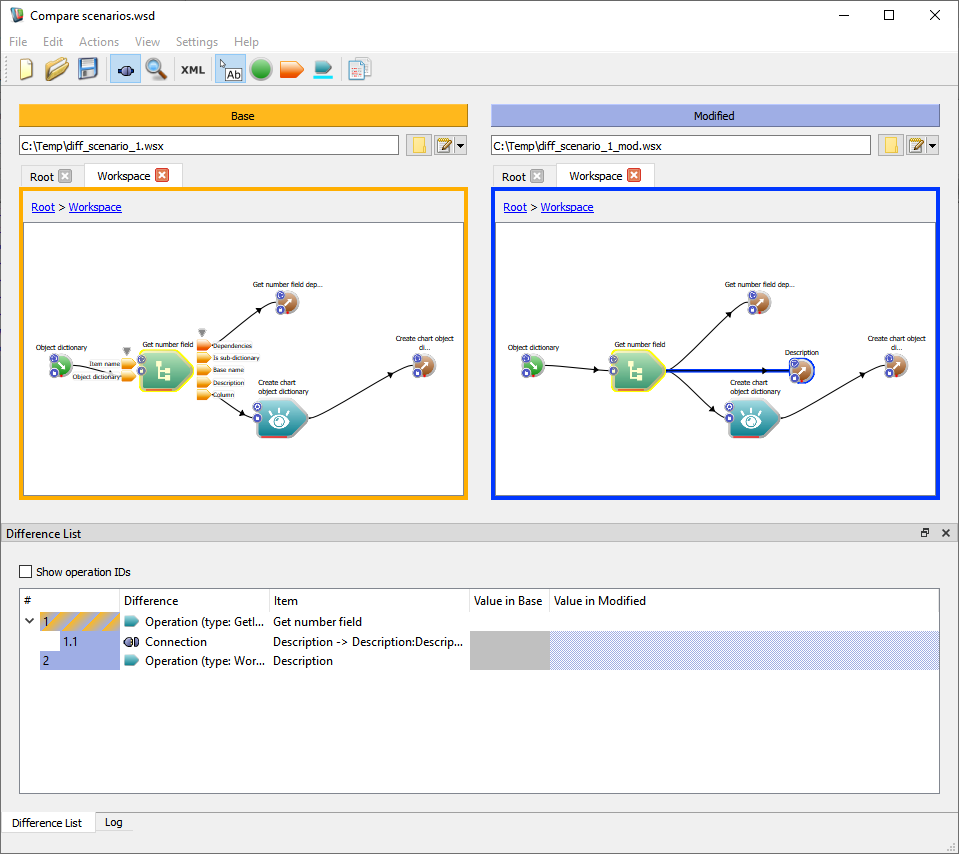
The differences are presented in the Difference List window. Here is an example.
Notes:
The workflow comparison tool looks for changes in:
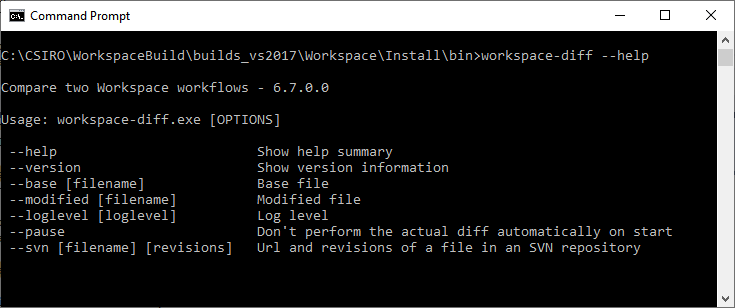
The workflow comparison application is shipped as part of a regular Workspace installation package. You can find it as Workspace diff in your start menu. It can also be run from the command line and integrated into applications that support external diff applications. For an example of such integration, see Configuring TortoiseSVN under Windows
The comparison tool expects a base and a modified file. You can
The Workflow Comparison tool can also be run from the command line
The application workspace-merge is a three-way merge tool for comparing and automatically combining Workspace workflows. Like the comparison tool, it presents differences visually so that they are easy to find and comprehend. It is most valuable when used to compare a base file with two different modified versions of it. The underlying differencing framework operates directly on the file xml code, but the application also displays the workflows in the workspace format so that you can connect the differences to the operations in a familiar format. If the differences are mutually compatible, it will attempt to automatically apply both sets of changes to the designated base file to produce a new workflow which you can save.
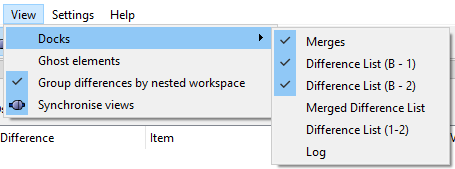
| Merges | Shows a list of the merges that will be applied (plus the option to reject or ignore them individually) |
| Difference List (B-1) | Shows differences between the base workflow and workflow1 |
| Difference List (B-2) | Shows differences between the base workflow and workflow2 |
| Merged Difference List | Shows differences between the base workflow and the final merged workflow |
| Difference List (1-2) | Shows differences between the workflow1 and workflow2 |
| Log | Log window |
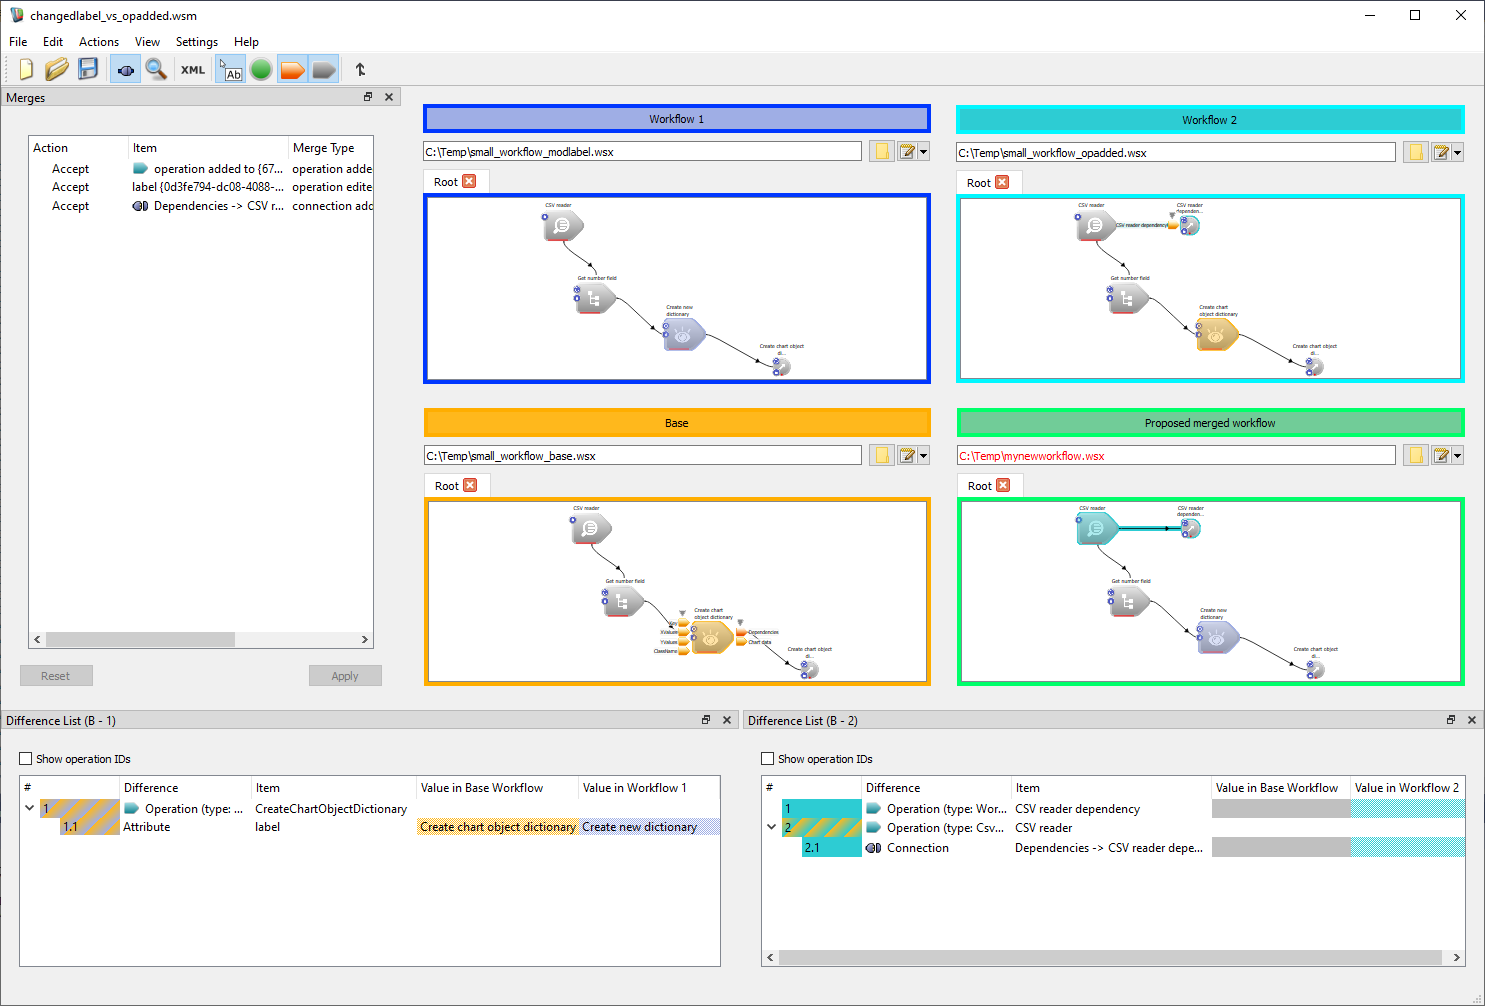
The following is an example of a large workflow with lots of nested workflows. The base workflow is missing several connections. Workflow 1 is a copy of the base but has had two explanatory notes added. Workflow 2 has had the missing connections added, but an operation and note have been removed from the root workspace. In the figure below you can see the original two modified workflows as well as their respective comparisons to the base . The differences have been grouped by nested workspace, so that it is easier to understand where they are.
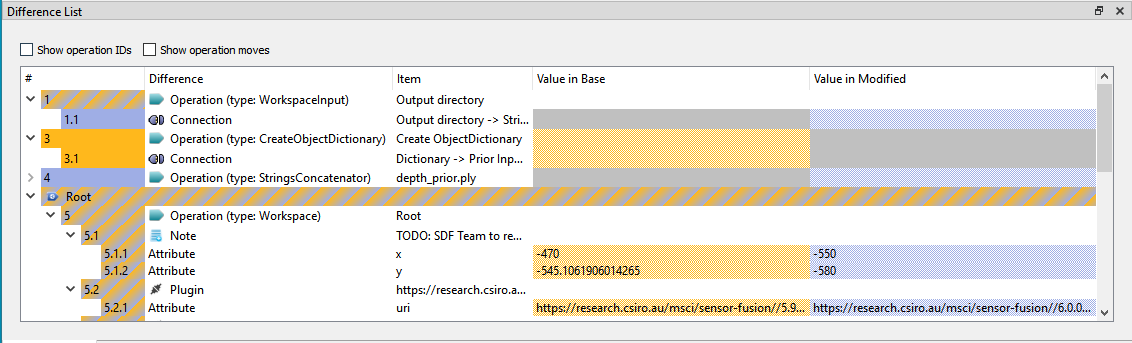
Difference List (B – 1) shows the differences picked up between the base and Workflow 1. There are just two: a note has been added to the Workspace Executables nested workflow and another to the Documentation workflow. You can navigate to either workflow by clicking on the workflow name. Difference List (B – 2) shows the differences picked up between the base and Workflow 2. There are more of these, so just some have been expanded. The solid colour of item 1.1 means that the note is only present in one workflow, and it is gold to signify that it is present in the base (only). Item 12.1 shows one of the connections that has been added to Workflow 2 and you can see attribute changes an input array at item 20.1 (a new array element has been added to hold the new connection). As the two modified workflows did not have any conflicting modifications, the automatic merge was successful. You can see the result in the figure below.
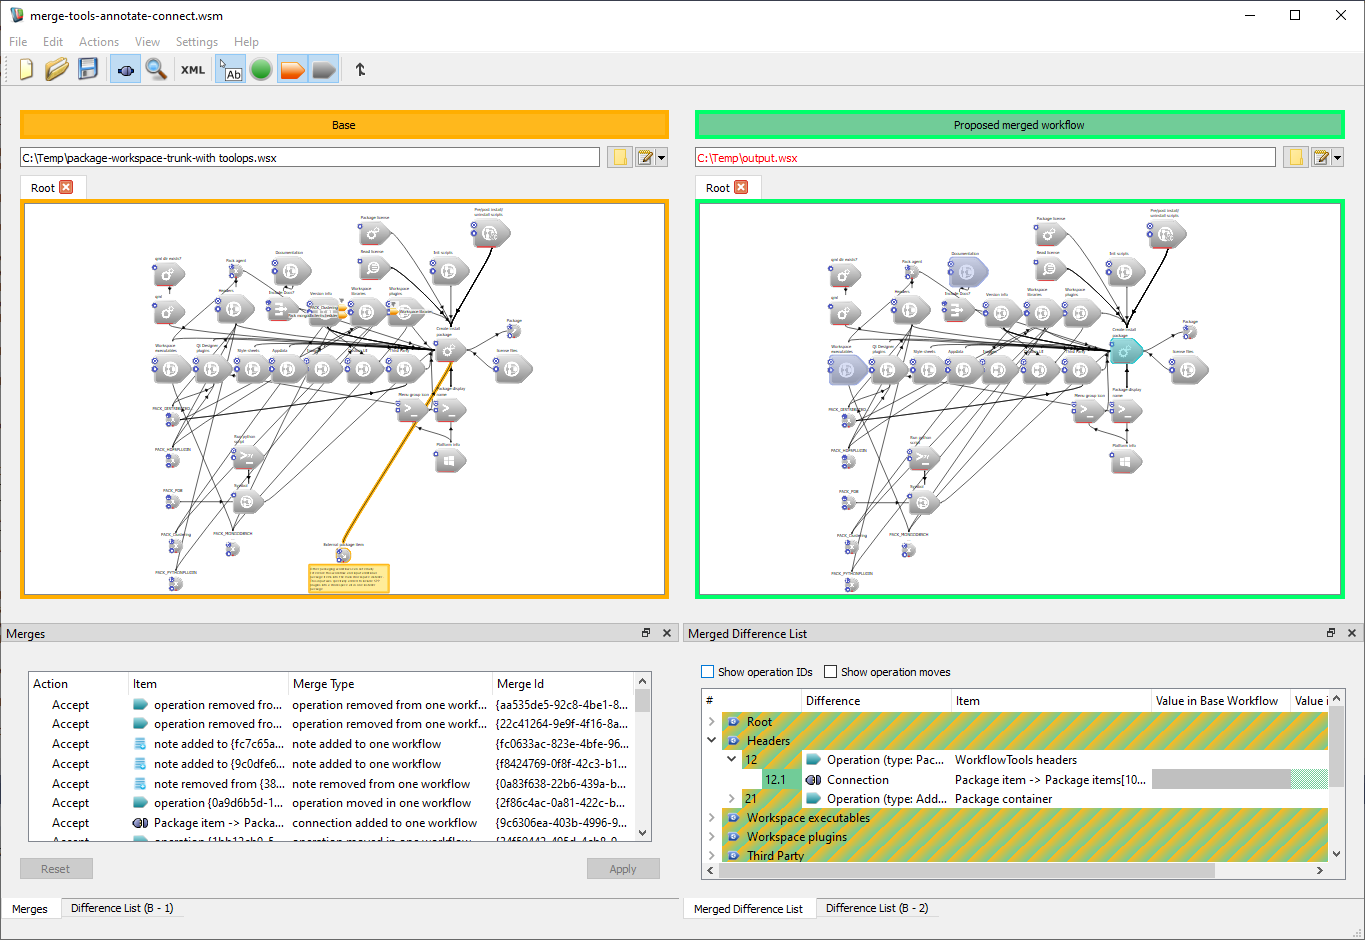
The merged workflow has the annotations, the new connections as well as the removed note. The auto-merge algorithm assumes that anything that has changed is wanted, and currently the user cannot choose a subset of these. The Merges window show the changes that were made: if you click on a row, it will trigger the matching differences to be selected in the difference trees and workspace widgets. Note that connections changed from one input array index to another are shown as pairs of connections added and removed.
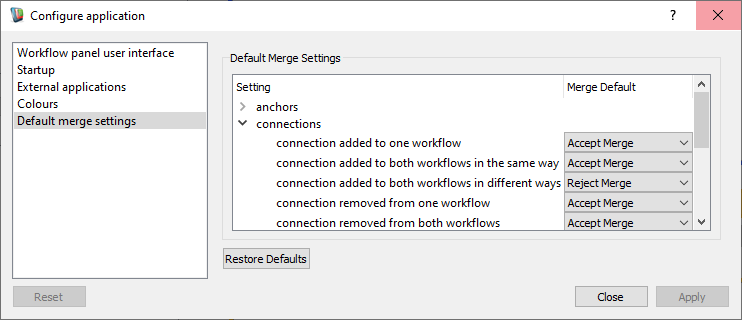
The differencing engine is the same as used by the comparison tool, so the same set of differences will be displayed. However, not all differences can be automatically merged into a new workflow. In general, if something is added/removed/changed in only one of the workflows, or identically in both workflows, and it can be practically merged, it will be. You can see what the result of an automatically merged workflow would be in the Merged Difference List and Merged Elements dock windows. Note there is currently no way for the user to influence result other than automatically rejecting merges that it would otherwise effect.
The workflow merge application is shipped as part of a regular Workspace installation package. You can find it as Workspace merge in your start menu. It can also be run from the command line and integrated into applications that support external diff applications. For an example of such integration, see Configuring TortoiseSVN under Windows
If you specify a file name under Proposed merged workflow then a successful auto-merge will create or overwrite this file. If this has not been set when the merge is run, then set it and then run Apply merge from either the Actions menu or the toolbar button.
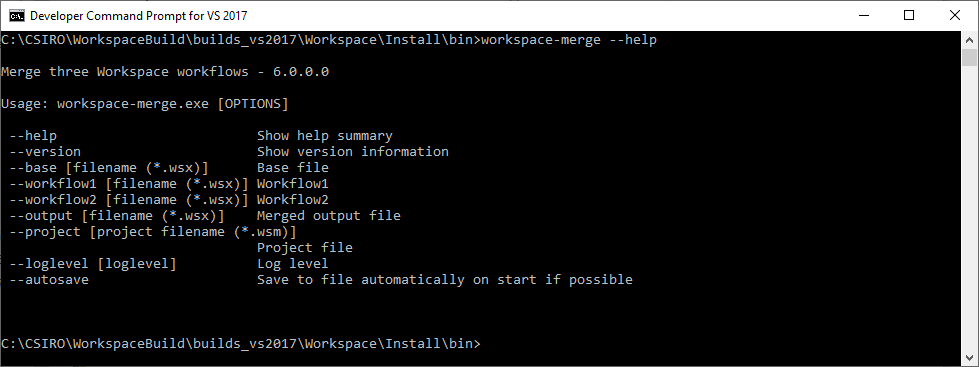
The Workflow Merge tool can also be run from the command line
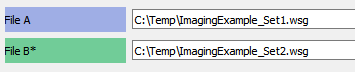
A global name file is an XML-based file that can be created from any Workspace workflow which has had global names assigned. It stores the current values of all the global names and can be reloaded later to overwrite the then-current values. To create a global name file, load your workflow into the workspace editor and select Export global names from the File menu.
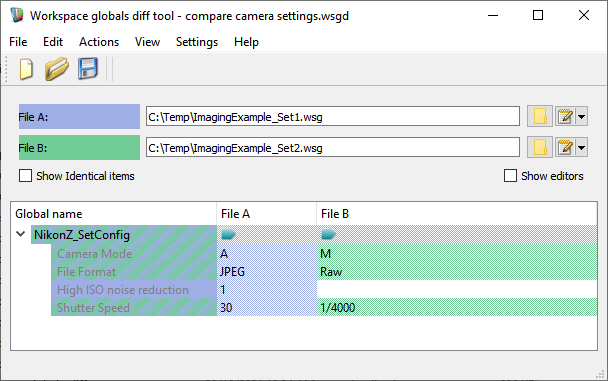
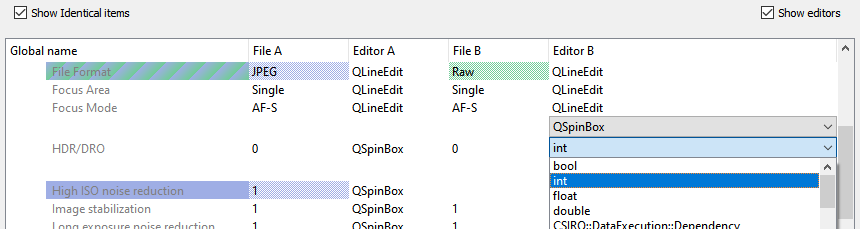
The figure above shows differences between two global name files that were produced by exporting global names from the same workflow at different times. As in the workspace-diff and workspace-merge tools, a solid colour indicates an entry only in one file, and a striped entry indicates an entry that is in both files but has a different value. Global names can stand for single values or more complex ones, even entire operations. In the Global name column, entries in black are global names, whereas entries in grey are other identifiers such as input names. Items can have both global names and identifiers. If you check the Show Identical items box, then all the global names will be shown, even if they have the same values in each file.
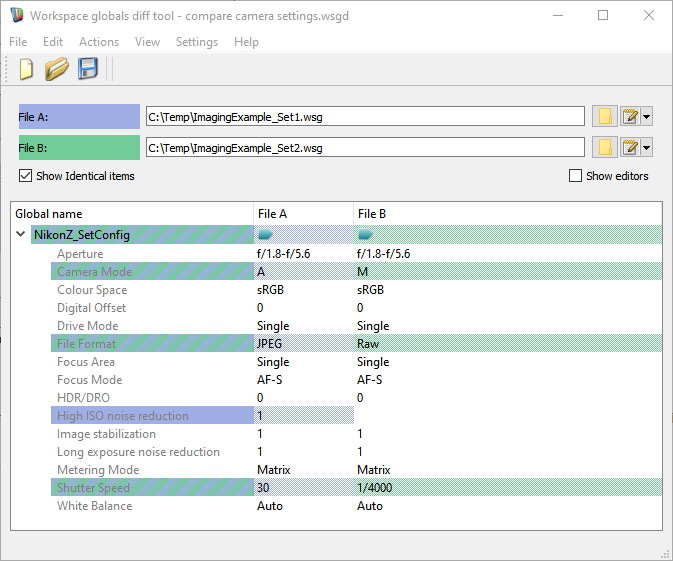
Entries in columns FileA and FileB ay have icons: these indicate the type of element that the global name is attached to. It may be a simple scalar input that can be edited directly, or something more complicated. More complicated types are indicated with an icon as shown in the figure below.
Here, an element associated with a global name had changed (NikonZ_SetConfig). It was a complex element, with multiple sub-elements associated with the same global name. It is striped to indicate that both files included that global name. The File Format global name was set in both files, it was different in each file. High ISO noise reduction had a value only in File A.
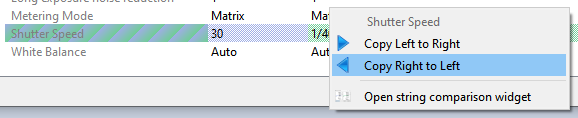
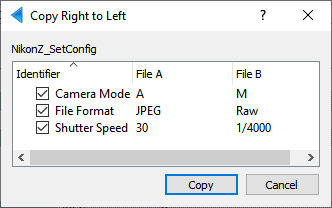
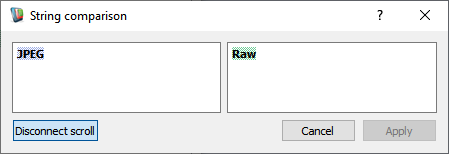
You can use the globals diff tool as an editor, whether you have one or two files loaded. Check the ShowIdentical Items box so that you can see all the itms (not just those that are different in the two files). Entries can be changed by:


As the global name files don't record datatypes, the application infers the data types to be int, uint, double or color based on any values that are set. The default is to assume the value is a string and should be edited with a line edit (or text editor if it is long).
You can see and change the inferred data types and chosen editor widgets if you check the Show editors box. In the case below, the datatype was inferred to be an integer. You can change to a bool or string if you prefer: note that editor changes are not saved when you close or save the file.
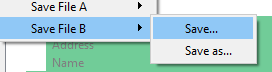
When you change the values, three things happen:
The global variable comparison application is shipped as part of a regular Workspace installation package. You can find it as Workspace global name diff in your start menu. It can also be run from the command line and integrated into applications that support external diff applications. For an example of such integration, see Configuring TortoiseSVN under Windows
The global names comparison tool can also be run from the command line

workspace-analyse-batch is a console command that looks for overt problems in loading or running workflows. Use this to check for warnings or errors generated when the workflow is run as-is. By default, it swallows most the of the log contents and sends a summarised display of the generated log output to the console output. Optionally, you can specify a log file and then all log messages generated will be saved there.
For information about running a Workspace application from a command line and setting up the system path, please refer to the general guidelines given in Running the workflow from the command line .
cmd and clicking run.Applications / Utilities folder in the dock.workspace-analyse-batch --help
Usage: workspace-analyse-batch [OPTIONS] [directoryName]

 --help                         Show help summary
 --version                      Show version information
 --no plugins                   Don't load plug-ins
 --no-user-plugins              Only load the default plugins that ship with Workspace
 --no-settings                  Don't load user settings
 --no-rendering-plugin          Don't load the rendering plugin
 --config [filename]            Specify configuration filename
 --recursive                    Search recursively
 --logFile [filename]           Log full output to file
 --resave-workflows             Resave all workflows
 --run-workflows                Run workflows
 --staticAnalyse                Run static analyse on the specified workflows instead of running them
 --dependencyComponent [component] Print dependencies of the workflow. Works with --staticAnalyse only
 --nameFilters [*.wsx;*.xml]    Name filters separted by ";" (default *.wsx)
 --workflowTimeout [10000]      Workflow timeout (ms)
 --autoAddConfigEntries         Automatically add a workflow configuration entry if it doesn't already exist
 --showRepeatedEntries          Show repeated log messages generated within the same workflow
 --listPlugins                  Print plugin versions
See also Command Line Arguments
Before the workspace-analyse-batch tool loads a workflow, it checks first to see if there is a file called workflow-analyse.config in the workflow's directory, and if so, whether there is a workflow entry corresponding to the workflow in question, and if so, whether there are any audited_logs defined. Whenever a log message is generated, it is first checked against any audited log entries - if it matches an entry, the log message is discarded.
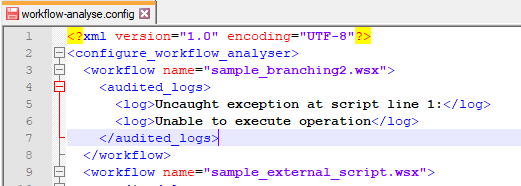
This is used to tell the analyser that a given log message is expected, or OK, and to ignore it. Audited logs must be explicitly set by manually editing the workflow-analyse.config file and creating a log entry. To simplify this process, if you set the autoAddConfig parameter, workflow-analyse.config files will be automatically created with a stub entry for each workflow encountered. (So you can run workspace-analyse-batch once to generate stub entries, add any log entries you want the analyser to ignore, and then run it again)
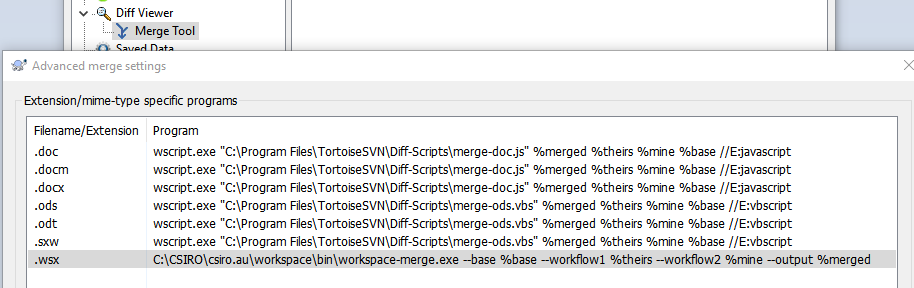
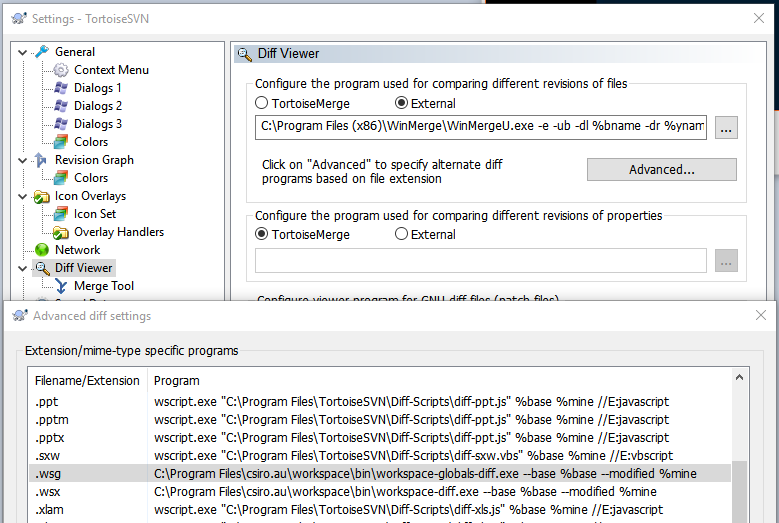
The workflow comparison, workflow merge and global names tools can all be run from the command line, and therefore integrated into applications that support export external diff and merge programs. One such program is TortoiseSVN, and here are instructions on how to integrate the workspace tools into this.
To integrate the diff tools as the default for .wsx and .wsg files respectively, click on the Advanced button and add workspace as the default program with parameters as shown below
To integrate the merge tool as the default for .wsx files, click on the Merge Tool, and then the Advance button and add workspace-merge as the default program with parameters as shown below