Contents
Introduction
Software provenance is the recording of system and component origin along with the history of, the changes to, and the recording of who made the changes. Provenance tracking promotes provable and reproducible research results. Workspace includes operations that help you to record the provenance of your workflows either locally, or remotely via Provenance management system.
In this tutorial, we show you the types of provenance reporting Workspace supports, give an example of local provenance recording and describe how you can save the data to a remote repository.
Just in case you get stuck, a sample workflow has been provided for you.
Construct a base workflow
First we are going to construct and run a base workflow. We will add the provenance operations later (Adding provenance metadata and directions) lets just load a sample workflow base workflow. This workflow loads a mesh, reduces its level of detail, adds texture and visualises it using the rendering operations described in 3D Rendering and Visualisation.
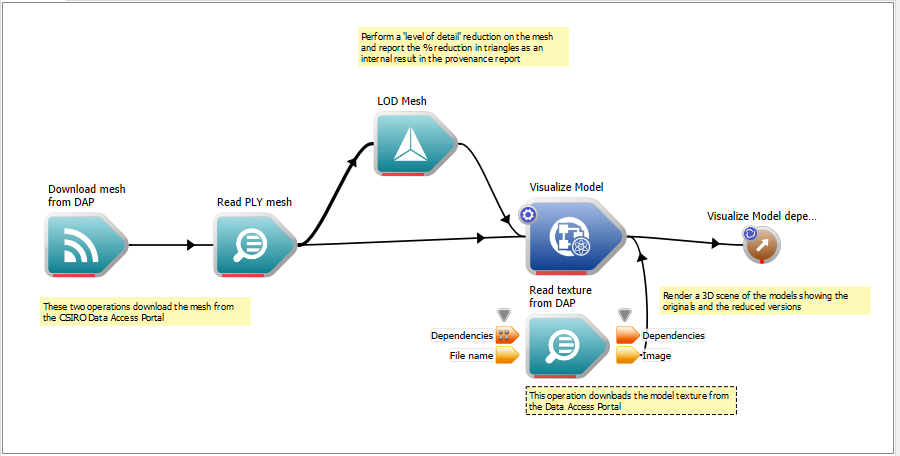
The base workflow downloads and visualises a mesh
- Load the workflow base workflow
- Execute the workflow by clicking on the Enable execution menu item (or its equivalent tool button)
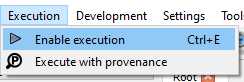
Execute the workflow
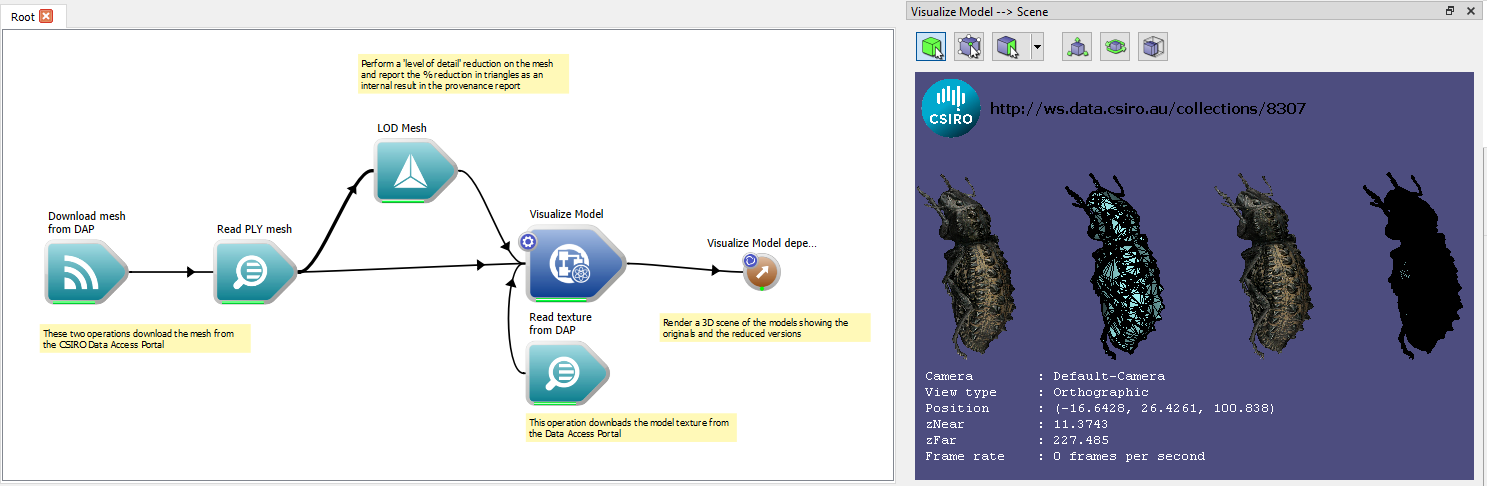
Workflow output
Adding provenance metadata and directions
We want to record two types of data along with the results:
- Static data describing the system that you enter before running the workflow
- Dynamic data, generated during the run according to your directions
To set up the static data, drag a GenerateProvenanceReport operation onto the Workspace canvas. Its Inputs will be prefilled by the system, but you should check that they are correct.
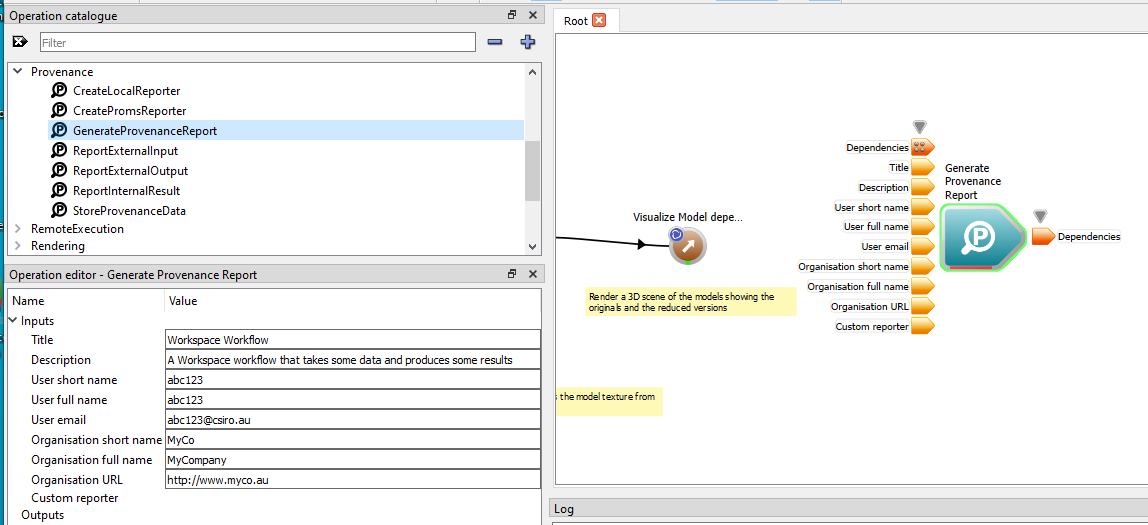
Adding static metadata with a GenerateProvenanceReport operation
Next, we need a Reporter operation to supply details about where the report should be saved. There are two available: CreateLocalReporter and CreatePromsReporter. We are going to save out data on the local drive, so we choose CreateLocalReporter. Note that we do not specify an output path until later (see Running the workflow and generating a provenance report).
- Drag a CreateLocalReporter operation onto the Workspace canvas, and connect its Reporter output to the Custom Reporter input of the GenerateProvenanceReport operation
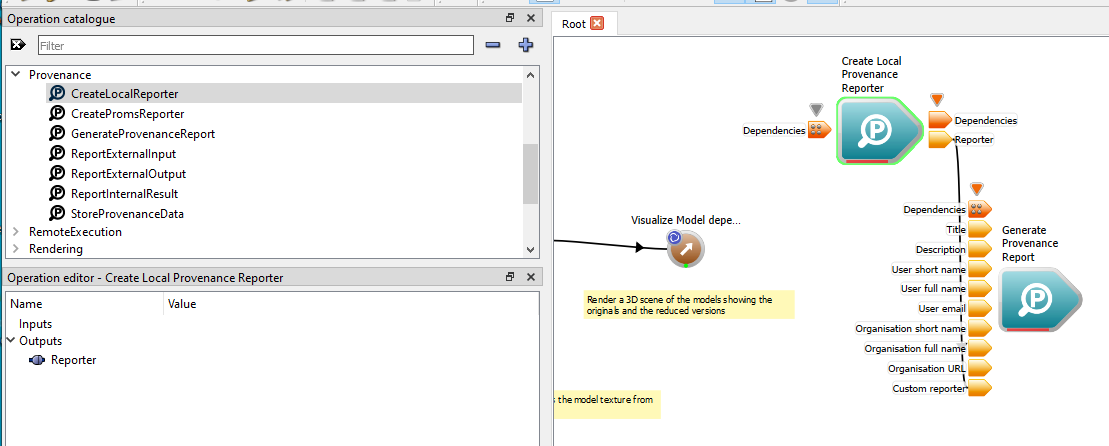
Specifying where the report should be sent
The next step is to specify what data we want to saved. In this example, we are going to save a copy of the image produced, along with some details about it. The provenance operations save details about files, but first we need to create an image file from the visualised data.
- Drag the two provenance operations to the right to give some space for out image-generation operators
- Remove the Visualize Model dependency operation (we will replace it later)
- Drag a WSGL off-screen render operation to the canvas
- Rename it Render results to image
- Connect the Scene output from Visualise Model to its Scene input
- Drag an ImageWriter operation onto the canvas
- Connect the Image output from the rendering operation to its Image input
- Now drag a CreateTemporaryFileName operation onto the canvas
- Set its Use file extension input to png
- Connect its File name output to the File name input of the Image Writer

Add an image writer
We use a StoreProvenanceData to specify that we want the image and metadata saved.
Drag a StoreProvenanceData operation onto the Workspace canvas.
- Connect the File name output from Create Temporary File Name operation to the Store File for Provenance File name input
- Connect the Dependency output of the the Image writer to the Dependencies input of the Store File for Provenance operation
- Connect the Dependency output of the Store File for Provenance operation to the Dependencies input of the Generate Provenance Report operation
- Give the Store File for Provenance operation a Title and Description (use the Operation editor)
- Connect a WorkspaceOutput to the Generate Provenance Report operation
- Save your workflow to a local directory as image_provenance.wsx
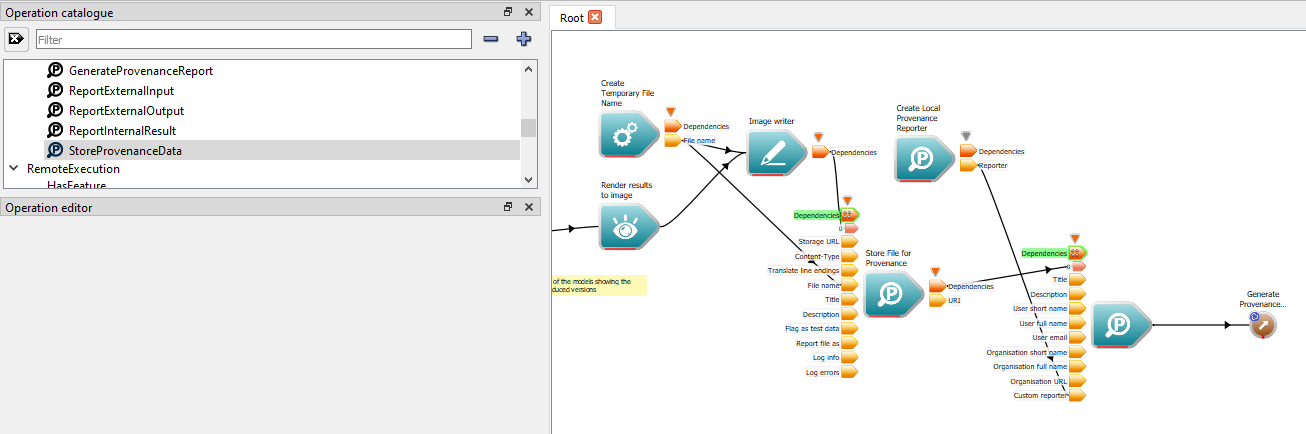
Store a file and its provenance

The full workflow
Running the workflow and generating a provenance report
If you run the workflow now, it will generate an image and a temporary file name and save a copy of the image there. However, it will not generate any provenance data unless you explicitly tell the Workspace editor to do so by checking the menu item Execution-> Execute with Provenence
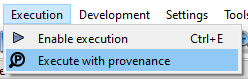
You must check 'Execute with provenance' if you want to generate provenance data
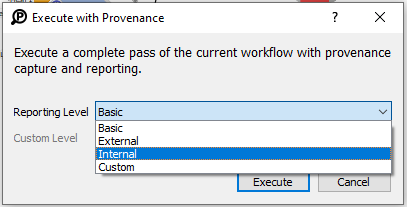
You will be prompted to choose what type of provenance reporting you want: Basic, External, Internal or Custom.
- Select basic
Click Execute
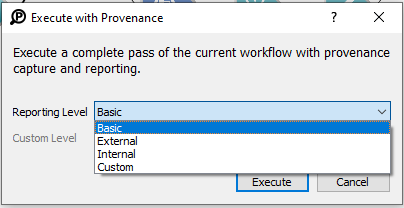
Choose a level of provenance reporting
When the execution is finished, that files are saved to a local directory based on the workflow name. A dialog box will provide a link to this (or cut and paste it fom the log window)
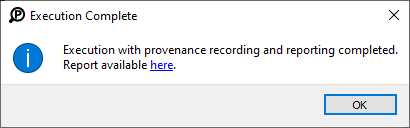
When execution is complete, a link is provided to the provenance files
Workspace will run the workflow as before, generating the image and writing it to a temporary file. It will also generate four provenance files and save them to a directory based on your local home directory and the workflow name eg MyHome/CSIRO/Provenance/image_provenance_b2567e44-8a7c-4a84-8b5d-d5bb9c1ba83f
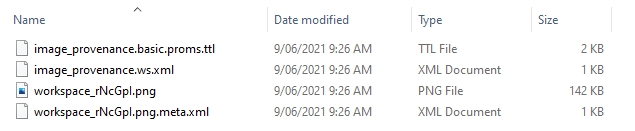
The contents of the provenance directory after executing the workflow with provenance
The new files created are:
- image_provenance.ws.xml General provenance information about the workflow (generated from the GenerateProvenceReport operation)
- workspace_rNcGpI.png A copy of the image (generated from directions in the StoreFileForProvenance operation)
- workspace_rNcGpI.png.meta.xml Provenance information about the image (also generated from directions in the StoreFileForProvenance operation)
- image_provenance.basic.proms.ttl The same information as in the ws.xml file, but packaged for PROMS (see Provenance management system)
image_provenance.ws.xml
<?xml version="1.0" encoding="UTF-8"?>
<provenanceActivity>
<url>file:///C:/Users/oak021/CSIRO/Provenance/image_provenance_b2567e44-8a7c-4a84-8b5d-d5bb9c1ba83f</url>
<organisationFullName>MyCompany</organisationFullName>
<organisationUrl>http://www.myco.au</organisationUrl>
<userFullName>abc123</userFullName>
<userEmail>abc123@csiro.au</userEmail>
<platform>FINITE-EP Windows x86_64</platform>
<title>Workspace Workflow</title>
<description>A Workspace workflow that takes some data and produces some results</description>
<startTime>2021-06-08T23:25:48Z</startTime>
<endTime>2021-06-08T23:26:09Z</endTime>
</provenanceActivity>
workspace_rNcGpI.png.meta.xml
<?xml version="1.0" encoding="UTF-8"?>
<provenanceDataItem>
<title>LOD Image</title>
<description>Image before and after</description>
<view>data</view>
<testData>false</testData>
<type>Output</type>
</provenanceDataItem>
Beyond basic provenance
So far we have learnt how to store system provenance with the CreateProvenanceReport operation, and how to use the StoreProvenanceData operation to store a file used or produced by this workflow as part of the provenance report.
There are three more provenance recording operations you can use:
- ReportInternalResult Reports that the workflow has produced an internal result that is of interest
- ReportExternalInput Reports that the workflow is accessing an external entity for provenance purposes.
- ReportExternalOutput Reports that the workflow has produced an external entity for provenance purposes.
We are now going to add a report on the LOD Mesh operation's Reduction % output by adding a ReportInternalResult operation to our workflow. Drag a ReportInternalResult operation from the Operation catalogue onto the Workspace canvas
- Rename it Report LOD result
- Use the Operation editor to set its Description input to "Mesh reduction % (0->1)"
- Connect the LOD Mesh operation's Reduction % output to the Report LOD Result operation's Result input
- Connect the Report LOD Result operation's Dependency output to the Render results to image Dependencies input
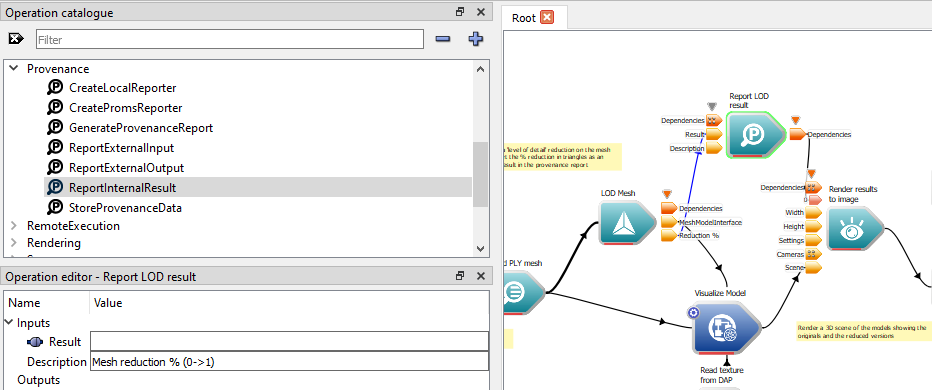
Add a ReportInternalResult operation to report on the LOD reduction
If you execute with basic provenance, the internal results will not be shown. To see all the results, select Execute->Execute with provenance as before
- Select Internal
- Click Execute
Creating a provenance report that includes internal results
A new set of files will be created in a new directory based on your local home directory and the workflow name as before.

The contents of the provenance directory after executing the workflow with internal provenance
Ignoring the new temporary file suffixes, the new files are shown below. The two ttl format files are created so that they can be by a CreatePromsReporter operation (Provenance management system)
- image_provenance.external.proms.ttl
- image_provenance.internal.proms.ttl
- image_provenance.wsx A copy of the workflow
The changed files are: image_provenance.ws.xml and image_provenance.basic.proms.ttl
image_provenance.basic.proms.ttl has not changed much; the run-times and filenames are updated but the new records are largely carried in the new ttl files image-provenance.ws.xml however, is now a large file that records the plugins used and the timing of operation execution steps as the workflow ran. The LOD Mesh Reduction % output value is recorded just after the record of the LOD Mesh operation execution
28 <
executeOperation accessTime=
"2021-06-09T01:50:18Z" title=
"Root" value=
"f9564bf3-453a-4009-953a-d9971777876a"/>
29 <
executeOperation accessTime=
"2021-06-09T01:50:18Z" title=
"Create Temporary File Name" value=
"5bd7c09d-c771-4aa8-aaa9-011984f5c21e"/>
30 <
executeOperation accessTime=
"2021-06-09T01:50:18Z" title=
"Download mesh from DAP" value=
"986c1798-497d-4257-b0d0-7536997eff42"/>
31 <
executeOperation accessTime=
"2021-06-09T01:50:27Z" title=
"Read PLY mesh" value=
"d2dc297b-b363-48a1-8c08-be3a669bb9a1"/>
32 <
executeOperation accessTime=
"2021-06-09T01:50:29Z" title=
"LOD Mesh" value=
"99f8a0e8-9145-4a63-992a-f4e6e97a4398"/>
33 <
executeOperation accessTime=
"2021-06-09T01:50:34Z" title=
"Report LOD result" value=
"85b55218-9f9c-4cb5-b775-2412c8f60162"/>
34 <
internalResult accessTime=
"2021-06-09T01:50:34Z" title="
Mesh reduction % (0-&
gt;1)
" value="0.75171
"/>
35 <executeOperation accessTime="2021-06-09
T01:50:35Z" title="Read texture from DAP" value="76
ccaa2d-57a7-4915-8039-a68793b8d8ad"/>
36 <executeOperation accessTime="2021-06-09
T01:50:35Z" title="Get file" value="ca227865-3cd1-4637-968b-2a59a5a0d1cd"/>
37 <executeOperation accessTime="2021-06-09
T01:50:38Z" title="Visualize Model" value="e4885daa-8c0e-4d1c-aa86-5b21362608cd"/>
Provenance management system
The Provenance Management System (PROMS) is a collection of tools and methodologies for managing provenance information. PROMS is managed jointly by CSIRO and Geoscience Australia. PROMS Server is an server and API used to manage provenance information. It is available as code (a Git repository) which can be cloned and implemented. See PROMS If you have access to a PROMs server, you can replace the CreateLocalReporter with CreatePromsReporter operator and save the provenance report remotely.
Summary
This concludes the tutorial on adding provenance recording to your workflows. You should now know how to:
-Add local provenance directives to your workflows -Execute the workflows and generate the provanence reports
A sample workflow for this tutorial can be found here.