Contents
Introduction
Sometimes you might want to reuse an existing nested workflow in order to repeat the same work elsewhere in your workflow. You can of course duplicate your nested workflow by the copy and paste method but this creates maintenance overhead. Consider the scenario where you wish to modify your nested workflow, you may need to manually update each copy of that nested workflow. Workspace provides a better method by allowing you to create references to external workflows that live in a seperate file.
In this tutorial, we show you how to create and use an externally referenced workflow. For this example we will create a nested workflow that writes a timestamp to the log which may be useful for keeping track of when sections of a workflow have been executed.
Just in case you get stuck, a sample workflow has been provided for you.
How to reuse workflows by externally referencing them
- Ensure you have a new empty workflow in the Workspace editor.
- From the Operation catalogue, add a Workspace operation to the canvas and set its label to Log with timestamp.
- Double click on the Workspace operation to view its contents in another tab.
In this nested workflow, we'll add a GetCurrentTime operation and we'll set its Format input string to be 'yyyy-mm-dd hh:mm:ss '.
- Note
- Take care to remember the space at the end of the Format input string.
Add a WorkspaceInput operation and set its data type to QString
- Note
- You change the data type from the operation properties dialog by click on the round indicator button on the top left hand side of the operation box.
- Add a ConcatenateStrings operation to the canvas.
- Connect the output string of the GetCurrentTime operation to the ConcatenateStrings operation.
- Connect the output string of the WorkspaceInput operation to the ConcatenateStrings operation.
- Add a LogText operation to and connect it's input to the output of the ConcatenateStrings operation.
- Create a WorkspaceOutput operation which is connected to the LogText operation.
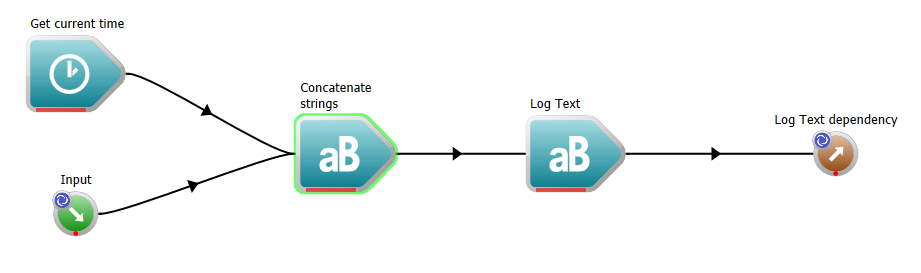
The nested time stamp workflow
- Click on the Root tab to view the top-level workflow.
- Right click on the Input of the Workspace operation and then select Create variable.
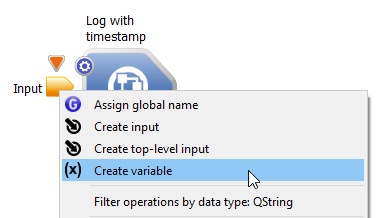
Creating a Variable operation
- Change the Variable operation's label to "My special value".
- Set the Variable's input field to an important value such as 42.
- Finally, create a WorkspaceOutput operation attached to the Output of the Workspace operation.
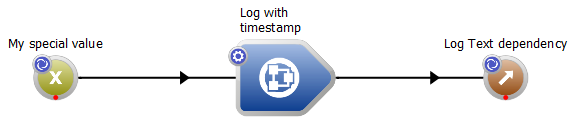
Completed top-level workflow
When you execute your workflow, you should get similar log output to the following:
2017-28-18 13:28:58 42
Workspace execution completed. Execution time = 0.023 seconds
Let's make a copy of this workflow so that we can print two time stamps
- Select all the operations and, using the copy and paste commands, duplicate the workflow.
- Rename the duplicate Variable operation to "My other special value" and set this operation's input value to be Cloned 42.
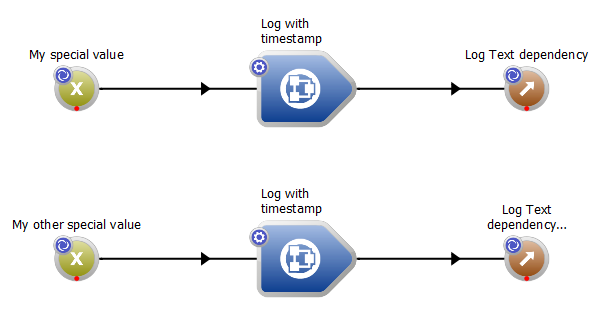
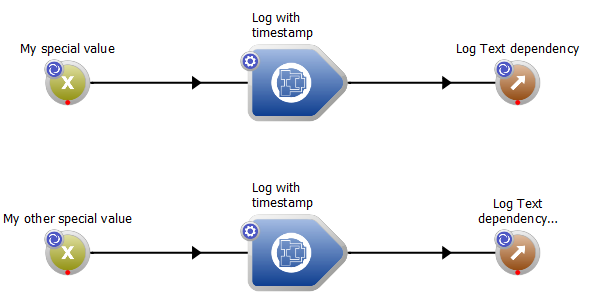
Duplicated workflow
Ensure that all your operations are reset and then execute your workflow. Your log window should print something similar to the following:
2017-51-18 13:51:00 42
2017-51-18 13:51:00 Cloned 42
Workspace execution completed. Execution time = 0.051 seconds
Did you notice that in the month field is incorrect? The field is actually printing out the minutes value. Sorry, but that was a deliberate error to demonstrate the painful scenario that we now find ourselves in by copying and pasting! To fix this error, we now have to go in to each workflow and fix the Format input value to use 'yyyy-MM-dd hh:mm:ss '. This is a trivial example but imagine if we had to correct several such copies! The agony!
This is where externally reference workflows come to the rescue.
- First, let's save the top-level workflow to disk.
- Right click on the the first nested workflow and select the Save as external workspace option. This will save the nested workflow as a seperate file which we can then reference within the top-level workflow.
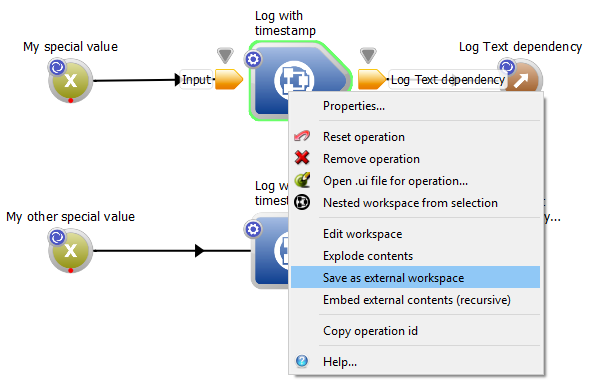
Save a workflow as external workspace
We'll save this external workflow as sample_logwithtimestamp.wsx and in the same location as the top-level workflow.
After saving, Workspace will ask you if you want the top-level workflow to use a reference to the external file. Click Yes'.
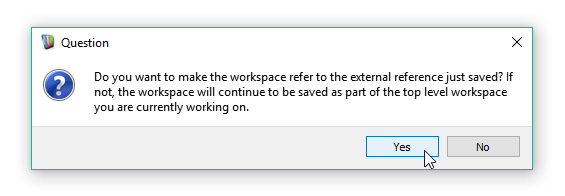
Prompt to use reference
Note that the icon of that Workspace operation changed slightly after becoming a reference to an external workflow.
A reference to an external workflow has a different icon
We can also check the URL path to the external workflow in the Workspace operation property dialog
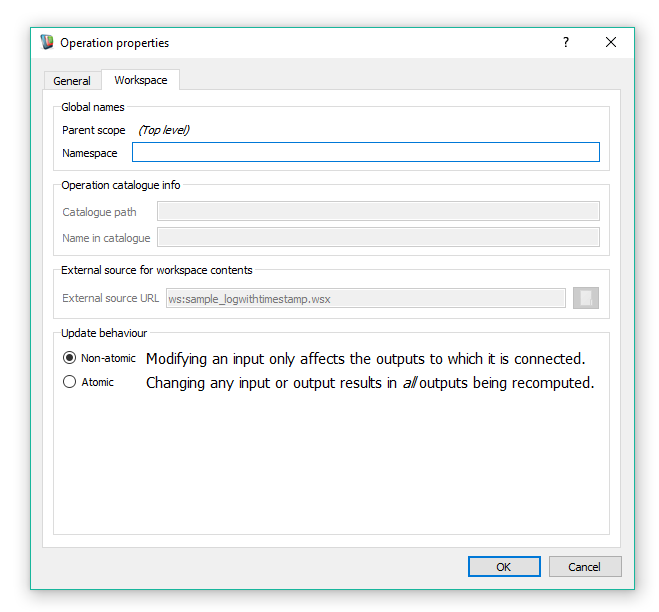
External source URL
- Note
- You can only change the URL path when the Workspace operation is not connected to other operations within the workflow.
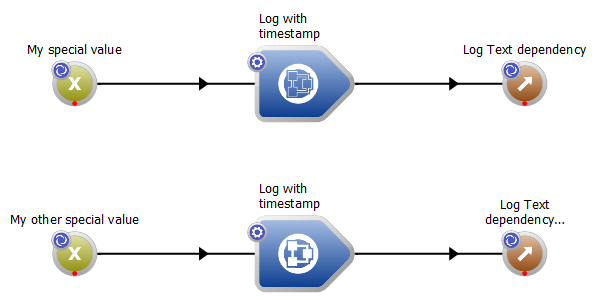
Let's now replace the copied nested workflow to so that both nested workflows are externally referenced.
- Select the second Workspace operation and delete it.
- In its place, copy and paste the first Workspace operation and reconnect it to as before.
Both nested workflows are now externally referenced
The last thing we need to do is to actually fix the bug that we found in our nested workflow which we're now externally referencing.
- Double click on one of the nested workflows.
- Your canvas should be greyed out indicating that you can not modify this workflow as it lives in a seperate file. We can open this file by using the shortcut on the top of the canvas area.
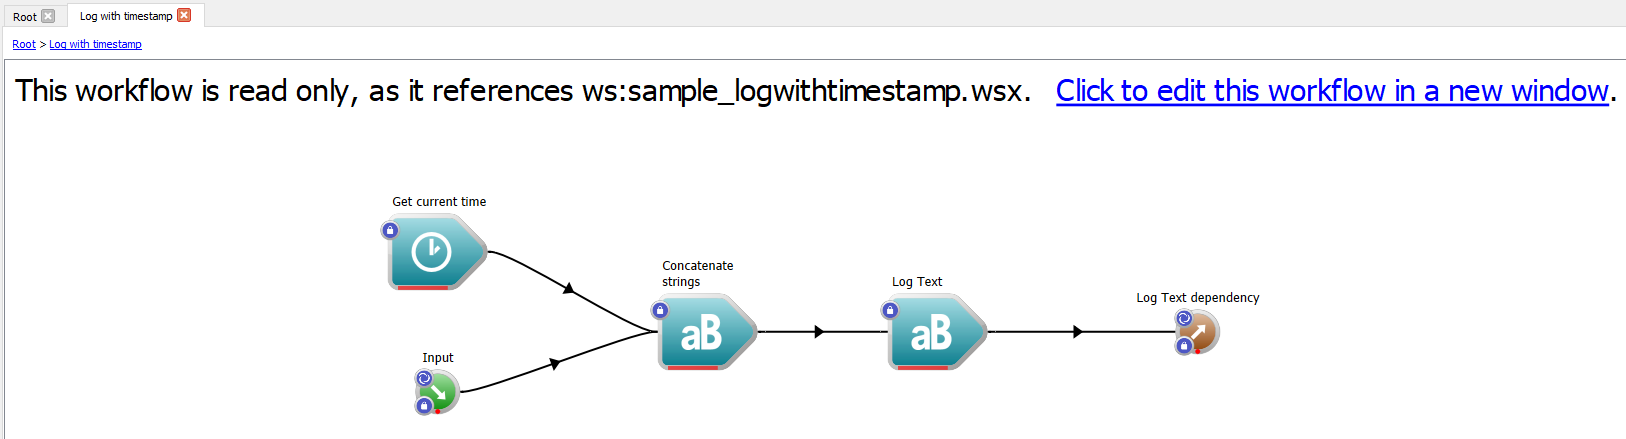
The view of the externally referenced workflow
A second instance of the Workspace editor will be launched where you can edit the external workflow.
- On the GetCurrentTime operation, set the Format value to 'yyyy-MM-dd hh:mm:ss '.
- Save the workflow and you can now close this second instance of Workspace editor.
- In the first instance of Workspace editor where the top-level workflow is opened, you will need to close that workflow and re-open it to 'reload' the changes that were made in the external workflow.
- When you execute the top-level workflow, you should now get the log messages printed correctly
2017-08-18 15:16:05 42
2017-08-18 15:16:05 Cloned 42
Workspace execution completed. Execution time = 0.032 seconds
Making an external workflow available in the Operation catalogue
For workflows that you're frequently reusing, it may be convenient to make them available in the Operation catalogue.
- First open your workflow in Workspace editor and right click the root node in the Workspace tree.
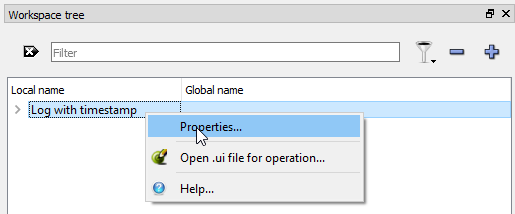
Accessing properties of the top-level workflow
- Set the "Catalogue path" to MyToolBox/Log, and "Name in catalogue" to LogWithTimestamp
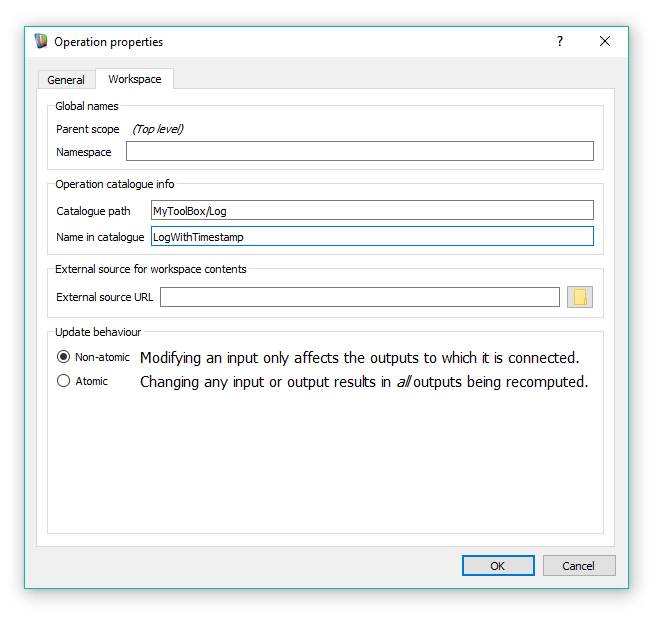
Set the catalogue path and name
- Note
- You can use the slash '/' to neatly organise your reusable workflows in a logical heirarchy and to avoid naming collisions.
- Open "Configure application" dialog from the menu "Settings".

Open "Configure application" dialog
- Add your workflow to the list in "Workspace collections", click 'Apply' and 'Close'
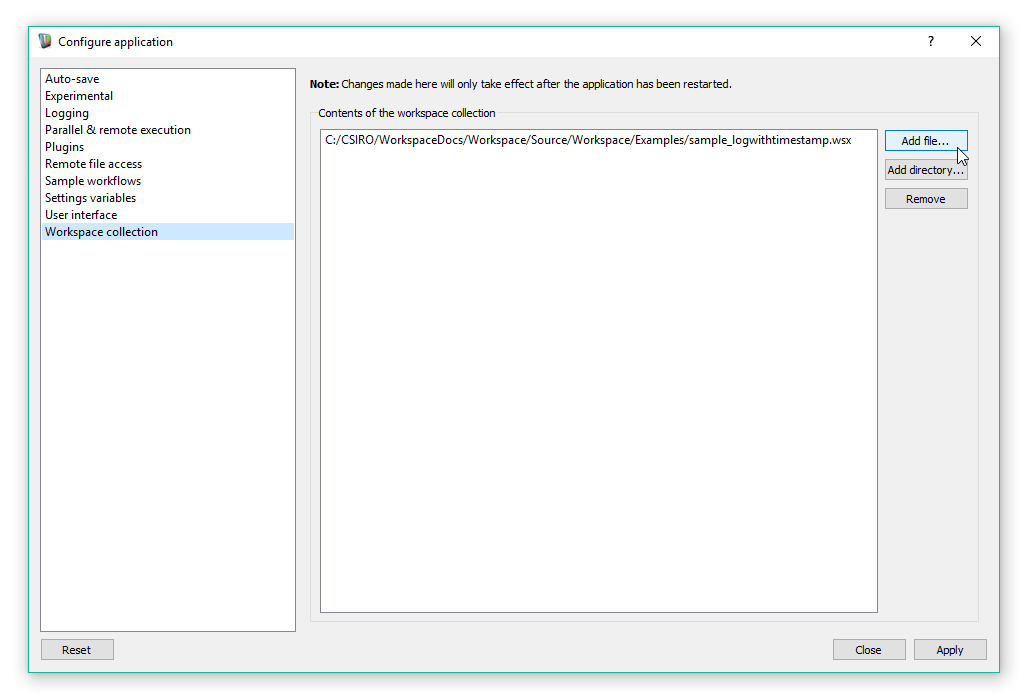
Workspace collection
- Now when you restart the Workspace editor you should be able to find your workflow in the Operation catalague.
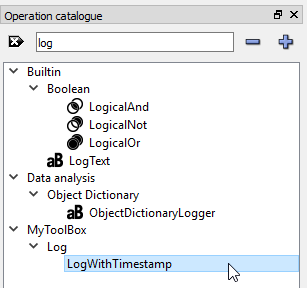
The workflow is now available from the Operation catalogue
Congratulations! You can now reuse your own workflows as easily as operations.
Summary
This concludes the tutorial on using external workflows. You should now know how to:
- Create an external workflow
- Reference an external workflows within a top-level workflow
- Add your own workflows to the operation catalogue
A sample workflow for this tutorial can be found here. The external time stamp workflow used in this tutorial can be found here.