Introduction
In this tutorial, we will learn how to write a basic Workspace operation, and add it to our simple plugin that we created in the previous tutorial, Writing a Simple Workspace Plugin. By the end of this tutorial, you will:
- Know how to use the built-in code wizard to create a Workspace operation
- Understand the code behind a Workspace operation
- Have added your new operation to a workflow
Contents
Sample files used and modified in this tutorial
Using the "Create Operation" code wizard
In the previous tutorial, we used the Workspace code wizard to generate the code for our Workspace plugin. In this tutorial, we're going to use the Create Workspace Operation wizard to add an Operation to our simple plugin. Specifically, we're going to create an operation that calculates the area of a rectangle. To start the wizard:
- Navigate to the
Development menu and select Create workspace operation...
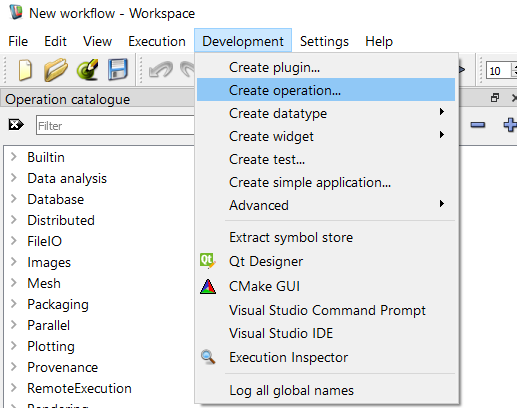
Finding the code wizard
- A window will be displayed that looks like this:
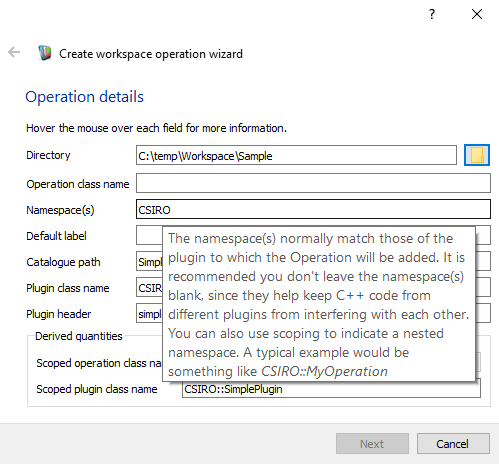
The create operation wizard
We can use this code wizard to generate the skeleton code required for a Workspace operation. Let's start by filling out the fields on the form:
- Directory: The directory in which our operation source files will be created. Point this to the same location that your plugin source is located.
- Operation class name: The C++ class name for our new operation. We will call ours "CalculateRectangleArea", normally most operation names start with a verb and do not contain any spaces.
- Namespace(s): The namespace used for the class. We will use
CSIRO as we did in the previous tutorial.
- Default label: The label that will be displayed on instances of the operation when they are added to a workflow. We will set ours to
Calculate rectangle area
- Catalogue path: The path in the Operation Catalogue that contains the operation. We will put ours in a folder called
Simple plugin
- Plugin class name: The fully-scoped name of the plugin class that will contain this operation. We're going to use the plugin we created previously,
CSIRO::SimplePlugin.
- Plugin header: The header that contains the definition of the containing Workspace plugin. Again, we refer to the file we generated in the previous tutorial:
simpleplugin.h
- Note
- At any time you can check the purpose of these fields by hovering over them with the mouse and reading the tooltips (as shown above).
Our form will now look something like this:
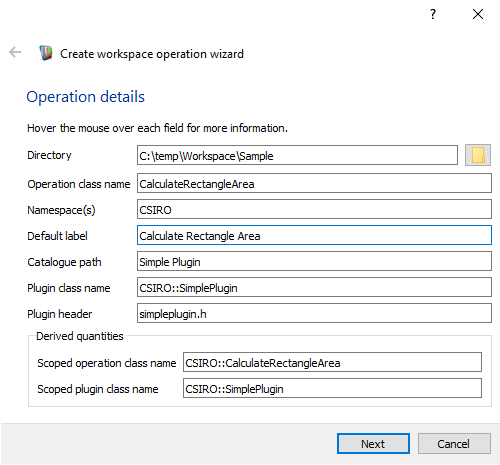
Our values entered into the wizard
If we now look at the bottom of the plugin wizard, we will see some derived values. Workspace is showing us the name of the scoped class name of the new operation, as well as the scoped class name of the plugin that it is going to add it to. Next:
- Click the Continue or Next button
The wizard will now show a screen for creating our operation's inputs and outputs.
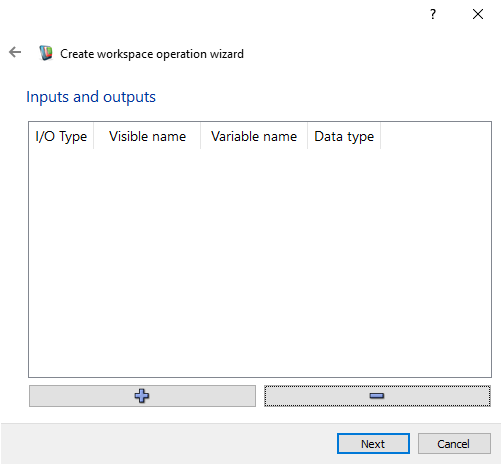
The inputs / outputs screen in the wizard
For our simple operation, we are going to calculate an area by multiplying two doubles. So let's create two scalar double inputs, and an double output:
- Click the plus button three times. This will create three rows in the table, each of them of type 'Scalar input'
- Change the Type of the third row to "Output"
- Change the Visible name of the first row to "Width", the second row to "Height" and the third row to "Area". The visible name is the name that users will see on the Workspace canvas when users are looking at the inputs / outputs of our operation.
- Change the Variable name of the first row to "width", the second row to "height" and the third row to "area". The variable name is the name that is used to represent the input and its data in the C++ code.
- Change the Data type of all three rows to 'double'. The form should now look like this:
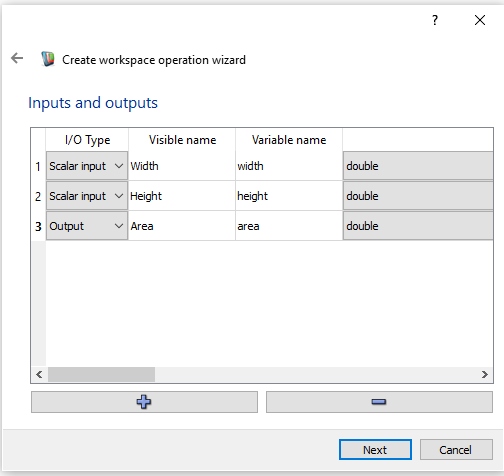
The inputs / outputs screen populated
- Click Continue or Next
As we did with the plugin wizard, we now get to select a copyright notice.
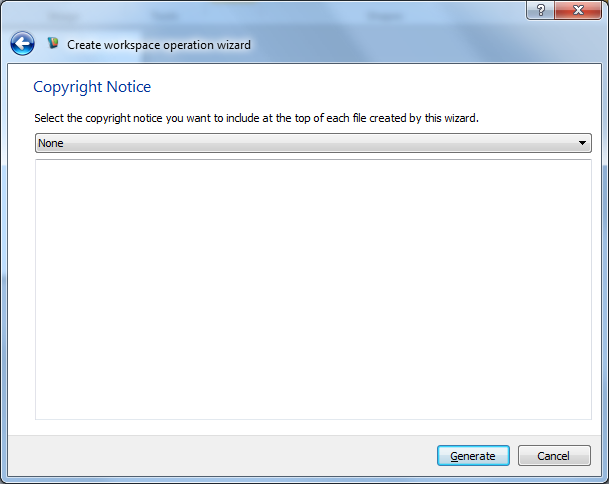
Select none for this tutorial
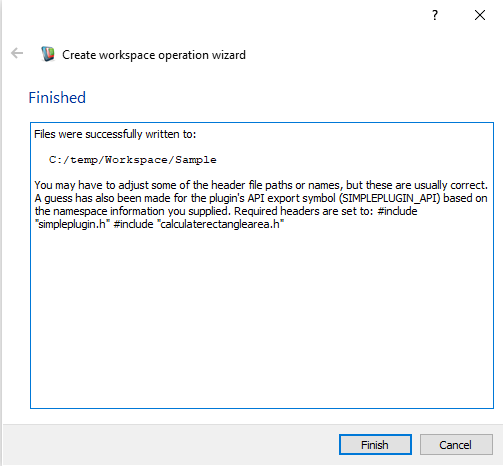
Create operation finished
Workspace will now generate the code for our new operation and place it in the directory that we selected earlier (the same directory into which we generated our plugin). If you navigate to this directory, you'll see that it has the following contents:
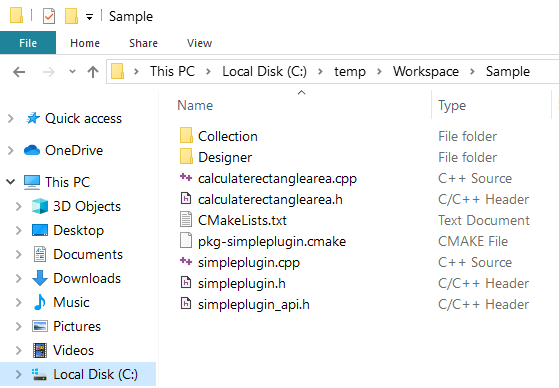
The contents of the plugin directory after generating the operation
For more details about the code generated, see Writing a Workspace Operation - looking at the code or click on one of the links to individual files below.
The new files added are:
- calculaterectanglearea.h This file is the C++ header for the new operation we created. It contains the class declaration for the operation as well as a few other things.
- calculaterectanglearea.cpp This file is the C++ source for the new operation we created. It contains the class definition for the operation.
Changes were made to the following files: simpleplugin.cpp and CMakeLists.txt
Customising the generated code
We now need to edit the autogenerated calculaterectanglearea.cpp file so that it does what we want it to. To do this, open the file in Visual Studio, and navigate to the execute function. In our case, we want it to multiply the width by height and return the answer as the area output. So we add the following line of code to the execute function:
So that it looks like this:
bool CalculateRectangleAreaImpl::execute()
{
const auto& width = *width_;
const auto& height = *height_;
auto& area = *area_;
area = width * height;
return true;
}
For more information about this structure of this file, see calculaterectanglearea.cpp
Creating and running a simple test workflow
Now you should stop the Workspace editor, recompile the Simple plug-in (see the steps in the last tutorial) and restart the Workspace editor. Again the plug-in should automatically load and now the operation should be in the Operation catalogue. As an exercise for the reader, you could now create a simple "workflow" and execute it to see how your operation works.
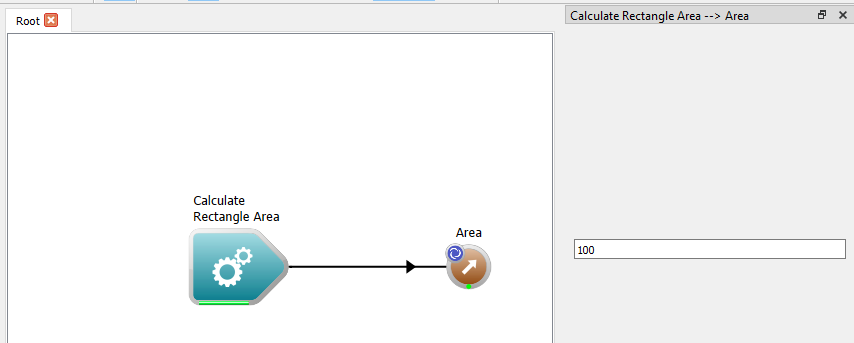
Running a simple workflow with your Operation
Summary
This tutorial has introduced you to the essential elements of adding a new operation to your Workspace plugin. The main points to remember are the following:
- Workspace operations are always a subclass of Operation . The subclass constructor tells the base class what factory to use and what default label to give to new instances of the operation.
- Data objects in Workspace are usually instances of SimpleInput<X> or SimpleInputArray<X> or SimpleOutput<X> where
X is the underlying class of the object.
- Inputs (InputScalar and InputArray) and Outputs wrap DataObjects, giving them a name and making them available to Workspace to use.
- The heart of a Workspace operation is its
execute() function. Any inputs or outputs added to your operation will already have valid data when execute() is called, so all you need to do is use the data objects you defined for the inputs and outputs as though they were pointers and return a true or false value when you are done to indicate whether the call to execute() succeeded or failed.