Introduction
Enums provide a handy way of providing calling code and users with a discrete set of well defined options. In Workspace, it is often necessary to expose enums as datatypes so that they can a) be passed around workflows as data and b) be interactively specified by users in the user interface.
In this tutorial, we are going to create a simple "Priority" enum that specifies values as "Low", "Medium" or "High".
By the end of the tutorial we will:
- Understand how to use the "create custom enum" wizard to generate our enum code
- Understand how enums differ from other integral datatypes like int and double
- Understand the Workspace code required to define and use enums correctly
Contents
Using the "Create Custom Enum" code wizard
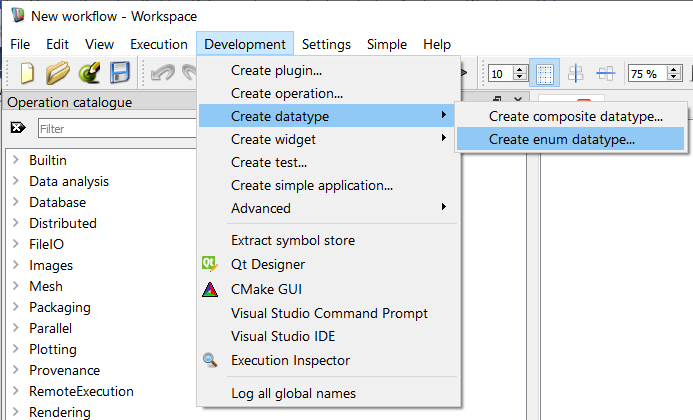
In previous tutorials, we used Workspace code wizards to generate the code for data types, operations and widgets. In this tutorial, we're going to use the Create Enum Datatype wizard to add a simple enum to our plugin. To start the wizard:
- Navigate to the
Development menu and select Create workspace datatype > Create enum datatype...
Finding the code wizard
- A window will be displayed that looks something like this:
The create custom enum wizard
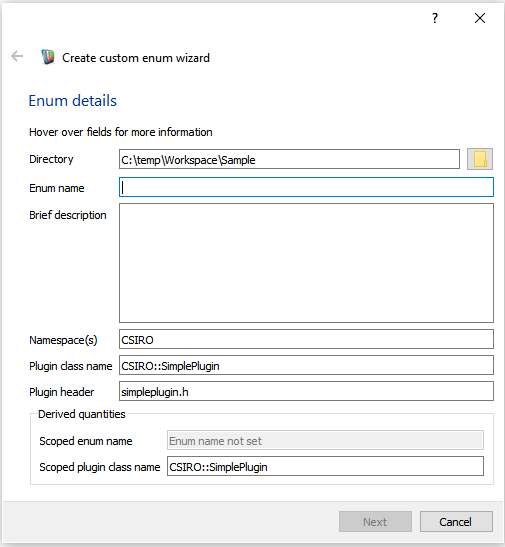
We can use this code wizard to generate the skeleton code required for an enum. Let's start by filling in the fields on the form:
- Directory: The directory in which our widget sources files will be created. Point this to the same directory in which your plugin source is located.
- Enum name: The C++ name of the enum. We will call ours, "Priority".
- Brief description: A brief textual description of the enum. This will appear above it in a doxygen comment.
- Namespace(s): The namespace used for the enum. We will use
CSIRO as we did in the previous tutorial.
- Plugin class name: The fully scoped name of the plugin class that will contain the enum. We're going to use the plugin we created previously,
CSIRO::SimplePlugin.
- Plugin header: The header that contains the definition of the containing Workspace plugin. Again, we refer to the file we generated in the earlier tutorials:
simpleplugin.h
- Note
- At any time you can check the purpose of these fields by hovering over them with the mouse and reading the tooltips.
Our form will now look something like this:

Our values entered into the wizard.
- Click the Continue or Next button. This will take us to the value assignment screen.
Fill this section in by clicking add row (the + button) for every value you wish to have in your enum. The column meanings are as follows:
- Visible name: The name that will be visible to Workspace users when they use this enum as a datatype (e.g. when it is used as an input to an operation).
- Symbol name: The symbol name in the code corresponding to this discrete value.
- Symbol value: The value associated with the enum symbol. Must always be an integer.
In our example, we are going to add three rows, one for low, one for medium and one for high. We are going to keep the default values of 0, 1 and 2 respectively and use lower case versions of our visible names for each of the symbols.
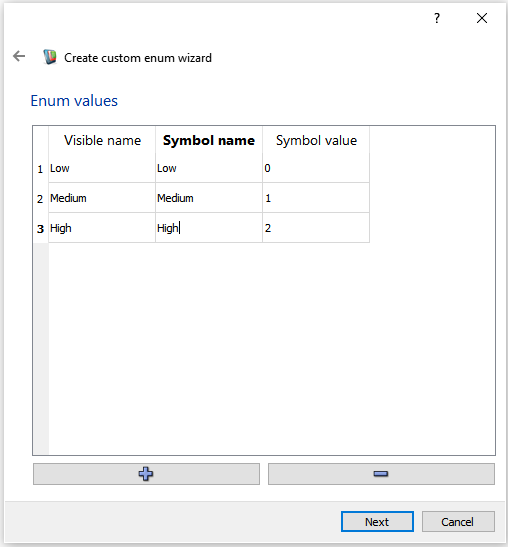
Our 'low', 'medium' and 'high' enum values.
- Click the Continue or Next button
As we did with the data type wizard, we now get to select a copyright notice.
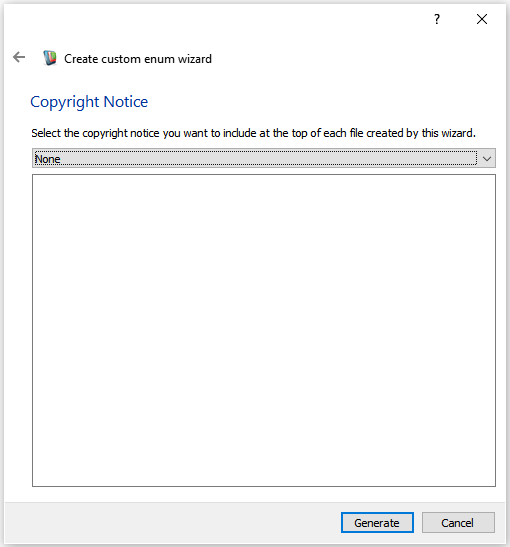
Select none for this tutorial
Workspace will now generate the code for our new enum and place it in the directory that we selected earlier (the same directory into which we generated our plugin). If you navigate to this directory, you'll see that it has the following contents:
- priority.h This file is the C++ header for the new enum. It contains the definition of the enum, the special Workspace macros for defining data factories and assignment adaptors, as well as the special Workspace code for specifying user readable names for each of the enum values.
- priority.cpp This file is the C++ source file for the new enum. It contains very little code: only the macros needed to define the Workspace data factories and adapter classes.
The following existing files have been modified: simpleplugin.cpp and Changes to the CMakeLists file
For more details about the code generated, see Writing a Custom Enum - looking at the code or click on one of the links to individual files above.
Rebuilding
Now that we've added our new files to the plugin, we will need to take the steps we did in the previous tutorial to compile our tutorial:
- Launch CMakeGui from the Workspace's Development menu
- Click Configure
- Click Generate
- Following the steps from the Writing a Simple Workspace Plugin tutorial, recompile your plugin for your target platform
Using our new enum
Once the compilation has finished, it is time to test our newly added enum:
- Load up the Workspace graphical editor
- Create a new Variable operation

Creating the variable operation
- In the properties menu for the new Variable operation, set the datatype to "Priority", and click OK.
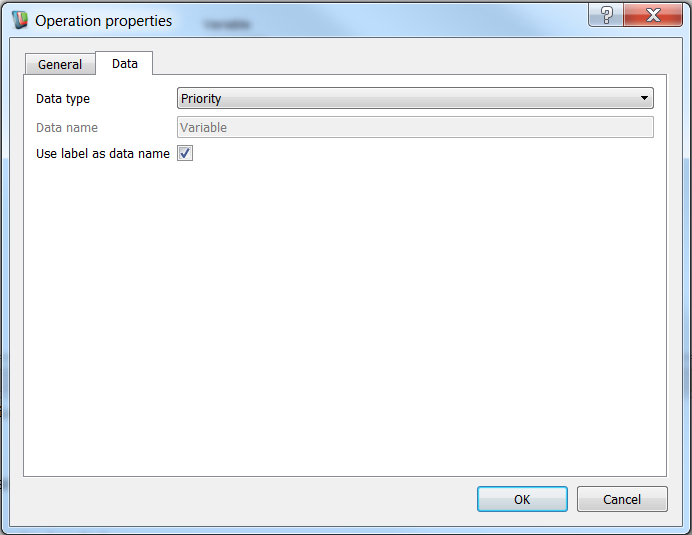
Selecting the priority datatype
- Click on the new Variable operation to select it, and you should see in the Operation Editor that it has a single input of type "Priority", with a special combo box widget attached to it containing the values, "Low", "Medium" and "High".
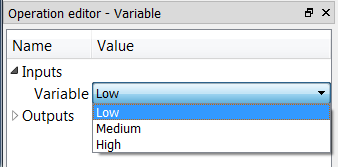
The priority datatype visible in the operation editor
Summary
In this tutorial, we have learned the essential elements of adding a new custom enum to your Workspace plugin. The main points to remember are the following:
- Enums are just another data type registered in a Workspace plugin
- Enums can be created easily using the Workspace wizard
- Enums can be converted to integers using the EnumToIntAdaptor
- The EnumComboBoxFactory allows enums to be easily selected in the UI