Introduction
As you have seen already, Workspace provides integrated support for calling out to scripts written in two scripting languages, QtScript and Python. By integrated we mean that we ship a runtime within Workspace to execute the scripts, that inputs and outputs can be dynamically added to the Operations and these inputs and outputs have their data passed in memory to these Operations. This means you should be able to run QtScript and Python scripts on any Workspace installation and should always get reasonable performance.
While Workspace does not provide integrated support for other scripting languages, we do however provide a generic scripting Operation that allows you to callout to other scripting languages. The limitations here are that you must install the necessary runtime and inputs and outputs cannot be dynamically added and data will be passed via the command line and the file system. Under the hood, this is the same process as used with our R and MatLab Operations.
Contents
Just in case you get stuck, a sample workflow has have been provided for you. Before you can run this workflow however you will need to modify the paths in the "Run External Script" Operation's inputs to match your machine’s setup.
Calling External Scripts via the Run ExternalScript Operation.
In this tutorial we will introduce the "Run External Script" Operation and show you how to call an existing script. To ensure this sample will work on any Workspace installation we will use workspace-batch as our runtime.
- Enter "Run" into the Operation Catalogue and you will see all five scripting Operations that Workspace provides:
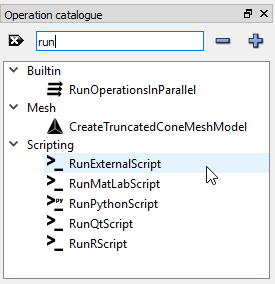
Finding the Run External Script %Operation in the Operation Catalogue
- Find the "Run External Script" Operation in the Operation catalogue and drag it onto the Workspace canvas. Depending on your current settings its Properties Dialog may open, if it does select Dependency as the data type and click OK.
- Select the "Run External Script" Operation on the canvas and look at the inputs and outputs in the Operation Editor. You may notice that the "Run External Script" Operation looks somewhat like the System Command Operation - this is because the "Run External Script" Operation delegates almost all the work of running the script to a System Command Operation.
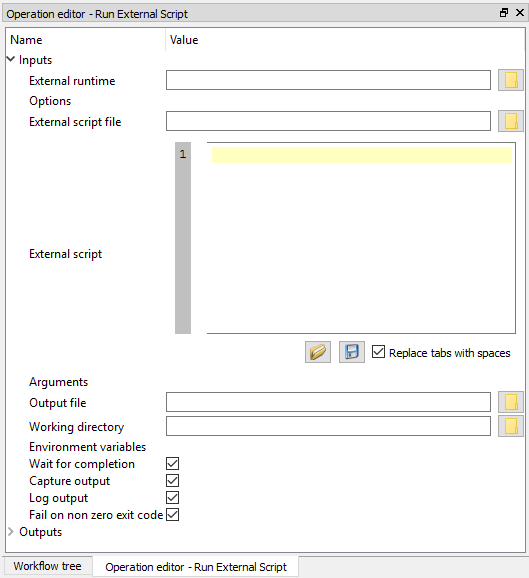
Setting up the inputs to your Run External Script Operation
- Set the "External runtime" input to the location of your runtime executable, in this case
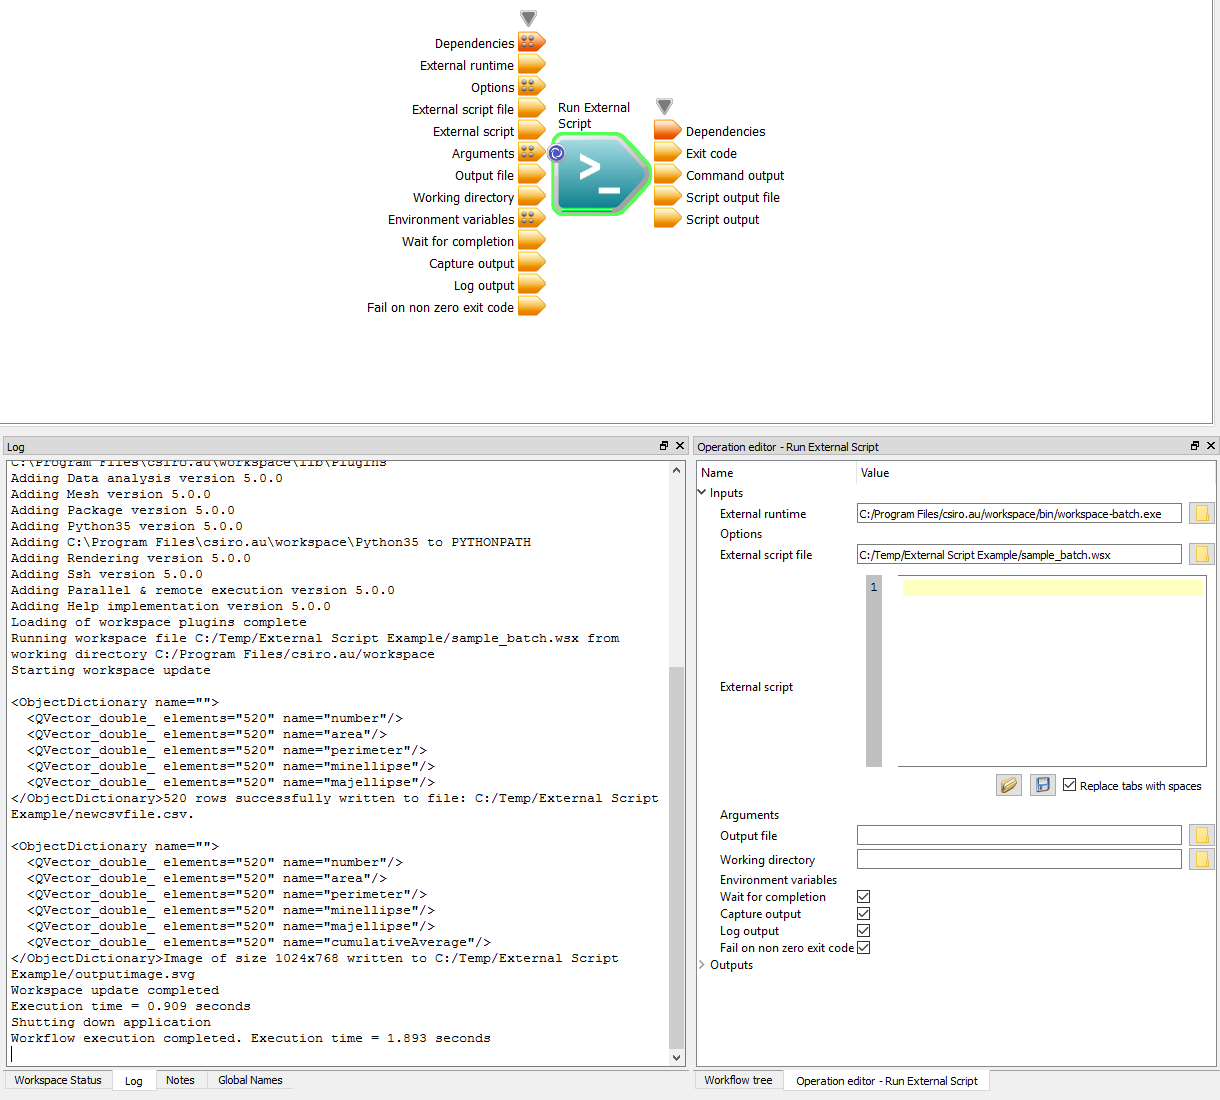
workspace-batch . This will vary from language to language and from machine to machine however, as an example, on my current machine and using workspace-batch.exe as the example runtime this would be: C:/Program Files/csiro.au/workspace/bin/workspace-batch.exe
- Next you can either point to a Workspace workflow file on disk using the "External script file" input or enter verbatim the XML for a valid workflow file. Initially we will use the sample workflow file as for the Batch Tutorial we completed earlier. For now just point to the location of (a copy of) the
sample_batch.wsx workflow - remember that as this workflow writes in its home directory you may need to copy it to a location where it has write permission. You will also need to copy the data file ( plotsample.csv ) into the same directory. In this example I have copied both files to a directory where I have write permission. The location for my workflow file is: C:/Temp/External Script Example/sample_batch.wsx
however your file could/would be in a different location.
- As this is now the minimum I need to run a script (a runtime and a script file), I will add a Workspace output and execute the workflow.
Executing our first workflow
- Note
- You will see the output from the workflow in the log window however this is functionality you may only see when running Workspace workflows.
Accessing the outputs of a script
The "Run External Script" Operation provides support for accessing a single output file. From the workflow's output in the Log Window you will see that a PNG file was written.
- Copy the location of the output file from the log windows to the "Output file" input. In my case this value was
C:/Temp/External Script Example/outputimage.png
however your location will probably be different.
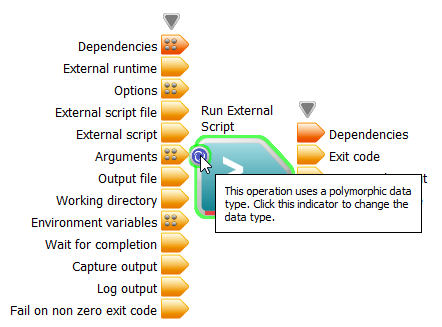
- Bring up the Properties Dialog for the Run External Script Operation by clicking on the polymorphic data type Operation indicator.
Opening the Run External Script's Properties dialog
- Select QImage as the Data type.
- Add an ImageWidget to the "Script output" output. You can do this by right-clicking on the "Script output" and selecting "Display with ImageWidget" from the context menu.

Adding an ImageWidget to our Operation's output
- Now run the workflow - the ImageWidget should contain a chart when the workflow finishes execution.
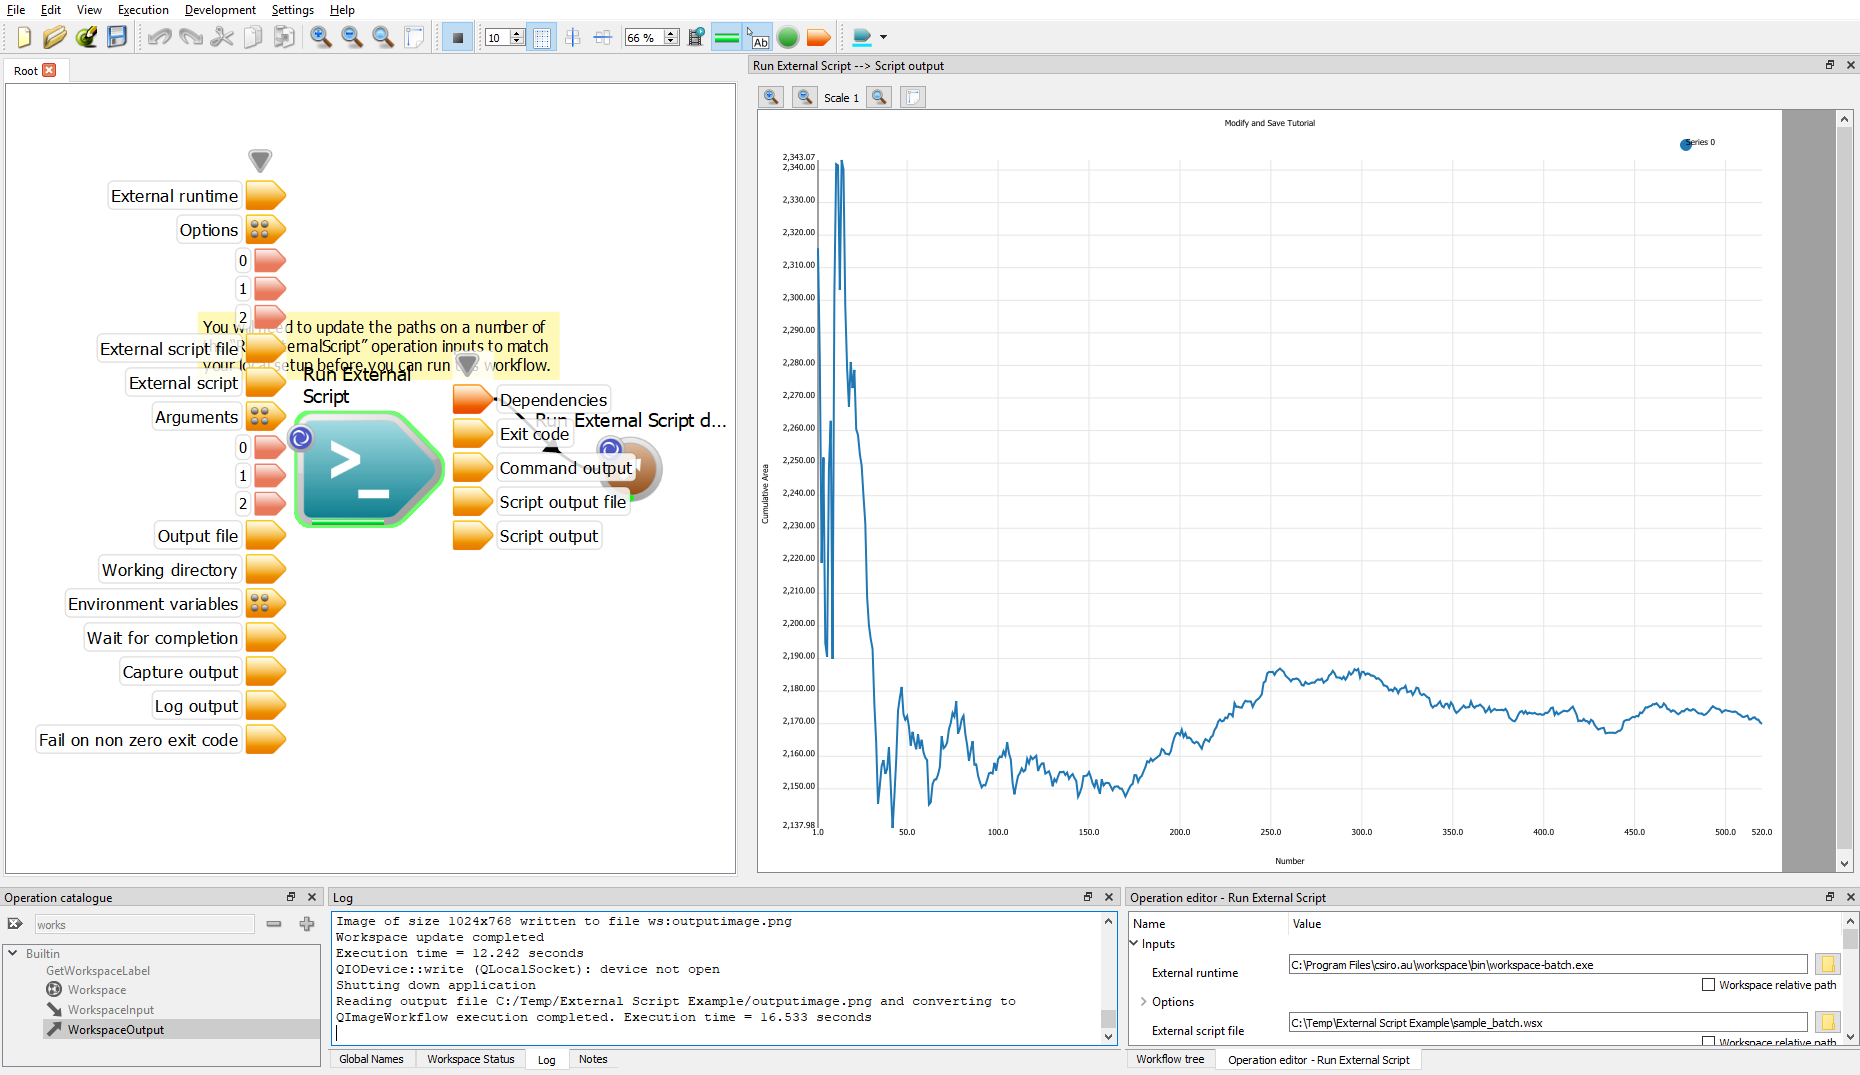
Executing our workflow with an ImageWidget
Call your scripts with options, arguments and environment variables.
You will have noticed that you can specify "Options" and "Arguments" when running your scripts.
- Note
- The basic syntax supported for calling an external script is
runtime [options] script_filename [arguments]
where:
-
runtime is the executable that will run the script
-
options are a set of parameters passed after the runtime and before the script_filename on the command line
-
script_filename is the location of the script file to execute
-
arguments are a set of parameters passed before the script_filename on the command line
Different runtimes sometimes insist that parameters are passed in various locations or orders. Users need to know the conventions for whichever runtime they are using - however this syntax allows for most common conventions to be supported.
You will remember that the sample_batch.wsx has two global names and you can pass values to workspace-batch for these via the command line. Let us add values for these parameters now. Workspace-batch does not care about parameter order, so just for experience we will add one as an Option and one as an Argument.
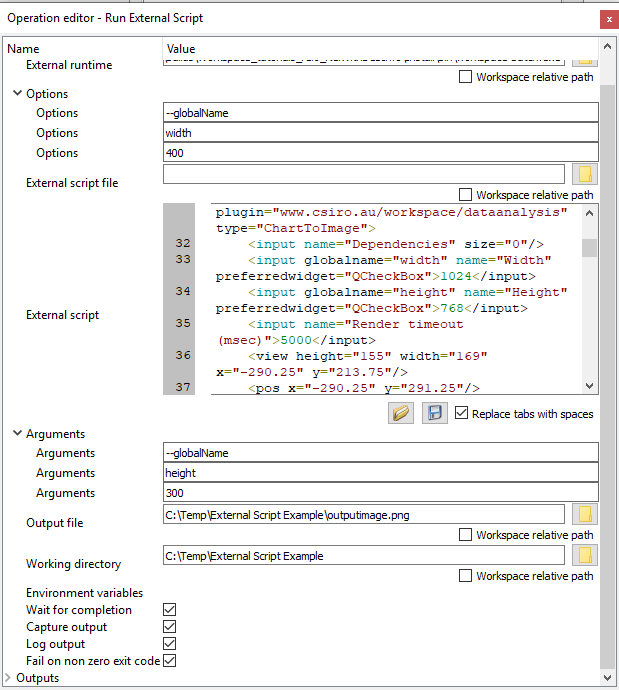
- Add three elements to the Option Input Array. You can do this by right-clicking on the input and selecting "Add input element" three times. Then in the Operation Editor enter these three values for the array elements you just added (and remember that there needs to be two dashes before the term "globalName"):
- Add three elements to the Argument Input Array. You can do this by right-clicking on the input and selecting "Add input element" three times. Then in the Operation Editor enter these three values for the array elements you just added (and remember that there needs to be two dashes before the term "globalName"):
- Your Operation Editor should look something like this:

Passing parameters to the Run External Script Operation
- Re-run the workflow and see how the size of the image changes in the ImageWidget. Since this is a Workspace workflow, you could also look at the output in the Log Window to see where the global name values were changed on the command line:
    ...
    Set global name 'height' to '300' from command line
    Set global name 'width' to '400' from command line
    ...
    Image of size 400x300 written to C:/Temp/External Script Example/outputimage.png
    ...
Parameters changing the size of the image produced
Entering Script Code Dynamically
This could almost be left as an exercise for the reader, however before we finish this introductory tutorial we will switch from using a Workspace workflow file on disk to entering script (well XML) dynamically into the "External script" input on the "Run External Script" Operation. Simply do these few steps:
- Remove the filename from the "External script file".
- Select the “Run External Script” Operation on the canvas and then go to Operation Editor and click on the Open file icon in the "External script" input and open your local copy of the
sample_batch.wsx file. The file contents will then be copied into the "External script" input.
- Set the "Working directory" input to the directory where the
sample_batch.wsx file is located. As the workflow expects to find the input file in the same directory as the workflow we must make sure that the temporary file is located in this directory.
Adding verbatim script to the Operation Editor
- Rerun your workflow
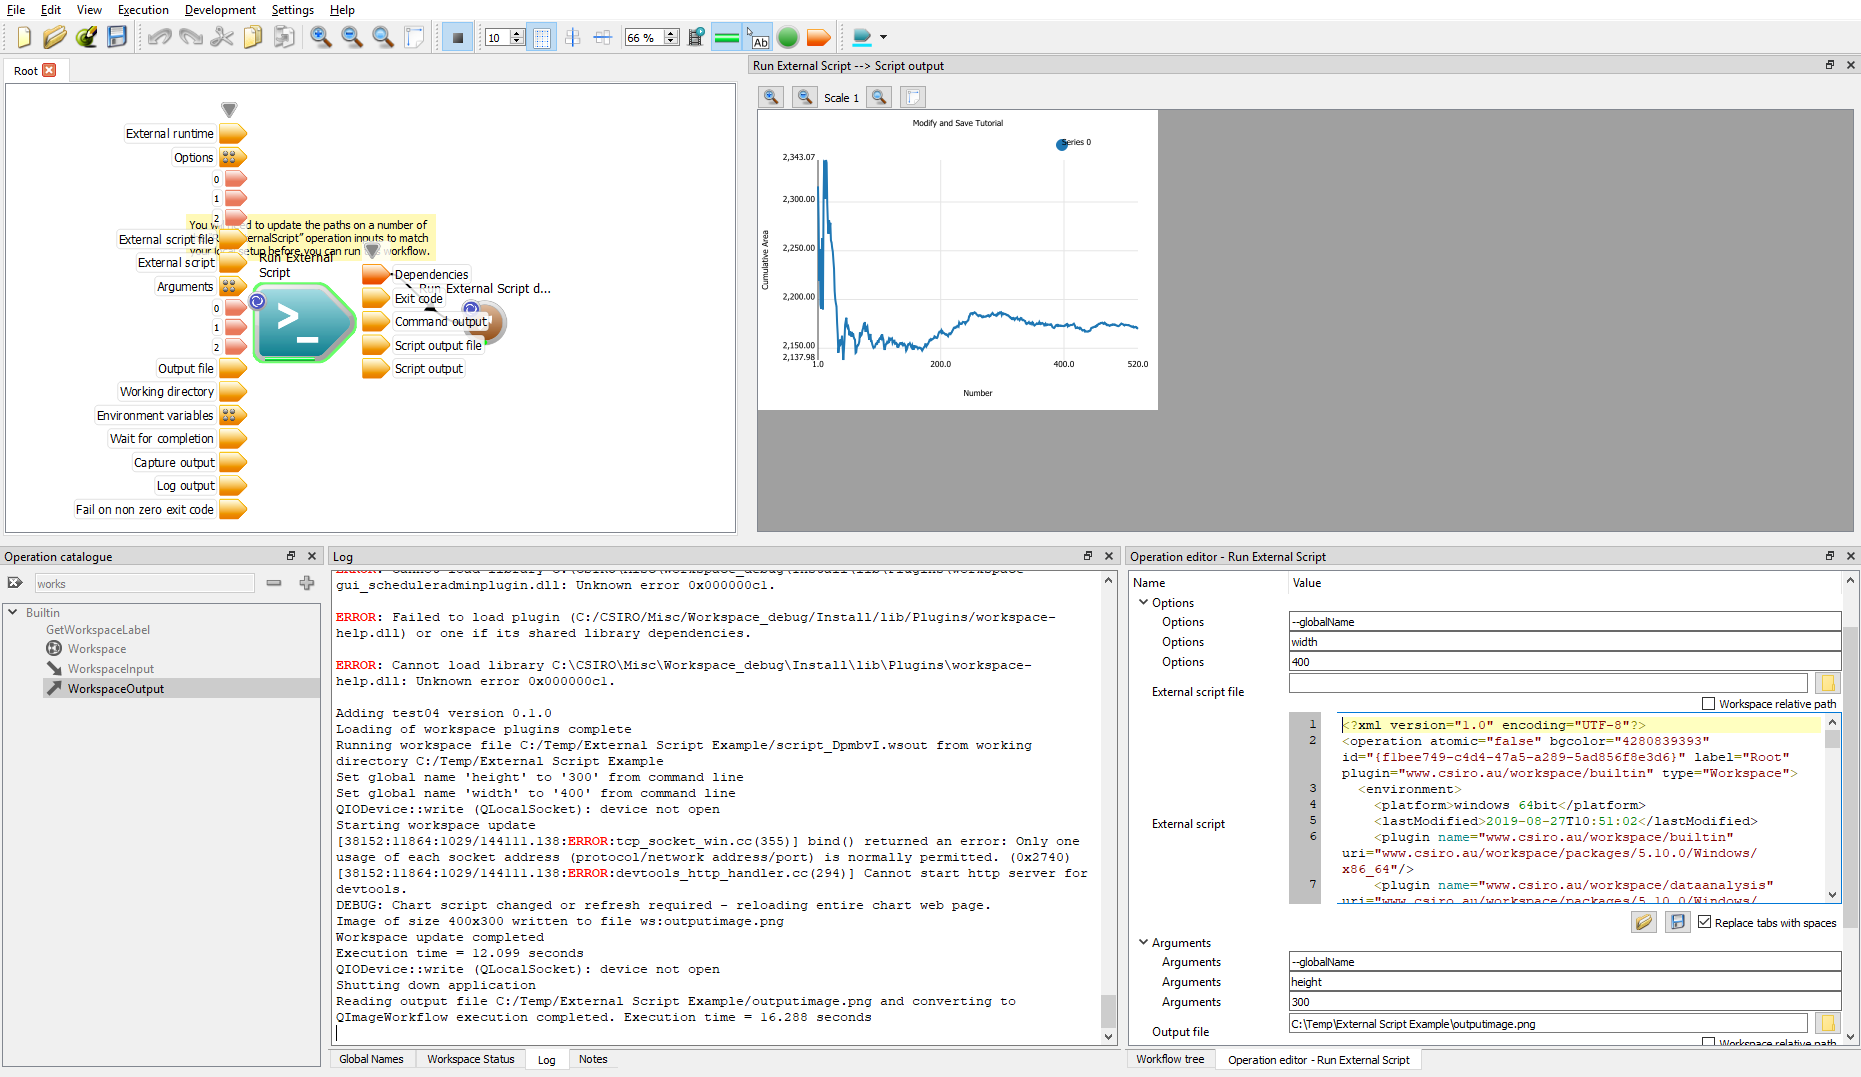
Executing dynamically entered Script
Summary
Although a somewhat brief tutorial, this tutorial does demonstrate the power of incorporating arbitrary scripting languages and how this can be leveraged relativity easily from within your Workspace workflows. In summary in this tutorial we have seen how to:
- Add a "Run External Script" Operation to a workflow
- Configure a "Run External Script" Operation
- Access an output of our "Run External Script" Operation
- Pass options and arguments (and environment variables) to our "Run External Script" Operation