Workspace 6.21.5
Leveraging the power of Python modules within Workspace workflows

Introduction

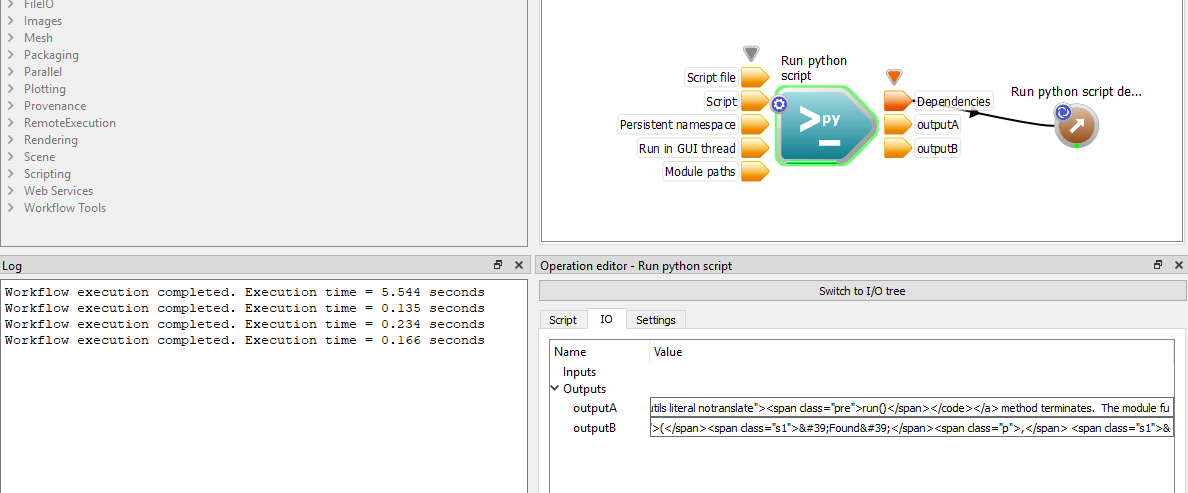
As Python is deployed with Workspace we can leverage the functionality of Python from within our workflows. In this tutorial we will use features from two of the standard Python modules (threading and urllib) to fetch a couple of web pages in parallel from within a RunPythonScript Operation.


Contents


Using Python Modules

In this brief tutorial we will use the RunPythonScript Operation. Just in case you get stuck, a sample workflow has been provided for you.

  1. Find the RunPythonScript Operation in the Operation catalogue and drag it onto the Workspace canvas.
  2. Select the RunPythonScript Operation on the canvas to display its properties in the Operation editor pane.
  3. Enter the following Python script into the Script Input:
    from threading import Thread
    from urllib.request import urlopen
    
    # On Linux and OSX, the certificate file (cafile) in OpenSSL was consolidated 
    # at build time, this leaves Python modules like ssl not able to access the 
    # cafile. To workaround it, on Linux and OSX, the module certifi has been 
    # pre-installed to help find the correct cafile. Simply pass 
    #   cafile=certifi.where()
    # to the urlopen() function and it should work properly. To make the script
    # run on Windows without certifi installed, you can use a try block like this:
    try:
        import certifi
        cafile = certifi.where()
    except ImportError:
        cafile = None
    
    class URLThread(Thread):
         response = ""
         url = ""
         def __init__(self,_url):
             Thread.__init__(self)
             self.url=_url
    
         def run(self):
             with urlopen(self.url, cafile=cafile) as response:
                 self.response = response.read().decode('utf-8')
    
    thread1 = URLThread("http://docs.python.org/3/library/threading.html")
    thread2 = URLThread("http://docs.python.org/3/howto/urllib2.html")
    thread1.start()
    thread2.start()
    thread1.join()
    thread2.join()  
    outputA=thread1.response
    outputB=thread2.response
    
  4. The above script will spawn two threads within Python to download two web pages in parallel and assign the web page data to two separate Operation outputs that we will define.
  5. Click on the RunPythonScript Operation's custom properties indicator to bring up the properties dialog.
  6. Add a new output labelled "outputA" (excluding quotes).
  7. Add a new output labelled "outputB" (excluding quotes).
  8. Apply your changes and close the properties dialog by clicking the OK button.
  9. Right click on the RunPythonScript's dependency output and choose the "Create workspace output" menu option.
  10. Run the workflow.
  11. Once the workflow has run, re-select the RunPythonScipt Operation to view its properties (displayed in the Operation editor window).
  12. Expand the "Outputs" to reveal your outputA and outputB outputs. Further expand these outputs to view the web-page content.

Adding your own Python Modules

You can add further Python modules using the included pip.

  1. Open a command-line editor.
  2. Use pip via the Workspace launcher to install the required modules:
    <Workspace_installation>/bin/workspace-gui.exe --launch python -m pip install visvis
    Workspace * workspace
    Definition: mongodbremotescheduler.cpp:171
    or
    <Workspace_installation>/bin/workspace-gui.exe --launch python -m pip install numpy-1.11.1+mkl-cp35-cp35m-win_amd64.whl
Python using Imported Modules

Summary

Although a brief tutorial it does demonstrate that the power of the standard Python modules can be leveraged within your workflows to perform a wide range of tasks.