|
Workspace 7.1.0
|
|
Workspace 7.1.0
|
Workspace provides basic support for SQL databases, however this is an area where the "devil is in the detail". Specific drivers will normally be needed to access most databases and there are often a number of configuration and setup steps involved. In this first tutorial we will keep it simple and use SQLite as this is the SQL Database shipped with Qt "out of the box". Before developing against your preferred database engine please consult your manuals on how to configure and setup access to any other database engine.
And, as a reference, a completed sample workflow has been provided for you.
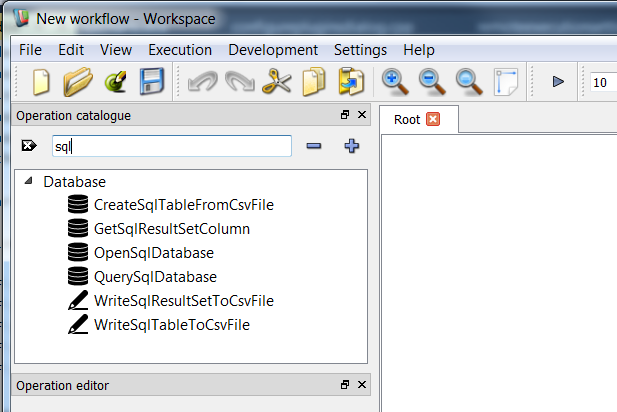
Let us begin by typing "sql" (without the quotes) into the Operation Catalogue.
This will show you the SQL Database operations, the Operation Catalogue will look something like this:
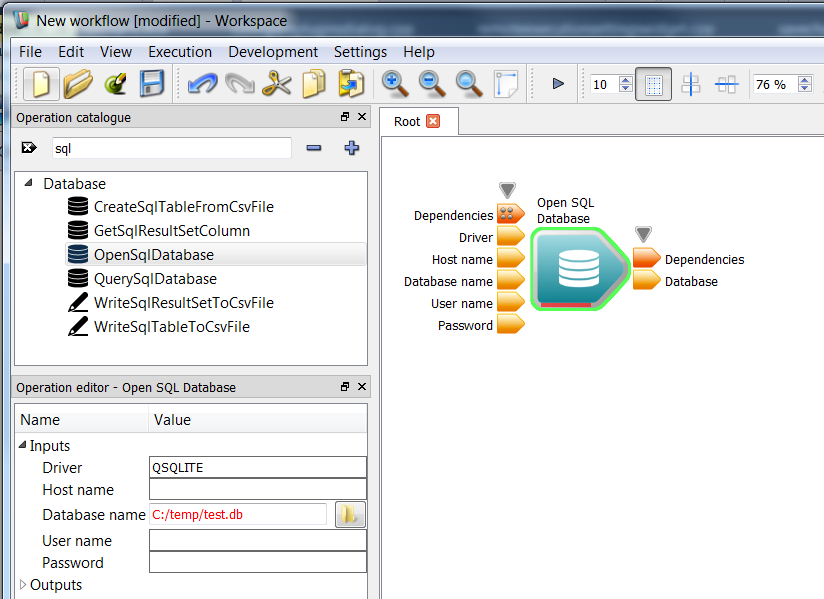
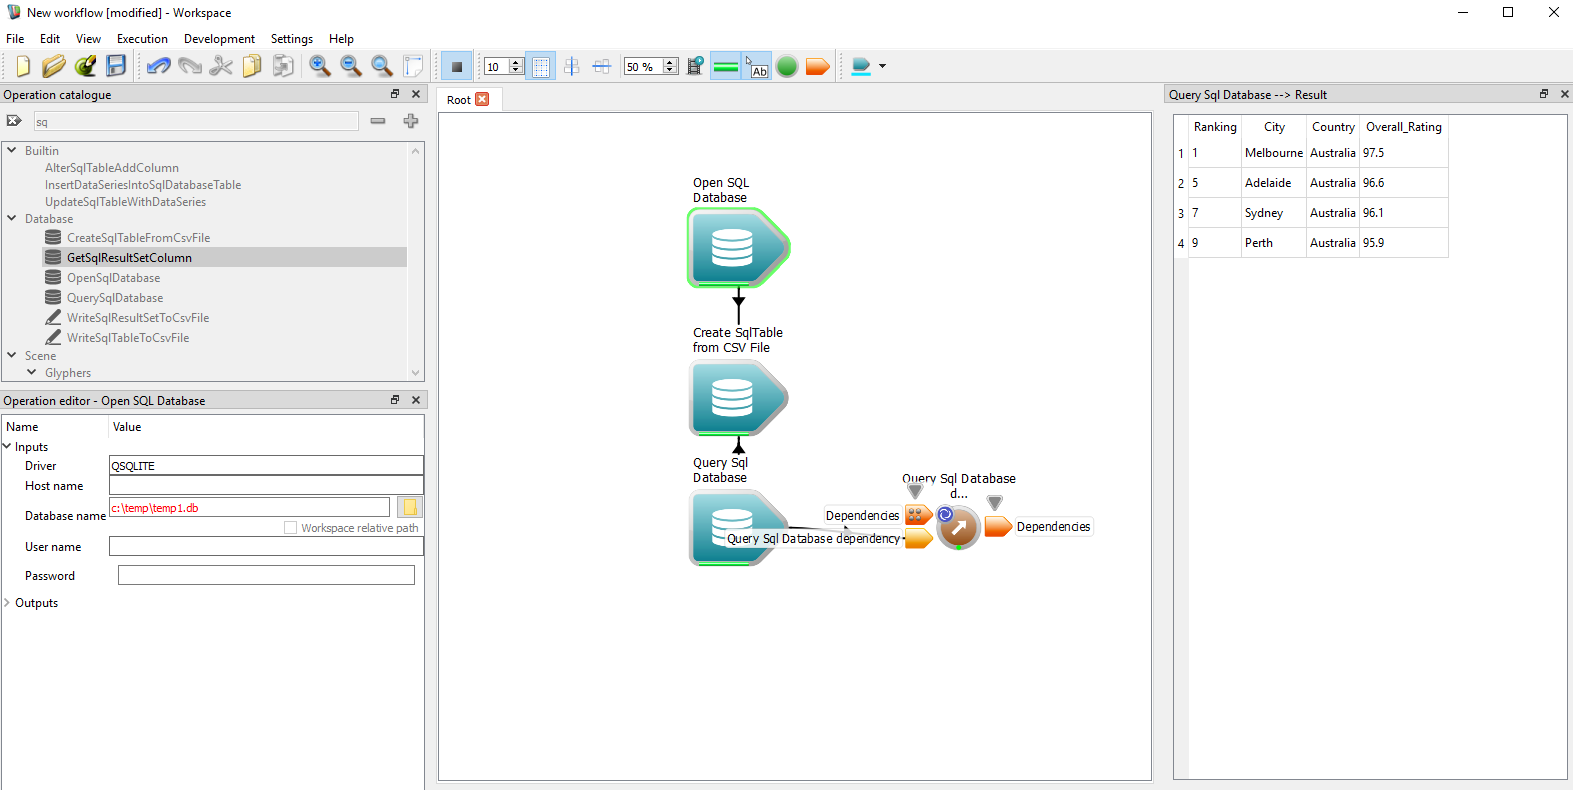
Drag the "Open SQL Database" operation on to the canvas and enter these values in the Operation Editor:
QSQLITE
C:/temp/test.db(or similar for your particular operating system.)
We would be the first to agree that database connection strings can look cryptic - and they seem to be different for each database engine. Again, when you want to use your favourite database engine then please look at your manual to see what values you need to enter.
As you progress through this tutorial, if you need to repeat steps and want to have a "clean slate" then the simplest process to follow is to change the Database name value (i.e. test.db) to something else. This will create a new clean database.
Your screen should look something like this:
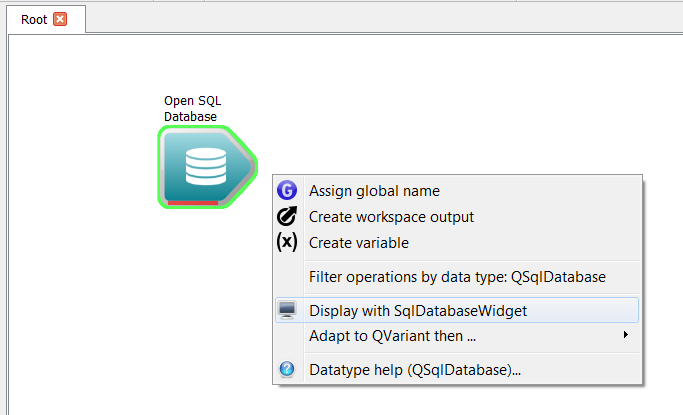
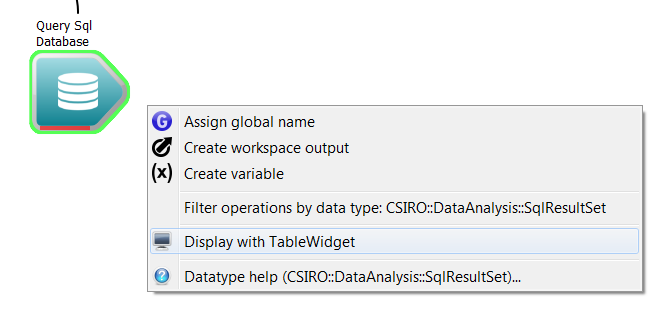
Next, right click on the Database output of the "Open SQL Database" operation and select "Display with Sql Database Widget".
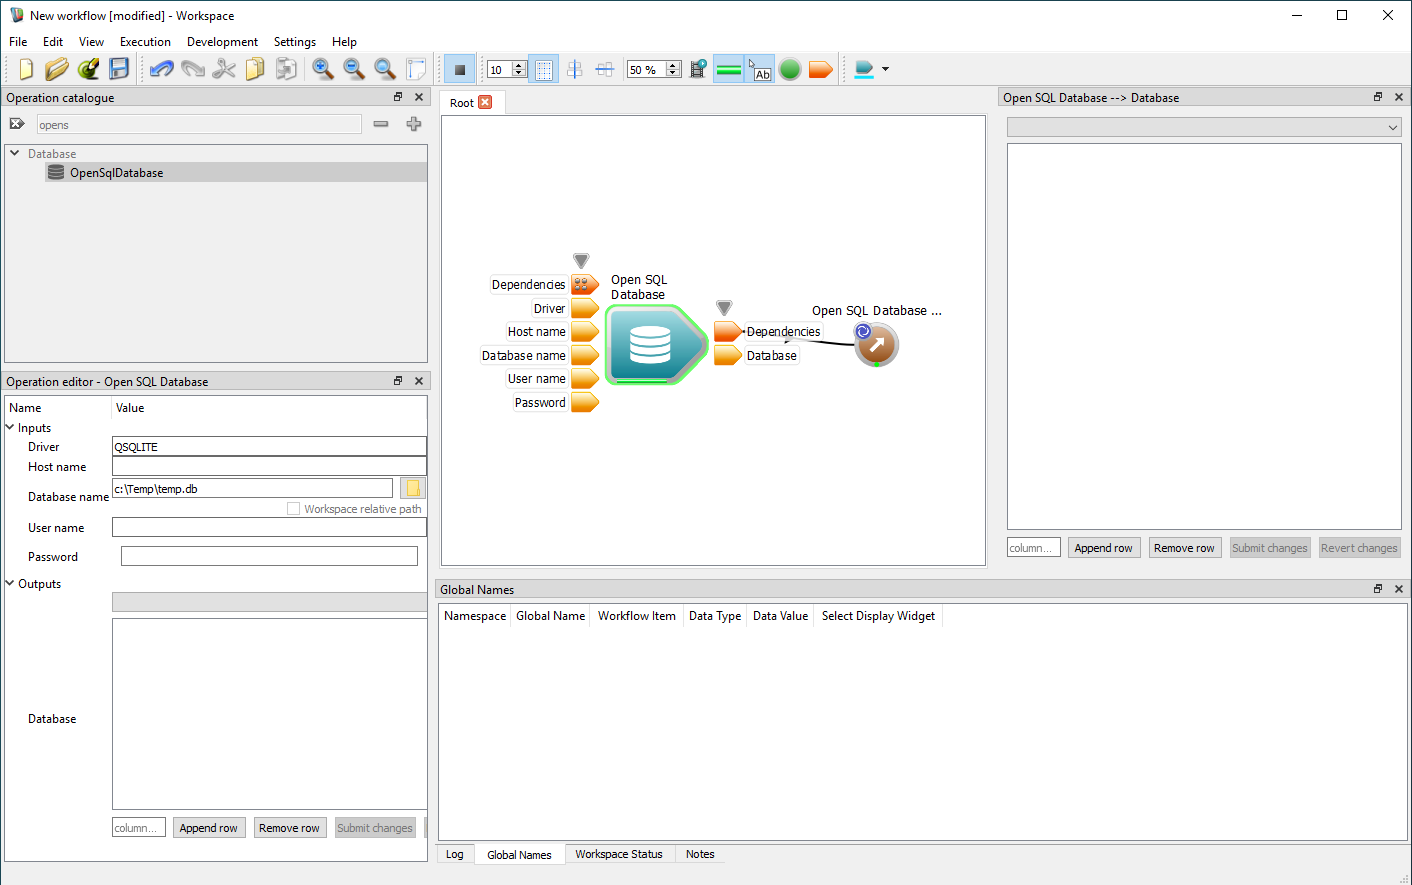
Add a WorkspaceOutput operation. You can now execute the workflow, but nothing much will be visible. Under the hood you have created an in-memory SQLite database but without any tables, so there is really nothing to show.
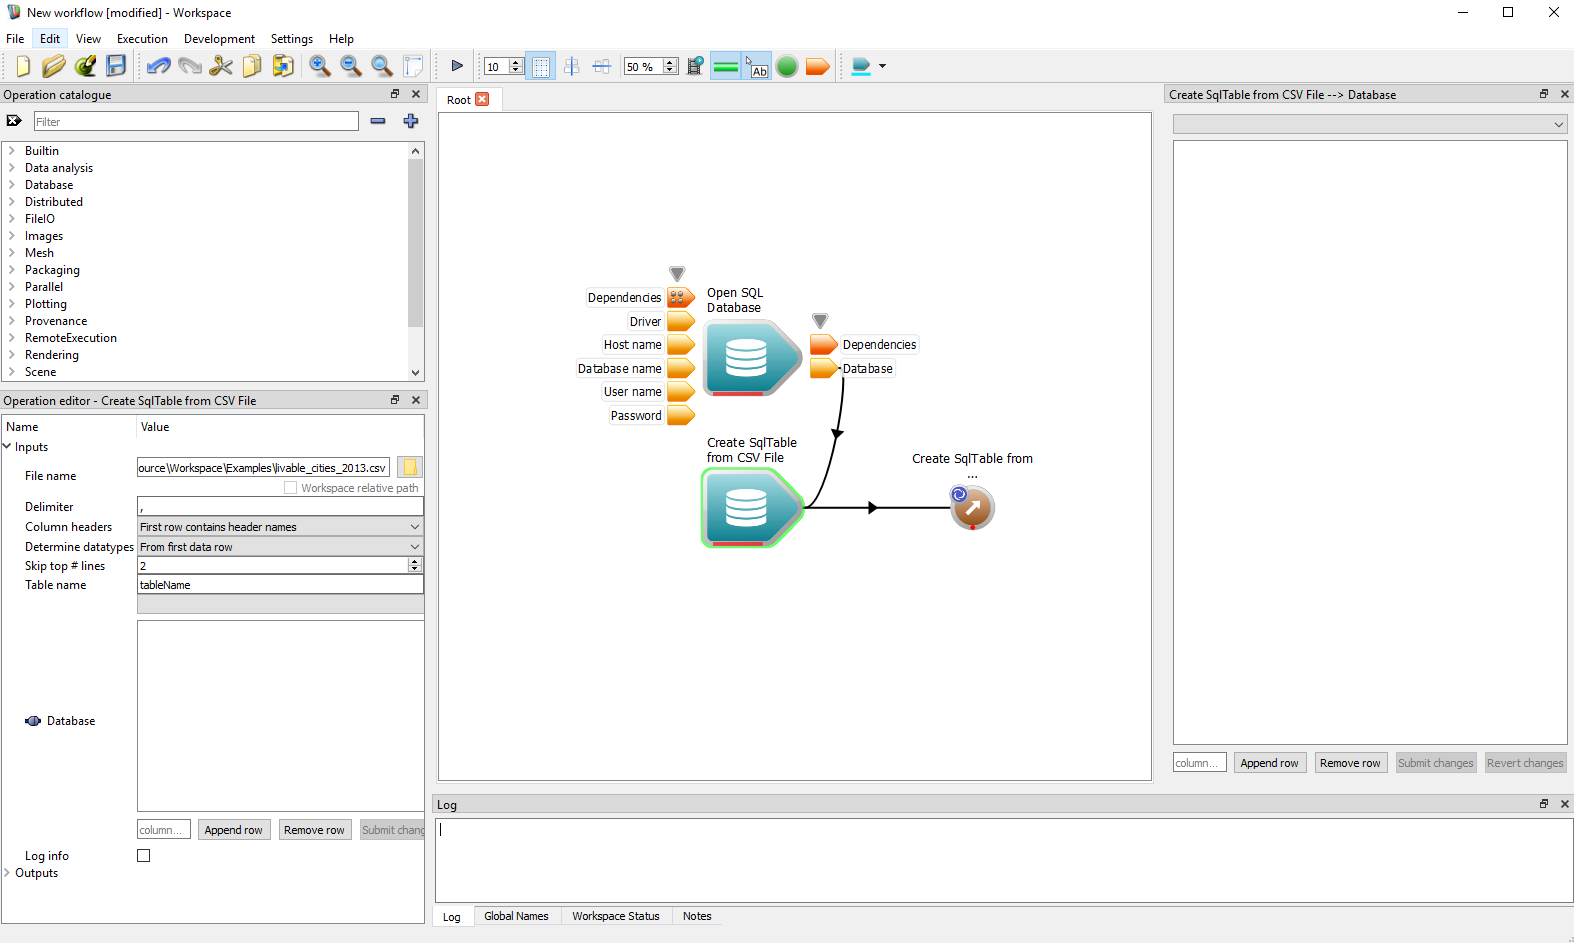
Next we will insert a Table into our Database. For this we will use the "Create SqlTable from CSV File" operation. Drag an instance of this operation onto the canvas and connect the database output from the "Open SQL Database" operation to the database input of the "Create SqlTable from CSV File" operation. Also remove the Sql Database Widget from the Database output of the "Open SQL Database" operation (this is really being done just to remove clutter from the screen.) You can remove the widget by clicking on the small X highlighted in the screenshot below and indicated by the black arrow - just to the right of the text "Open SQl Database --> Database".

Next, right click on the Database output of the "Create SqlTable from CSV File" operation and select "Display with Sql Database Widget".
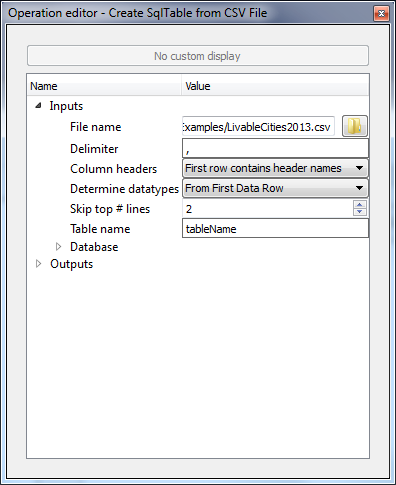
Finally we need to set the inputs on the "Create SqlTable from CSV File" operation.
The operation Editor should look something like this:
And your workflow should look something like this:
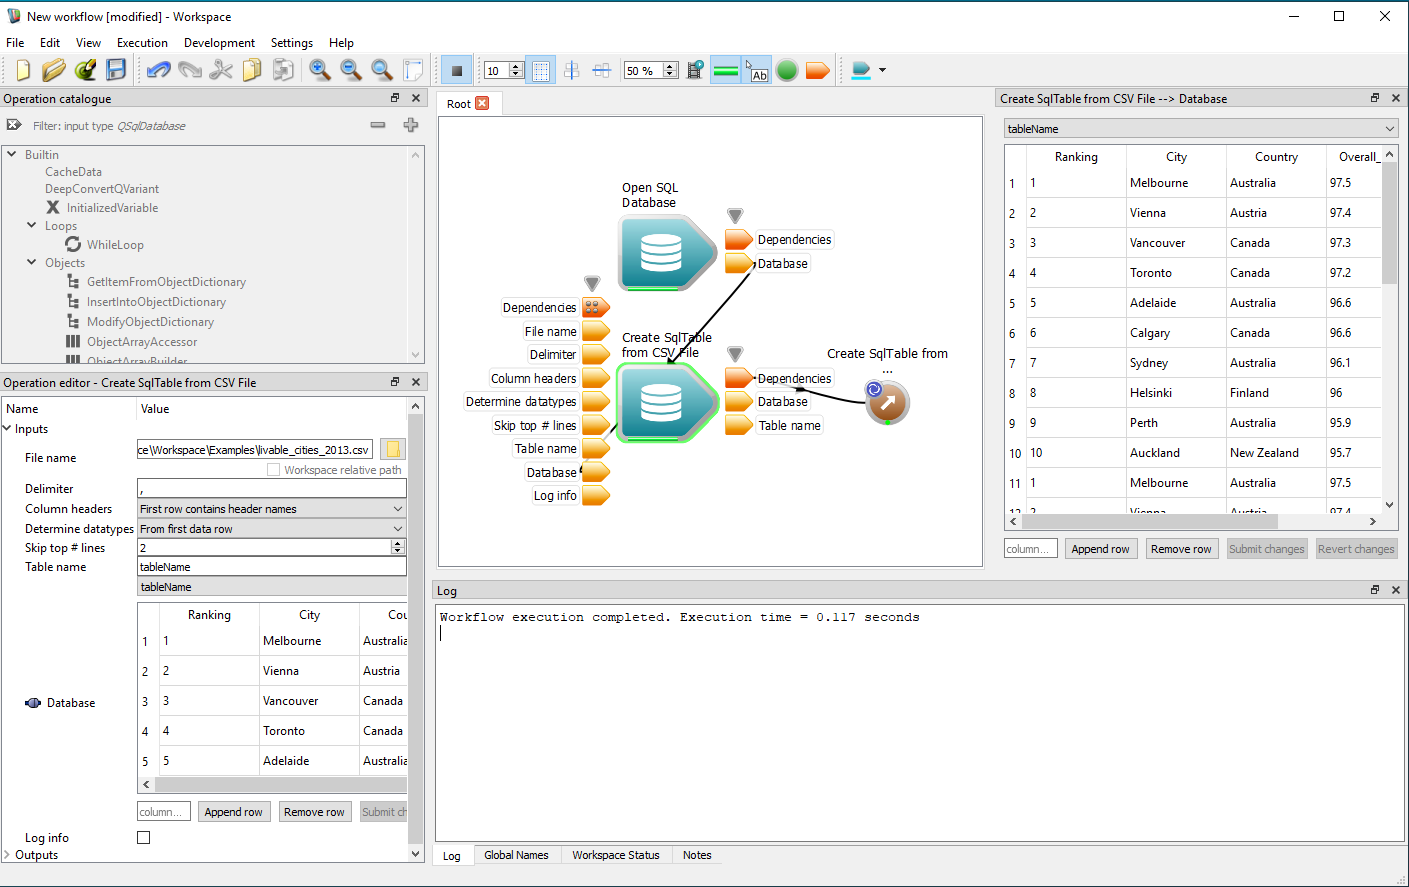
Now run your workflow and the result should look something like this:
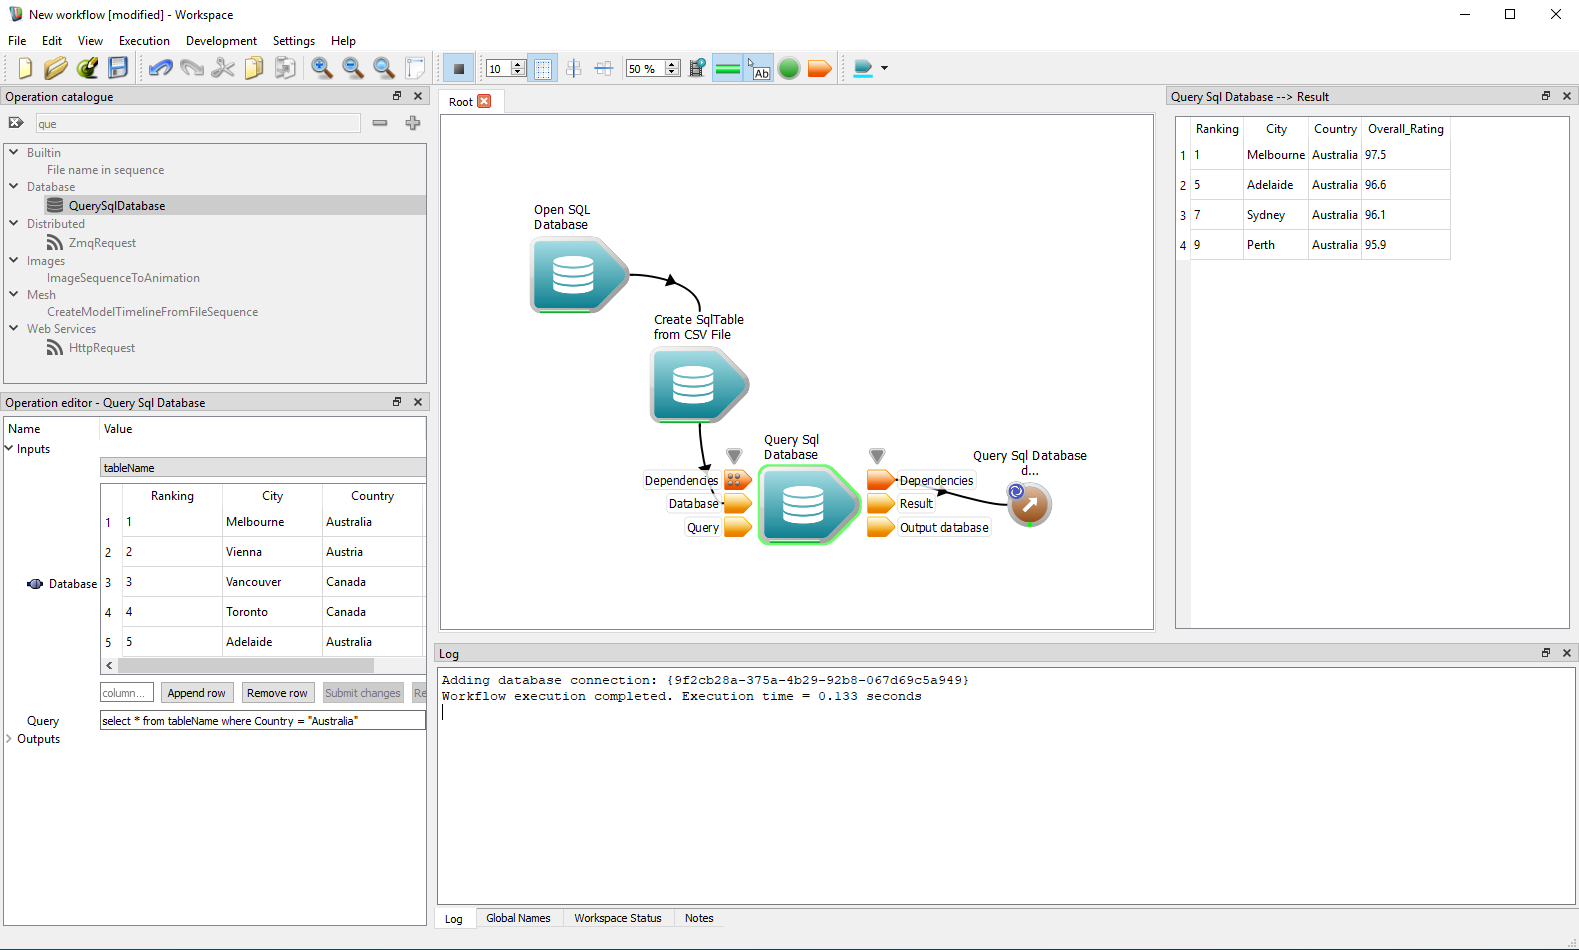
Next we will run a SQL query on our database (and observe some interesting behaviour.) Drag a "Query SQL Database" operation on to the canvas. Remove the WorkspaceOutput operation. Connect the Database output of the "Create SqlTable from CSV File" operation to the Database input of the "Query SQL Database" operation. Enter the following SQL statement
select * from tableName where Country = "Australia"
as the Query input of the "Query SQL Database" operation. Remove the Sql Database Widget connection from the database output of the "Create SqlTable from CSV File" operation (again, this is really being done just to remove clutter from the screen - you could even leave it displayed if you wish.)
Finally, connect a Table Widget to the Result output of the "Query SQL Database" operation.
Now you run your workflow and see something like the following:
Occasionally you may find your workflow looking more like this:
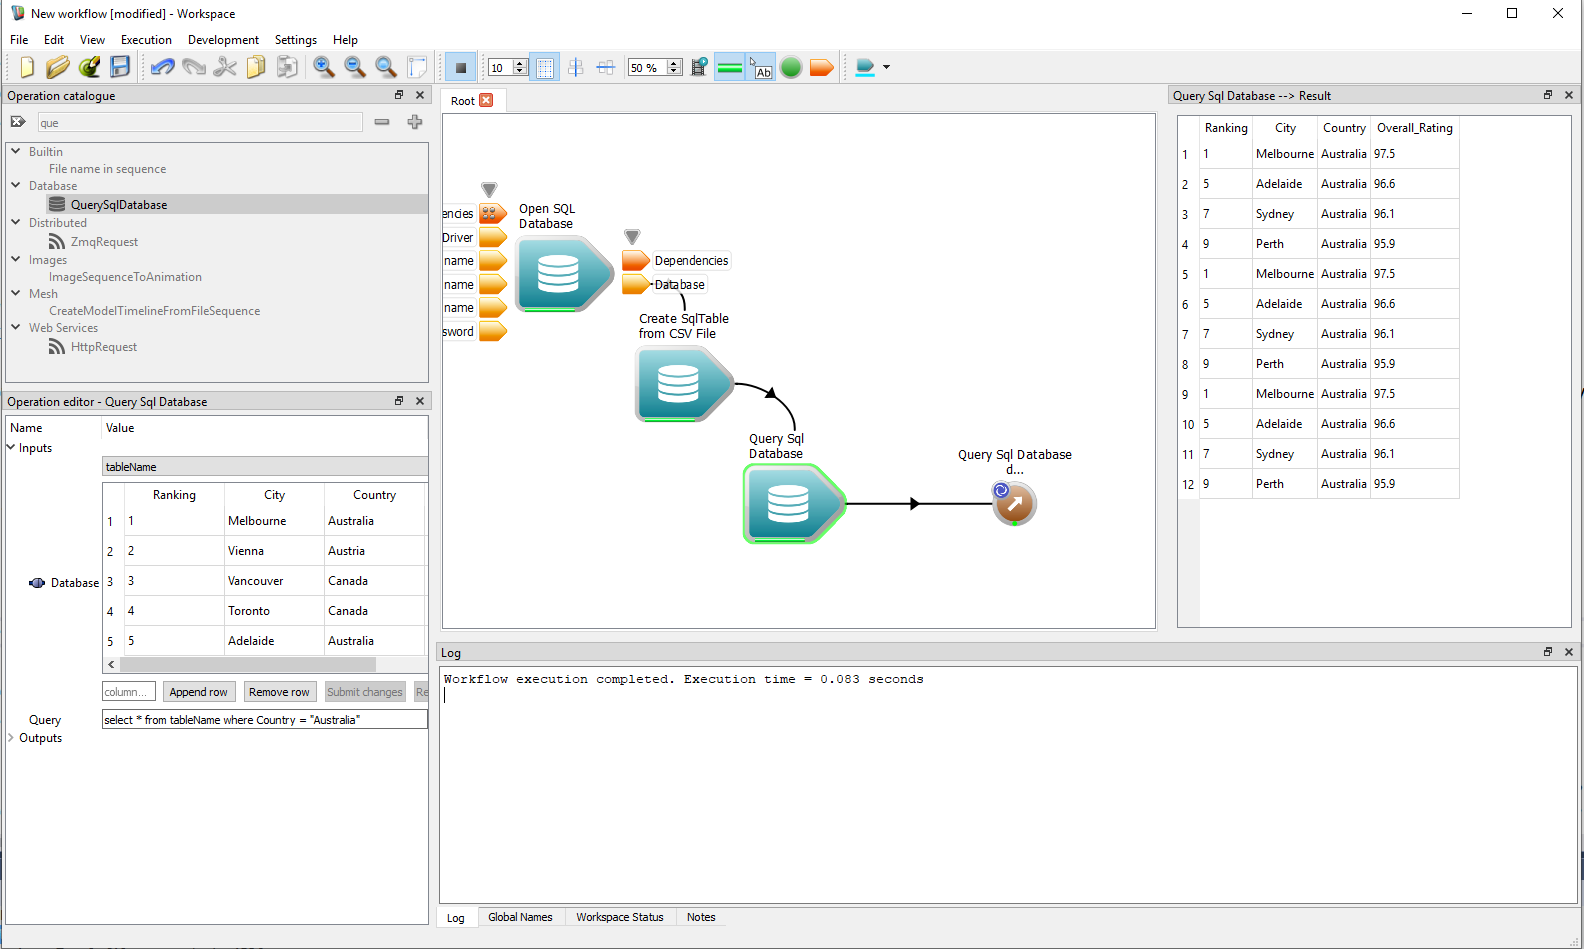
Now your first question may be "why are the cities listed mulitple times?" Databases have ACID properties: Atomicity, Consistency, Isolation, Durability. Each time an operation executes that modifies the database, then any updates to the database are durable (that is they persist.) If parts of your workflow are re-run, for example as a result of resetting an operation or changing input values, then you may see the effect of the update twice (or even more). If you want to see the workflow show the results of executing the operations only once, then rename the database in the "Open SQL Database" operation and run the workflow.
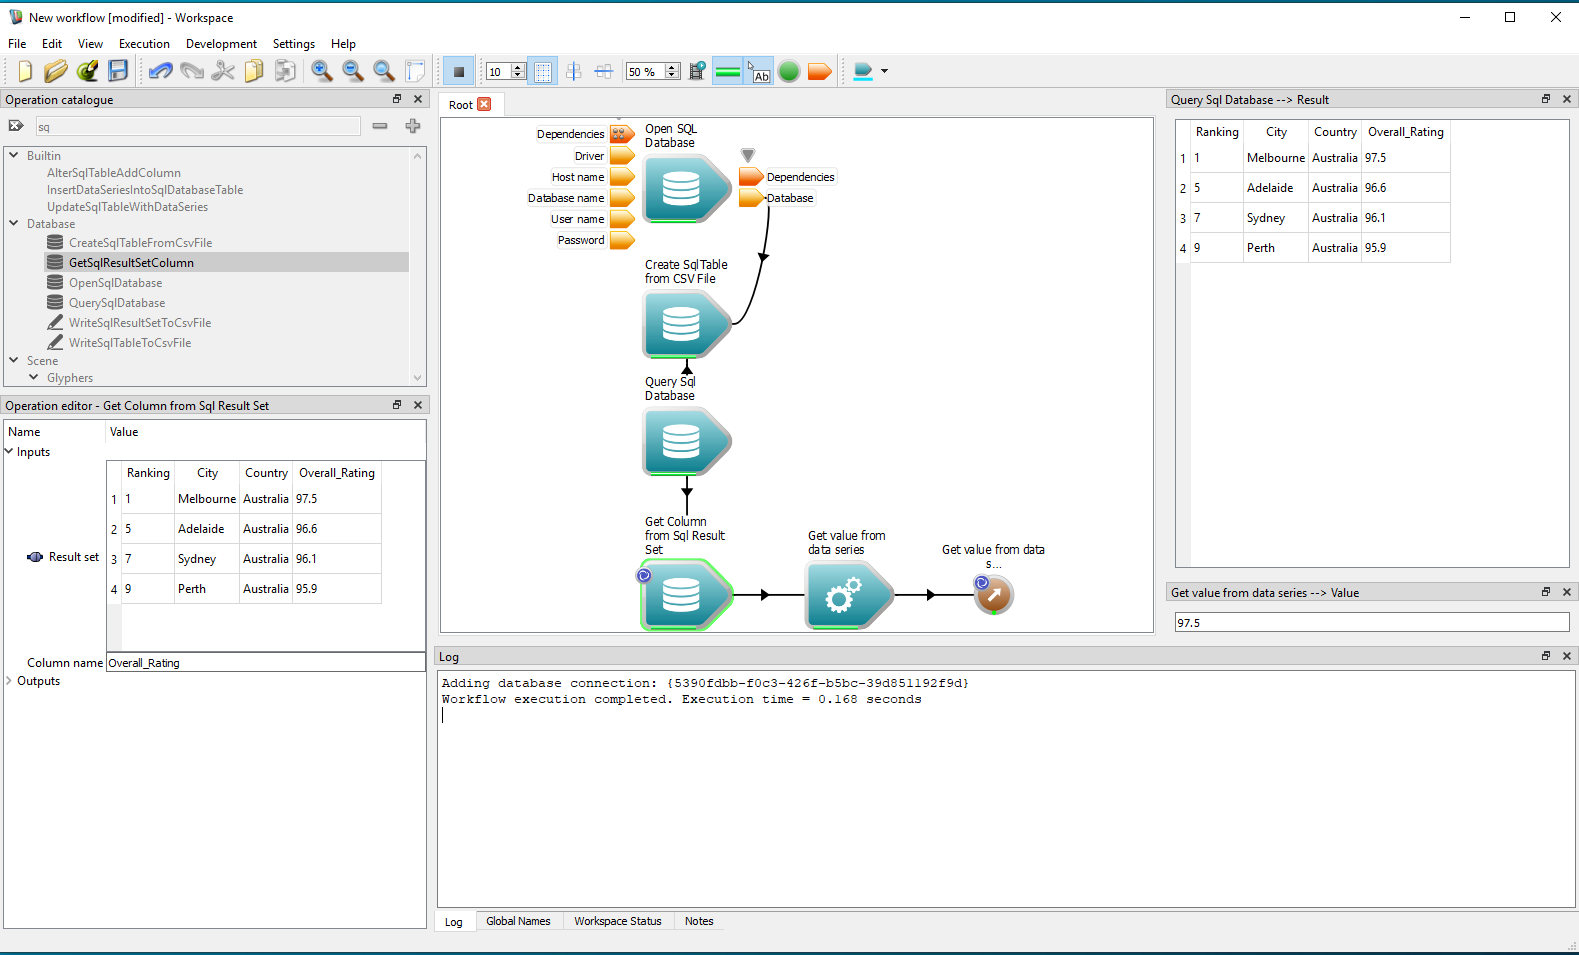
Next we will extract a column from our result set.
Now execute your workflow and your screen should looks something like this:
This concludes the first database tutorial. What have we learned?