seL4 on the Raspberry Pi 3
seL4 on the Raspberry Pi 3
The seL4 kernel is a burgeoning project that’s been creating a buzz in the security world for its uncompromising capability-based security model that comes with end-to-end proofs of conformance to its formal specification. It’s a microkernel, and it’s the fastest of its ilk. It says, “Security is no excuse for poor performance!”, and then backs it up. It’s open source. It’s free. It’s an increasingly relevant disruption in the Operating Systems monolith.
And now it’s on the Raspberry Pi 3. Do you have a Raspberry Pi 3? Then seL4 is now at your fingertips. Here’s how to get your hands on it.
Motivation:
Why was seL4 ported to the Raspberry Pi 3? Why now?

The team recognized that the Raspberry Pi 3 has a keen, intelligent userbase, and in order to promote security-conscious development and get folks practically involved in real world usage of a secure operating system, we decided to pilot a port that would appeal to a wide audience. From students to hardened embedded systems experts, to Linux hobbyists, the Raspberry Pi 3 presents a suitable platform for the growth of people who respect the fact that we live in a world where technology has an increasingly prevalent place in our lives.
That brings along with it both benefits and threats. The new generation of software engineers won’t be working on applications that are just bits and bytes in a computer. They will be writing the software that powers our cars, mobile phones, and machines that must be trusted with our very lives – pacemakers, robotic surgical aids, and nuclear power control systems.
It seems as a society, we haven’t yet fully understood the seriousness of the problem. Why is seL4 on the Raspberry Pi 3 now? Well: now is the critical time to get more developers invested in solid, realistic paradigms for software security. Could there be a better time?
A call to action.
A new, secure, connected world can’t be run without a fully-featured, mature platform. That’s where you come in. seL4 is still young. Can you do contribute? Yes: try seL4 on your Raspberry Pi 3. Tell a friend that it worked, and that they can get their hands on it too. Read our FAQ and understand the basics of our secure capability-based system. Join and follow our mailing list to clarify your understanding or contact us some other way. Ask us the tough questions. We don’t have all the answers, but you can jolt us into thinking about them.
Do you have an idea for a software project based on seL4? Drop us a question. Don’t be a stranger.
Prepare yourself:
The seL4 build dependencies.
There is no silver-tongued way to say, that seL4 has a fairly involved build-dependency set-up procedure. We know it’s tedious, and we’re working on it.
Follow the seL4 build-dependencies guide, here. Make sure you don’t omit downloading Google’s “Repo” tool!
Building the seL4-Test project
The seL4 project maintains a unit test project which can be used as both a simple way to determine that you have a fully-functioning build, and to prototype new features in userspace. You can find the seL4-Test project publicly available here.
We’re going to check out a fresh copy of the source and build it. Run the following:
mkdir sel4test && cd sel4test
repo init -u https://github.com/seL4/sel4test-manifest.git
repo sync
mkdir build-rpi && cd build-rpi
../init-build.sh -DPLATFORM=rpi3 -DBAMBOO=TRUE -DAARCH32=TRUE
ninja
At the end of this, you should have a build of the seL4 kernel, with the sel4-test framework built as a CPIO payload. The built seL4 kernel image (unstripped) can be found and examined under build-rpi/kernel/. The final images that are meant to be executed are placed in the build-rpi/images subfolder. The generated seL4 bootable image will have the filename sel4test-driver-image-arm-bcm2837 by default.
Debug output:
You need to connect a serial cable to UART0 on your Raspberry Pi 3, because this is the line on which seL4 dumps its boot log and the line on which seL4-test also dumps the output from all of its tests. The settings should be 115200 baud, 8-N-1 signal bits.
Booting seL4 on your Raspberry Pi 3:
The Raspberry Pi 3 has two convenient ways to get a kernel image onto the board for booting. Using u-boot, you can TFTP-boot seL4, or copy seL4 onto an SD card and boot it from there.
Read through our Raspberry Pi 3 support page. The Raspberry Pi 3 expects there to be an FAT32 partition on the SD card, and it expects certain files with specific filenames to be in the root directory of that partition. Our wiki page gives you links to all the binaries you need, except for the actual u-boot bootloader. Please use our prebuilt U-Boot image since the stock upstream U-Boot won’t boot seL4 out of the box. If you don’t trust prebuilt binaries, then the support page provides directions for how to generate the image we supplied from source as well.
You should now have all the following files:
-
bootcode.bin(This is provided via a link on the support page). -
start.elf(This is provided via a link on the support page). -
u-boot.bin(You can either build one of your own, or use our prebuilt image). -
config.txt(This is provided via a link on the support page). -
sel4test-driver-image-arm-bcm2837(See Building the seL4-Test project, above).
Copy them all into the root-directory of your FAT32-formatted SD-card, attach your serial cable to see seL4’s output, and power your Raspberry Pi 3 on!
…So what exactly am I seeing here?
You’re seeing the seL4 microkernel booting, and preparing all of the various kernel objects that describe the running system. These objects include, IRQ Controllers, Untyped Memory objects,
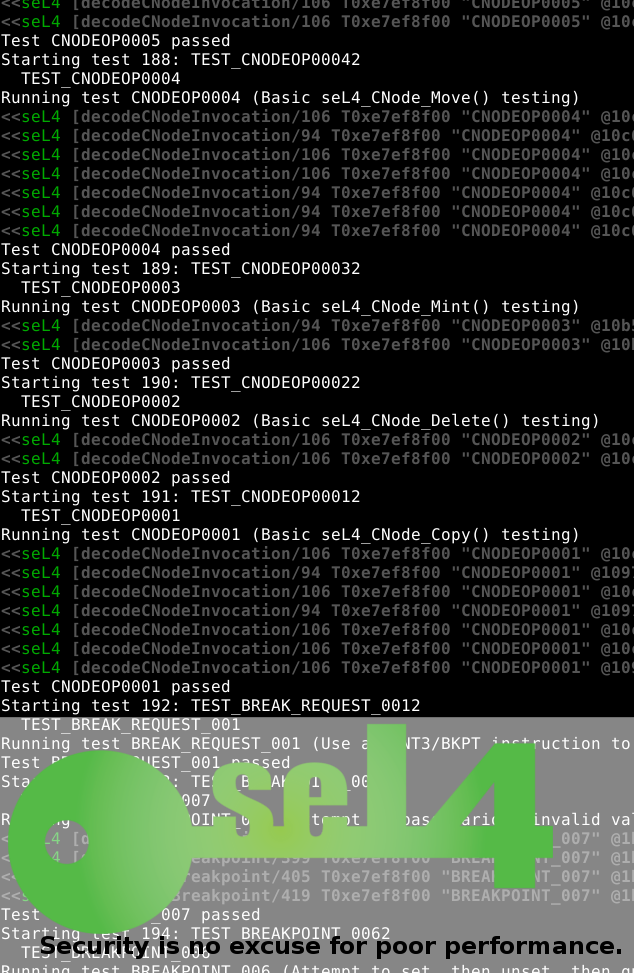
seL4’s test suite (Click for full size)
Address Space ID pools, and so on. Each of these object types represents a resource that can be manipulated and “invoked” through a capability token. Invoking an object through a capability will cause the kernel to perform an action with that object.
You then see the seL4 microkernel examine the CPIO archive containing the seL4-test process,
and load it as its first userspace process – the “Root Task” TM. The root task is the parent of all other threads, and it contains the highest level of permissions to access all kernel objects. It can then decide which threads have access to which objects. It achieves this by making (or not making) capabilities to those objects available to those other threads.
To run the tests, the seL4-test parent process takes an “Untyped” object of a certain size, and sub-partitions it into a child-process. It then gives the remainder of that “Untyped” object to the same child process that it created dynamically. This child process will be repeatedly killed and re-created sequentially for each test.
The results of each test-run are sandboxed from the effects of the previous and subsequent test-runs because after each test is executed, the seL4-test parent-process performs a “Recycle” operation on the original “Untyped” object that was used to create the child-test process. This is done in one simple operation, and showcases the strength of the seL4 capability model for allowing strong capability-based security.
Ok, pretty cool: what next?
General:
Well, you now have a running seL4 image in your hands. Do you have a project that has real world consequences for human life? Do you want to move with a responsible choice that respects the criticality of your application, and the security of your users? Security is a difficult, and ever-evolving problem. Come talk to us.
While seL4 doesn’t promise to be the magic bullet, it does promise to be the solid, performant foundation upon which secure, Trustworthy Systems can be constructed, with careful planning, and adherence to good practice, and respect for the strong isolation guarantees that seL4 provides.
Writing applications?
Familiarize yourself with the seL4 capability system and then come ask us questions on Mattermost about the seL4 userspace libraries. The userspace libraries abstract away a lot of the work involved in creating a running seL4 application. Feel free to ask us questions about your design, and try to understand how to ensure that you extract the benefits of seL4’s security model in your new application.
Writing drivers?
As a microkernel, seL4 drivers are really just userspace threads. The thing that distinguishes a thread as a “driver” is that it handles one or more IRQ objects (because it has a capability to invoke operations on one or more IRQ objects), and it maps in and accesses device registers using some combination of Memory-Mapped I/O, Port-Mapped I/O and Direct Memory Access – all of these also being governed by capabilities.
You’ll need to learn to structure your system such that the correct capabilities are handed down to the correct driver threads. In general, it’s all about using the principle of least privilege: don’t give out capabilities to child threads that aren’t needed for them to accomplish their functional requirements!
February 12, 2017 at 4:01 pm
Nice work!!
Don’t forget to add a link to this article from the RPI hardware page on the wiki (or copy this there). https://wiki.sel4.systems/Hardware/Rpi3
Great to see on RPi3. It’s probably the most common hobbyist & arm64 out there, apart from phones. Also one of the most affordable, which is important for students and many open source volunteers. (If only Broadcom would open source the boot too, it’d be even more broadly suitable for high assurance).
Would be great if there was Genode support for armv8_64 too. 🙂 There’s a thread here if that’s your thing and you have the skills: https://sourceforge.net/p/genode/mailman/message/35566945/. With the road-map ahead for Genode (https://genode.org/about/road-map), it’d be a great way to get hobbyists using seL4 daily in a dynamic, general purpose OS scenario.
February 12, 2017 at 4:09 pm
Wow — linking this post there is a really good idea that I would have missed: thanks
EDIT: With regards to AArch64, you might find yourself pleasantly surprised by upcoming developments in the kernel. seL4 is a fast moving target 😉
February 12, 2017 at 4:14 pm
No worries! Thank you!!
February 12, 2017 at 5:06 pm
Fast moving indeed. I’ve seen the public road-map and that’s really exciting!
It’s been a good month for aarch64. OpenBSD & HardenedBSD builds are recently out on RPi3 too. Maybe we’ll even see them running in an seL4 VM on a Genode desktop one day.
I still dream of QubesOS-like end-user tooling on top of Genode+seL4. Would be great to have that transition path to support secure native components & domains, alongside compartmentalised legacy (mainstream) OSs on other cores. I could see someone porting Wireguard over (VPN in ~4000 loc) too. Maybe even doing things like virtualising CopperheadOS’s hardened Android for better security compartmentalisation with seL4 on mobiles.
With Robigalia on seL4 and RISC-V processors coming too, there’s real hope on the horizon for the kind of trustworthy systems needed for safety, security assurance and real-world maintenance requirements. (A massive problem with the number of legacy & embedded devices that are buggy, uneconomical to maintain and becoming botnet WOMDs etc under current paradigms) .
The great work seL4 team’s doing are going to open a lot of architectural options for safer systems.
Well done to you and your team!
May 3, 2017 at 12:18 am
Interesting article – but my Pi3 doesn’t boot to seL4. I built the seL4test project, built U-Boot, copied the files to my SD card, powered up the Pi and… got the following:
Hit any key to stop autoboot: 0
switch to partitions #0, OK
mmc0 is current device
Scanning mmc 0:1…
USB device 0: unknown device
Waiting for Ethernet connection… unable to connect.
missing environment variable: pxeuuid
missing environment variable: bootfile
Retrieving file: pxelinux.cfg/01-b8-27-eb-95-a5-5c
Waiting for Ethernet connection… unable to connect.
missing environment variable: bootfile
Retrieving file: pxelinux.cfg/00000000
Waiting for Ethernet connection… unable to connect.
missing environment variable: bootfile
Retrieving file: pxelinux.cfg/0000000
Waiting for Ethernet connection…
Any thoughts or things to look at would be most helpful!
May 3, 2017 at 3:36 am
For anyone else running into this issue – turns out u-boot v2017.3 (and later) hangs after printing out the “Starting application at 0x20000000 …” message. Instead, checkout v2017.1 (or v2016.11), build it and use it instead.
When booting, press any key to get to the U-Boot prompt. Then manually load and run the sel4test binary:
fatload mmc 0 ${loadaddr} sel4test-driver-image-arm-bcm2837
bootelf ${loadaddr}
You’ll get some CACHE Misaligned operation messages, but then all of the tests run and pass.
Hope this helps someone!
May 3, 2017 at 9:53 am
Good looking out, Steve!
May 6, 2017 at 12:18 pm
I cannot get the repo/github to work:
$ repo init –config-name -u git@github.com:https://github.com/seL4/sel4test-manifest.git
… A new repo command ( 1.23) is available.
… You should upgrade soon:
cp /home/jesper/sel4test/.repo/repo/repo /usr/bin/repo
Permission denied (publickey).
fatal: I don’t handle protocol ‘git@github.com:https’
Please advice, if you have any suggestions – thanks! I am running Ubuntu 15.10 on a Thinkpad T61.
Jesper
May 7, 2017 at 11:19 pm
I got it fixed. I had to set up a SSH key on GitHub. I am a noob, sorry 🙂
May 11, 2017 at 12:43 am
What is the trick to getting seL4 to boot off of the SD card? I’ve followed your guide here and have my RPi3 up and running. After many iterations of “Waiting for Ethernet connection…” I get to a U-Boot prompt. I am not sure where to go from there.
May 11, 2017 at 12:56 am
I ended up following the instructions here: https://wiki.sel4.systems/Hardware/General-ARM#Booting_from_SD_card and made progress with that.
May 23, 2017 at 11:21 am
I need some help, please! I have followed the tips above with fatload and bootelf, and here is what I get:
———————————————————————————————————————
CACHE: Misaligned operation at range [2030c000, 2031c820]
## Starting application at 0x20000000 …
ELF-loader started on CPU: ARM Ltd. Cortex-A53 r0p4
paddr=[20000000..2031c81f]
ELF-loading image ‘kernel’
paddr=[0..36fff]
vaddr=[e0000000..e0036fff]
virt_entry=e0000000
ELF-loading image ‘sel4test-driver’
paddr=[37000..427fff]
vaddr=[10000..400fff]
virt_entry=1e968
Enabling MMU and paging
U-Boot 2017.05-00578-ga375ff8 (May 20 2017 – 08:29:32 -0400)
DRAM: 944 MiB
RPI 3 Model B (0xa02082)
MMC: sdhci@7e300000: 0
reading uboot.env
In: serial
Out: vidconsole
Err: vidconsole
Net: No ethernet found.
starting USB…
USB0: Core Release: 2.80a
scanning bus 0 for devices… 3 USB Device(s) found
scanning usb for storage devices… 0 Storage Device(s) found
Hit any key to stop autoboot: 0
switch to partitions #0, OK
mmc0 is current device
Scanning mmc 0:1…
U-Boot>
——————————————————————————————————————
It just restarts u-boot after loading the kernel? My ${loadaddr} is 0x00200000 – is that correct?
Thanks!
Jesper
May 24, 2017 at 12:05 pm
OK, I may have made some progress. I had left the bootcode.bin and start.elf from Raspbian on the card. When I downloaded the ones that are linked from here, I got to the bug where it hangs after loading the ELF image, reported by Steve above. Tomorrow I will get the older version of u-boot and try again.
May 25, 2017 at 9:07 am
So I ran git reset –hard for the first commit of 2017 and recompiled u-boot. Tried again and got:
…
Test suite passed. 218 tests passed.
218/218 tests passed.
All is well in the universe.
Thanks, Steve!
August 4, 2017 at 11:21 am
Hey just wanted to give you a quick heads up and let you know
a few of the pictures aren’t loading properly. I’m not sure why but I think its a
linking issue. I’ve tried it in two different web browsers and both show the same results.
August 4, 2017 at 11:37 am
Could you give some more details? What browser are you using? It seems fine to me
October 9, 2017 at 6:27 am
Hello, despite I have tried all of the above solutions (U-Boot version and others) I can’t pass the “Starting application at 0x20000000” message error. Can someone helps me, by giving me his files for example? Thanks
October 26, 2017 at 2:25 pm
Hi Arthur,
We’ve updated the instructions on the wiki page and included a pre-built U-boot binary file which should successfully load seL4: could you try downloading the pre-built U-Boot binary on this page (https://wiki.sel4.systems/Hardware/Rpi3) and using that? Or if you are so inclined, I guess you could build your own from source using the instructions on the wiki page — either approach should work.
Please let me know how things go~
October 27, 2017 at 10:58 pm
Hi,
Sadly, I can’t make this work. I’ve recompiled my kernel, tried using the wiki’s u-boot and even building one following the instructions. Everytime I boot, it hangs at:
CACHE: Misaligned operation at range [20000000, 20007860]
CACHE: Misaligned operation at range [20007860, 203d8cc0]
CACHE: Misaligned operation at range [203d8cc0, 203ec820]
## Starting application at 0x20000000 …
I really want sel4 to work on my system, thanks in advance
January 31, 2018 at 9:33 am
Hey Arthur,
Could you please try reverting commit 995eab8b5b580b67394312b1621c60a71042cd18 in the U-Boot source before rebuilding U-boot from source, or else could you try using the pre-built U-boot image that is linked to on our Wiki page here (https://wiki.sel4.systems/Hardware/Rpi3?
January 18, 2018 at 10:21 pm
I need some help, please!
When I make u-boot, I get the following error.
—————-
scripts/kconfig/conf –silentoldconfig Kconfig
CHK include/config.h
UPD include/config.h
CFG u-boot.cfg
GEN include/autoconf.mk
GEN include/autoconf.mk.dep
*** Your GCC is older than 6.0 and is not supported
arch/arm/config.mk:69: recipe for target ‘checkgcc6’ failed
make: *** [checkgcc6] Error 1
—————-
How can I do?
January 29, 2018 at 10:08 am
Hi SDY,
Could you try perhaps installing an earlier version of GCC? If you’re on debian or one of its derivatives, this should be as easy as running the following command in a terminal:
`sudo apt-get install gcc-5`
That said, you shouldn’t have to compile u-Boot from scratch since we provide a U-boot image for you to use out of the box — see the wiki page. But it’s fine if you want to build it as well~
–Good luck
January 30, 2018 at 9:08 pm
Thank you for your help.
But I have another problem with booting.
When I run raspberry pi by saving the following file to SD card and boot pi.
bootcode.bin
start.elf
u-boot.bin
config.txt
sel4test-driver-image-arm-bcm2837
=> Hit any key to step autoboot
=> fatls mmc 0
=> fatload mmc 0 0x3937920 sel4test-driver
Console log : ‘FAT: Misaligned buffer address (03937920)
Console log : 3937920 bytes read in 17588 ms
=> bootelf 0x3937920
Console log : CACHE : Misaligned operation at range[2000000, 20007860]….
Console log : Starting application at 0x200000000 ….
=> and stop RPi
Please help me
January 31, 2018 at 9:32 am
Sdy,
In order to have a working U-boot image for the RPi3, which will be able to boot seL4, you will need to revert commit 995eab8b5b580b67394312b1621c60a71042cd18 in the U-Boot git repository before building it from source. Could you try to revert that commit, then re-build your U-boot image?
February 2, 2018 at 6:43 pm
Thank you for your help.
I did it, and my another problem is serial cable connection.
February 7, 2018 at 10:51 pm
Hi Arthur,
I want to write applications and execute them on seL4.
How can I do it and where can I reference documents?
And would you advice the best study plan for beginners?
Now, I am studying seL4 tutorials but it is difficult.
April 16, 2018 at 4:39 pm
Hi, I want to boot seL4 on imx6q-sabrelite, but I get the log like that:
—————————————————————
## Starting application at 0x20000000 …
ELF-loader started on CPU: ARM Ltd. Cortex-A9 r2p10
paddr=[20000000..20417fff]
ELF-loading image ‘kernel’
paddr=[10000000..1003afff]
vaddr=[e0000000..e003afff]
virt_entry=e0000000
ELF-loading image ‘sel4test-driver’
paddr=[1003b000..10520fff]
vaddr=[8000..4edfff]
virt_entry=257e0
Enabling MMU and paging
No user images loaded!
abort() called.
————————————-
Do you have any ideas? Thank you!
April 16, 2018 at 6:08 pm
It’s ok. I change the u-boot-2016 as Steve’s suggestion. Thank you!